Max. 25 Nm
2
1
18
VM1/A/P
- INSTALLATION AND SERVICE INSTRUCTIONS ANSI: ... 15 KV; ... 2000 A; ... 31.5 K A
—
5. Installation
5.4. Racking
VM1/A/P circuit breakers are designed with two
positive racking positions: Disconnect, Connect. In
the Disconnect position the shutters are closed.
Electrical closing from the front panel is allowed for
up to 60 seconds without control power (if the
capacitors are fully charged) and manual opening is
allowed. Electrical operation of the circuit breaker is
allowed with control power supplied through the
secondary contacts with the shutters closed. As the
circuit breaker approaches the Connect position, an
increase in racking force is required to lift the
shutters and to engage the primary contacts. In the
Connect position, the primary disconnects are fully
engaged and the shutters are open. Electrical
operation of the circuit breaker through the
secondary contacts remains enabled.
Close door racking is mandatory between all
positions
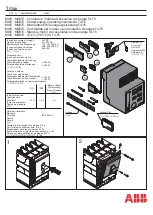
1. Engage the racking handle (item 1 Figure 8) with
the racking screw collar (item 2 Figure 8).
a. CLOCKWISE (cw) rotation inserts the circuit-
breaker towards the primary contacts.
b. COUNTER-CLOCKWISE (ccw) rotation
withdraws the circuit breaker away from the
primary contacts.
Circuit breaker rack-ing-in/-out must be carried out
gradually to avoid shocks which may deform the
mechanical interlocks and the end-of-runs.The
torque normally required to carry out rack-ing-in
and racking-out is <25 Nm.This value must not be
exceeded. If operations are prevented or difficult,
do not force them and check that the operating
sequence is correct.
Fig. 8
Racking-in
Racking-out
5.5. Disconnect through connect
1. Engage the racking handle (item 1 Figure 8) with
the racking screw collar (item 2 Figure 8).
a. CLOCKWISE (cw) rotation inserts the circuit-
breaker towards the primary contacts.
b. COUNTER-CLOCKWISE (ccw) rotation
withdraws the circuit breaker away from the
primary contacts.
2. Racking-in operation:
a. Verify switchgear door is CLOSED
b. Begin racking by rotating the racking handle
to the CLOCKWISE direction.
c. Twenty (20) revolutions (200mm) will move
the circuit breaker between the Test and
Connect positions.
•
The Connect position is indicated by a positive
lock, preventing further racking shaft rotation.
•
Closing of the circuit breaker is prevented
between Test and Connect positions.
5.6. Connect through disconnect
1. Perform a visual inspection of the circuit breaker:
a. Verify Close/Open Indicator shows OPEN.
b. Verify switchgear door is CLOSED.
2. Racking-out operations:
a. Begin racking by rotating the racking handle
in the COUNTER-CLOCKWISE direction.
b. Twenty (20) revolutions (200mm) will move
the circuit breaker between the Connect and
Disconnect positions.
•
Closing of the circuit breaker is prevented
between Connect and Disconnect positions
Summary of Contents for VM1/A/P
Page 49: ...MEDIUM VOLTAGE PRODUCTS 49 49 ...
Page 51: ...MEDIUM VOLTAGE PRODUCTS 51 51 ...
Page 53: ...MEDIUM VOLTAGE PRODUCTS 53 53 ...


