18
4.0 SETTING UP FOR USE (con’d)
Re Setting Forced Steering
Carefully read and understand fully the Abbey instructions prior to operating this machine.
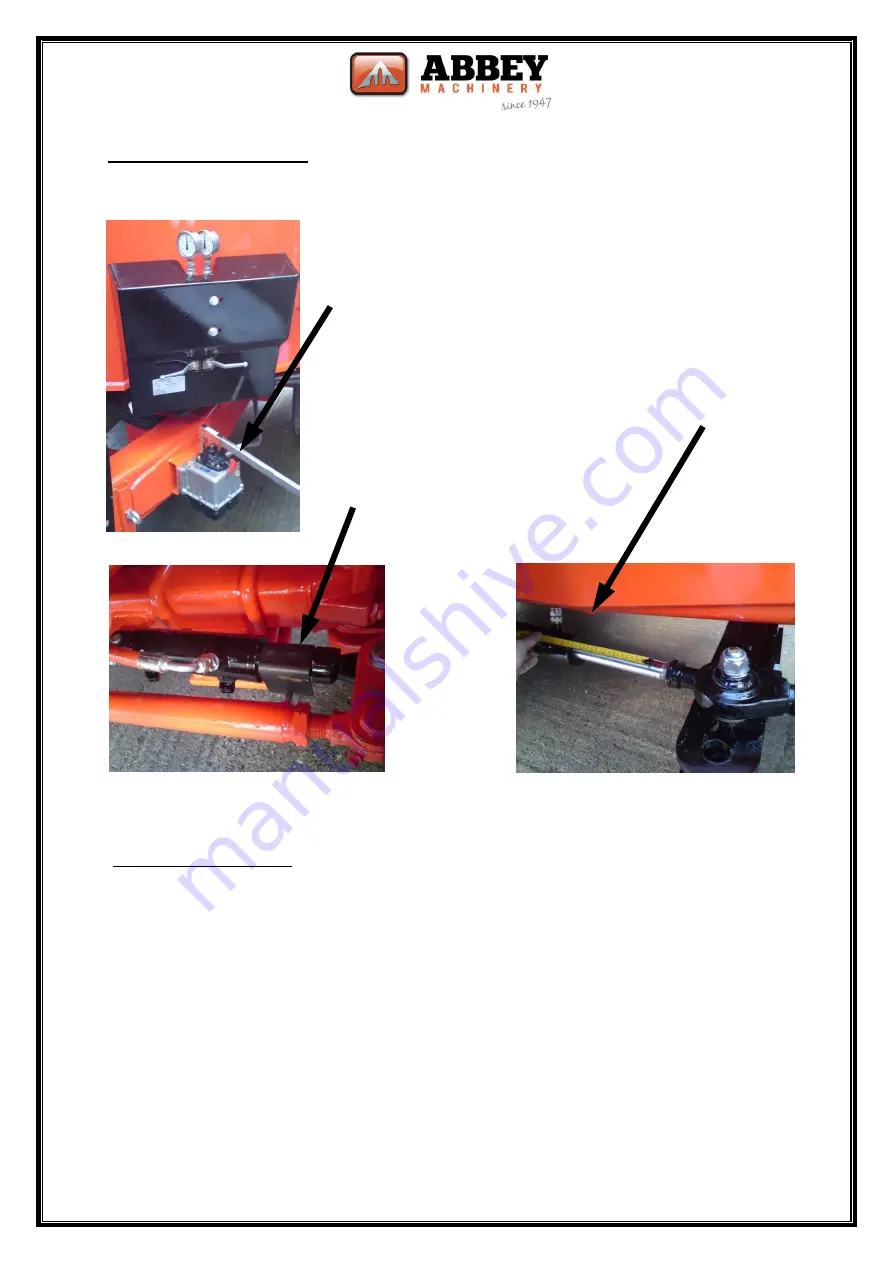
Re Set the steering as follows
Release all hydraulic pressure from the system, and remove the steering locking bracket from the steering rams if
factory fitted for transport.
Drive the tractor and feeder forward on a level surface, in a straight line to align all axles ( with no pressure in the
system).
Now adjust the length of the control rod between the tractor and machine, until the control ram under the front of
the chassis has stroked half its length. Lock all positions tabs on the control rod to prevent it varying in length, when
the locking pin assembly is faced away from the chassis. Once adjusted to suit a particular tractor, no further
adjustment of the control rod is required. Use the locking pin in future to hitch the machine to the tractor.
Open the ball valves to prime the steering system. Keep pressurising the system until the pressure clocks read 80
bar. Close all taps and test the steering system by driving the tractor at low speeds to ensure it is working correctly,
both in forward and reverse directions.
Adjust the length of the control rod until the control ram is stroked half its
length.175mm for this ram
Remove steering locking bracket
First time setup. Remove locking bracket.
Release all pressure from the system.
Drive the tractor and feeder forward in a straight line for approx. 30m. To
make sure axles are in line with the tractor.
Summary of Contents for Slurry Tanker
Page 1: ...Slurry Tanker ...
Page 36: ...36 ...
Page 48: ...48 8 0 Replacement Parts Con d 8 7 Vacuum Pumps ...
Page 49: ...49 8 0 Replacement Parts Con d ...
Page 50: ...50 8 0 Replacement Parts Con d ...
Page 51: ...51 8 0 Replacement Parts Con d ...
Page 52: ...52 8 0 Replacement Parts Con d ...
Page 53: ...53 8 0 Replacement Parts Con d ...
Page 54: ...54 8 0 Replacement Parts Con d 8 9 Garda Pump with Gland Seal ...
Page 55: ...55 8 0 Replacement Parts Con d ...
Page 58: ...58 8 0 Replacement Parts Con d ...
Page 59: ...59 8 0 Replacement Parts Con d ...
Page 60: ...60 8 0 Replacement Parts Con d 8 10 Traps ...
Page 63: ...63 8 0 Replacement Parts Con d ADR 1800x150 Axel420x180 Brake Shoe ...
Page 64: ...64 8 0 Replacement Parts Con d ADR 1800x150 Axel420x180 Brake Shoe ...
Page 65: ...65 8 0 Replacement Parts Con d ADR 1800x150 Axel420x180 Brake Shoe ...
Page 66: ...66 8 0 Replacement Parts Con d Tandem Bogie ...


