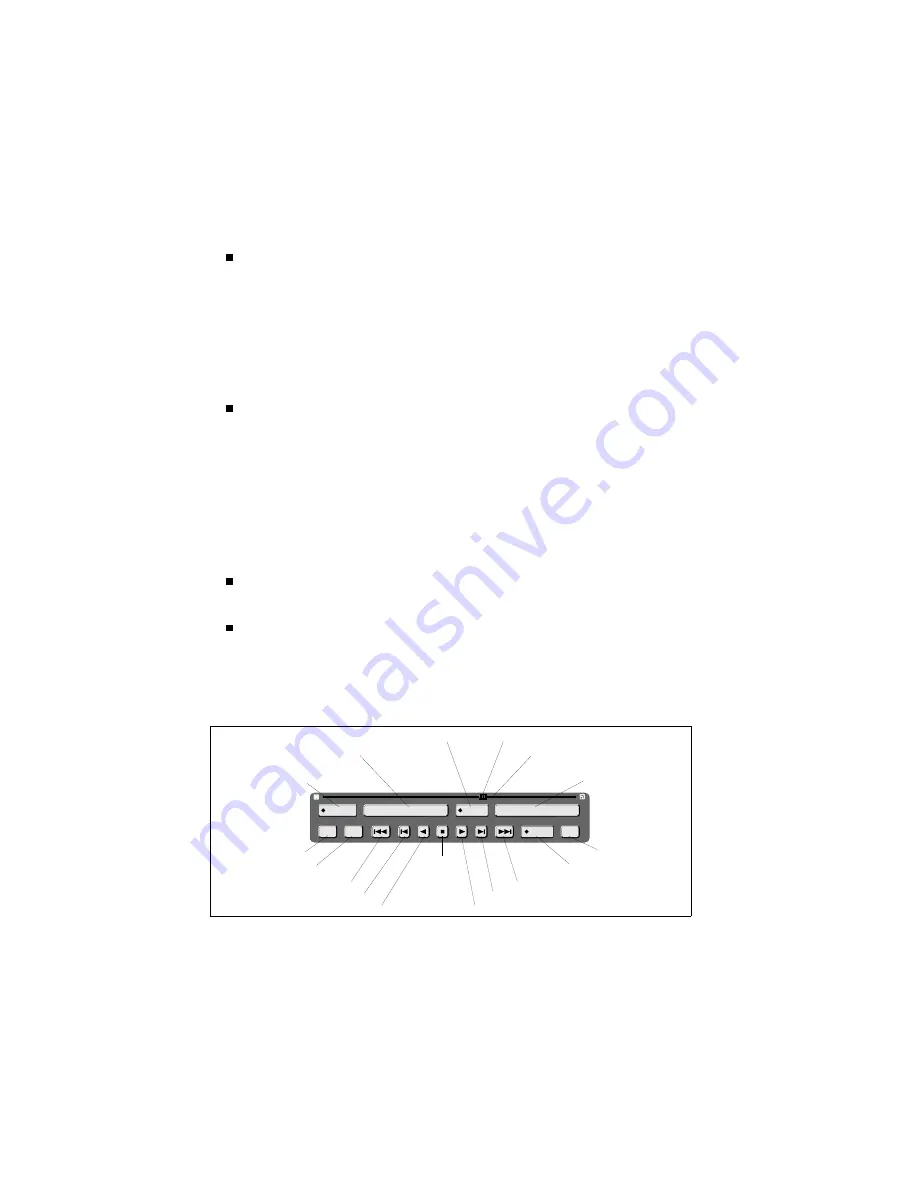
Click the Rec button to arm Diskus for recording. The button
highlights to indicate record mode is enabled. With record
mode enabled, pressing a play button causes Diskus to record
to the disk. You can enter a record length by clicking on the
diamond to bring up the Numeric window. The record length
entered appears in the Default menu. See Section 2 – Getting
Started for more details on recording.
The Timecode/Frames item displays the current disk position
in timecode or frames, as set in the Timecode menu. You can
go to a specific point on the disk: click on the Timecode/Frames
button to bring up a Numeric window. Enter a number by
clicking on the buttons. (The number you enter is in frames or
timecode, depending on the display type selected in the
Timecode menu.) When you click on OK in the Numeric
window, Diskus instantly moves to the entered disk position.
Click the In button to toggle between the video feeding the
selected input (in the Defaults menu) and the off-disk video.
Click the Fz button to freeze Diskus’ output. Enabling freeze
mode writes a frame of video into the framestore, and this
becomes Diskus’ output. You can view field 1, field 2, or the
full frame, as set in the Defaults menu Freeze parameter.
0 0 : 0 0 : 1 9 : 2 6
I n
D i s k
R e c
V a r
F z
F m
P a u l 3
Name
(opens Disk Define List)
Slider Bar
Record
Timecode/Frames
(opens Numeric window)
Slider
Disk Mode
(opens Disk Mode List)
Input
Go To Beginning
Jog Backward
Play Backward
Stop
Play Forward
Jog Forward
Go To End
Freeze
Frame
Variable Speed
button
The Transport Window
The GUI
Diskus Operations
3-12
User Interface & Menus
9100-0217-02 - SEP 95
Summary of Contents for Diskus
Page 1: ...Diskus Digital Disk Recorder Manual ...
Page 477: ...NOTES Diskus Operations Index 9100 0217 02 SEP 95 Index xvii ...
Page 478: ...NOTES Index Diskus Operations xviii Index 9100 0217 02 SEP 95 ...
Page 479: ...NOTES Diskus Operations Index 9100 0217 02 SEP 95 Index xix ...
Page 480: ...NOTES Index Diskus Operations xx Index 9100 0217 02 SEP 95 ...


