SWITCHING ON
IEC POWER SOCKET
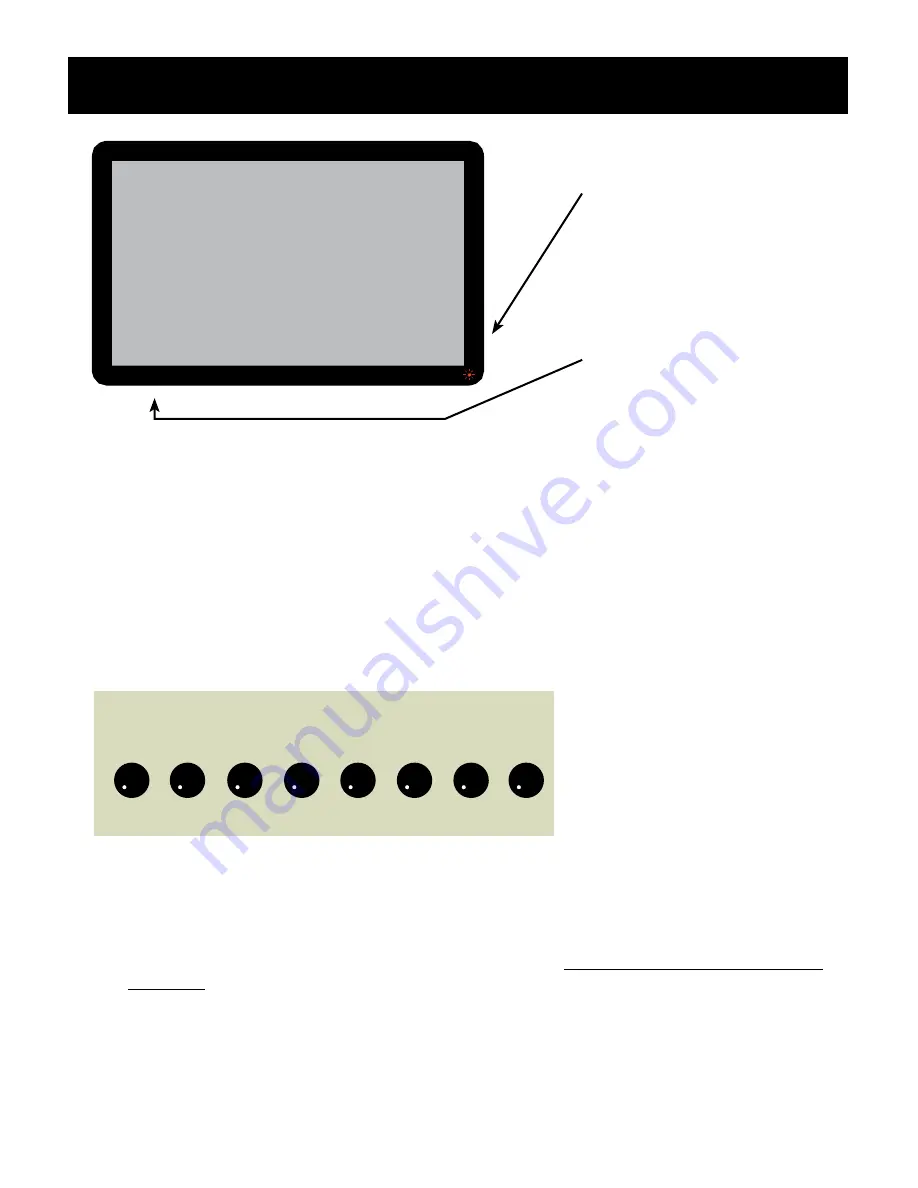
Connect 240V IEC power
plug here
POWER button
Indicator lights:
RED - Standby
BLUE - System ON
After checking power connections are correct, switch power ON using the power button on
the remote (see page 9 for diagram of remote buttons).
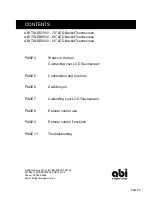
Alternatively, locate the CONTROL BUTTONS on the right lower side of touchscreen frame
and press the POWER button (see diagram below). The indicator light in the lower right
hand corner will change from Red (Standby) to Blue (System On)
.
Changing which source is displayed
1. Using remote, press Source, use Up/Down arrows to select source & press OK.
2, Using panel, press AV/TV, press CH+ or CH- to scroll through source list and press either
VOL+ or VOL- to OK selection
PC POWER AV/TV MENU CH+ CH- VOL+ VOL-
Driver Options:
•
If you are using Windows 7 / 8, a driver is not required to activate “touch” interactivity.
Simply plug in, wait for the USB recognition & the touchscreen should be ready for use,
Reboot your PC with the USB connected if you have any issues.
•
If you are using Windows XP, you must use the driver
Setup
Multi-TouchScreen Server
V2.7.exe
on the setup disc. To load the driver, double click on the
fi
le & follow instruc-
tions to load onto your PC. When installed, the USB icon is green when connected to the
touchscreen & working; grey when not conected and/or working. Note that XP will NOT
operate in dual touch mode. You must click on the green USB icon, click Settings & set to
“single touch”. Click on Calibrate to calibrate your screen. XP is no longer recommended
as it was designed for touch operation and Microsoft are stopping all XP support from
April 8, 2014.
PAGE 6
Note: PC button only used
with embedded PC option.
Summary of Contents for TSLED70V2
Page 1: ......
Page 8: ...REMOTE CONTROL REMOTE CONTROL USE PAGE 8...
Page 11: ...TROUBLESHOOTING PAGE 11...


