ABIMIG
®
SpinArc
®
7 Operation
EN - 11
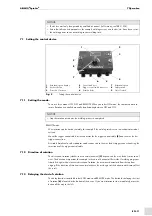
7.1 Setting the control device
7.1.1 Setting the mode:
There are three modes: ON, OFF and REMOTE. When you select ON mode, the contact tip starts to
rotate. Rotation is controlled manually by alternating between OFF and ON.
REMOTE mode:
Wire rotation can be started remotely, for example if the welding torch is used in mechanical or robot
systems.
Mount the trigger control cable at the connector for the trigger control cable
and the wire feeder
trigger connection.
A suitable Amphenol or other adaptor can be connected to the wire feeder trigger connection using the
two strands of the trigger control cable.
7.1.2 Direction of rotation
The direction of rotation (clockwise or counter-clockwise)
depends on the wire feeder's direction of
view. The direction is important, for example in the case of horizontal fillet welds. If welding progresses
from left to right with a clockwise direction of rotation, the arc moves downward from the top front
edging. If the direction of rotation is counter-clockwise, the arc begins at the bottom, and this may affect
the result.
7.1.3 Delaying the start of rotation
The delay function is available in both ON mode and REMOTE mode. The button for delaying the start
of rotation
is located at the bottom of the device. If you want rotation to start immediately, move the
button all the way to the left.
NOTICE
• The device must only be operated by qualified personnel (in Germany, see TRBS 1203).
• Ensure that all required parameters, for example welding current, wire feeder, etc., have been set at
the welding power source according to your welding task.
1
Rotational speed display
2
Mode selection
3
Direction of rotation
4
Control lead port
5
Trigger control cable connector
6
Rotation delay
7
Rotational speed
8
Safety switch
9
On/off switch
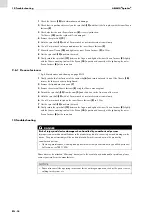
Fig. 5
Setting the control device
1
3
2
4
5
6
7
8
9
NOTICE
• Stop the rotation as soon as the welding process is completed.

