FES-200 W3
5 Functional description
EN - 17
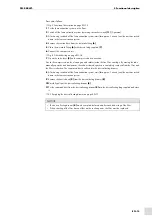
Proceed as follows:
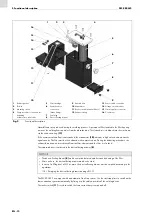
Fig. 2 Functional description on page EN-12
1
Put the fume extraction system on the floor.
2
Switch off the fume extraction system by turning the rocker switch
(0 position).
3
After having switched off the fume extraction system, wait (for approx. 1 minute) until the dust has settled
down in the fume extraction system.
4
from the cover and lift it off.
5
Place the cover carefully on the fume extraction system so that the filter cartridge points upwards.
6
Press the rotation mechanism carefully downwards.
7
Place the dust collecting bag completely over the filter cartridge
and pull it down to the cover.
8
Loosen the filter cartridge
by turning it to the left (counter-clockwise direction).
9
Remove the filter cartridge
and slide it completely into the dust collecting bag.
10
Close the dust collecting bag tightly.
11
Clean the sealing surface of the cover using a damp disposable cloth.
12
Dispose of the dust collecting bag and the disposable cloth according to the local regulations.
13
Place the pin and the sponge rubber seal of the new filter cartridge
into the locking mechanism.
14
Press the filter cartridge
slightly downwards into the locking mechanism.
15
Fix the filter cartridge
by turning it to the right (clockwise direction).
16
Make sure that the filter cartridge is fixed on all locking points.
17
Insert the cover with the mounted new filter cartridge into the fume extraction system.
18
.
4
Closing the dust collecting bag tightly
5
Inserting a new filter cartridge into the
locking mechanism
6
Checking the locking points
Fig. 6
Removing the filter cartridge
NOTICE
• When mounting the new filter cartridge, make sure to touch only the bottom of the filter. Otherwise the
filter material may become damaged, which will destroy the filter cartridge.
NOTICE
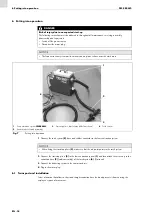
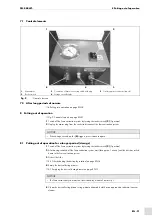
• Make sure that the cables and hoses are not kinked, caught or damaged.
Summary of Contents for FES-200 W3
Page 4: ...DE 4 1 Identifikation FES 200 W3 ...
Page 5: ...FES 200 W3 1 Identifikation DE 5 ...
Page 34: ...EN 4 1 Identification FES 200 W3 ...
Page 35: ...FES 200 W3 1 Identification EN 5 ...
Page 64: ...FR 4 1 Identification FES 200 W3 ...
Page 65: ...FES 200 W3 1 Identification FR 5 ...
Page 94: ...ES 4 1 Identificación FES 200 W3 ...
Page 95: ...FES 200 W3 1 Identificación ES 5 ...
Page 122: ...ES 32 Notas FES 200 W3 Notas ...
Page 123: ...FES 200 W3 Notas ES 33 ...


