Identification of Parts & Charging Batteries
9
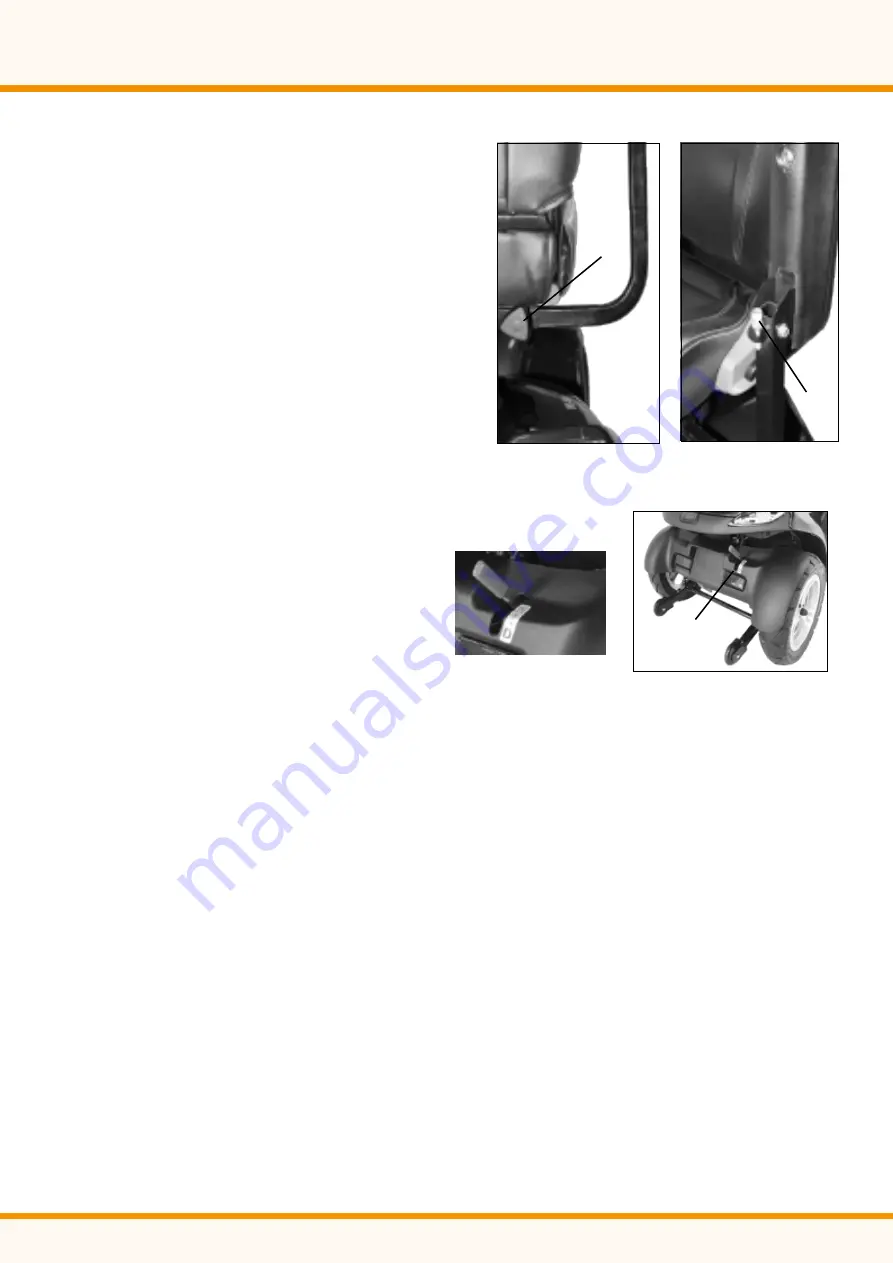
Armrest Adjustment Thumbscrews
1. Loosen the two thumbscrews to adjust arm width
tighten again to lock in at desired position. (1)
2. Adjust the attached screw height, to control
armrest’s angle. (2)
CAUTION: Pull the armrest up when get on or
off the scooter. Do not hang heavy parts on the
armrests may cause the scooter to tip over.
Anti-tip wheels
Helps keep scooter from tipping over.
Free-Wheel Lever
When lever is in N (Neutral) position, scooter can be moved manually without power. When lever
is in D (Drive) position, scooter can be driven. Normal position is D. (3)
CAUTION: Freewheel operation is only
recommended on flat surfaces, never
on gradients. Never leave your scooter
on a gradient with its motors disengaged.
Always re-engage the motors immediately
after pushing the scooter.
Charging the batteries:
Batteries must be charged before using the scooter for the first time and should be recharged after
each day use. You will need the scooter and the battery charger.
CAUTION: Each country may supply different charger. The charging procedure may be
different from below. If you require more details, please contact your authorized dealer.
Be sure the scooter key is in the OFF position. Do not use extension cord to connect the
charger. Do not use other brand charger to charge the scooter.
1. Insert battery charger cord into the charger connector on the charger output.
2. Plug the other end of the battery charger cable into a standard electrical outlet.
3. Turn the power on. Normally, The LED (Power) Light will turn on when electric current passes.
4. Charging starts. During charging, LED (Charge) will indicate orange light, when it turns to
green light, that means well-charged.
5. LED indication
LED(POWER) - GREEN LIGHT ON : Power On.
LED(CHARGE) - ORANGE LIGHT ON : Charging / GREEN LIGHT ON : Fully Charged
1
2
3
3


