


Chapter 1
AT7-MAX2
1-4
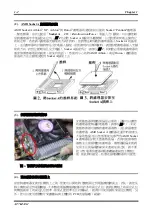
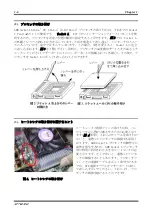
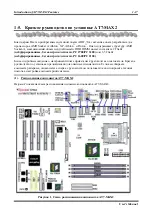
ATX12V1
的連接
頭
,所以您不必連接
任
何的電源纜線接
頭
到
ATX2
連接
頭
上面。)。請記
住
您必
需將來
自
ATX
電源供應器的電源供應纜線連接
頭
牢牢地插到主機板上的
ATX1
以及
ATX2
連接
頭
上面,並確
認其
連接
頭
有
良好
連接。
注意:
請注意接腳的位置及方向。
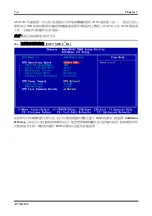
(8).
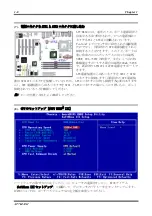
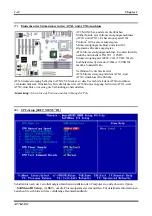
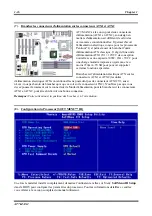
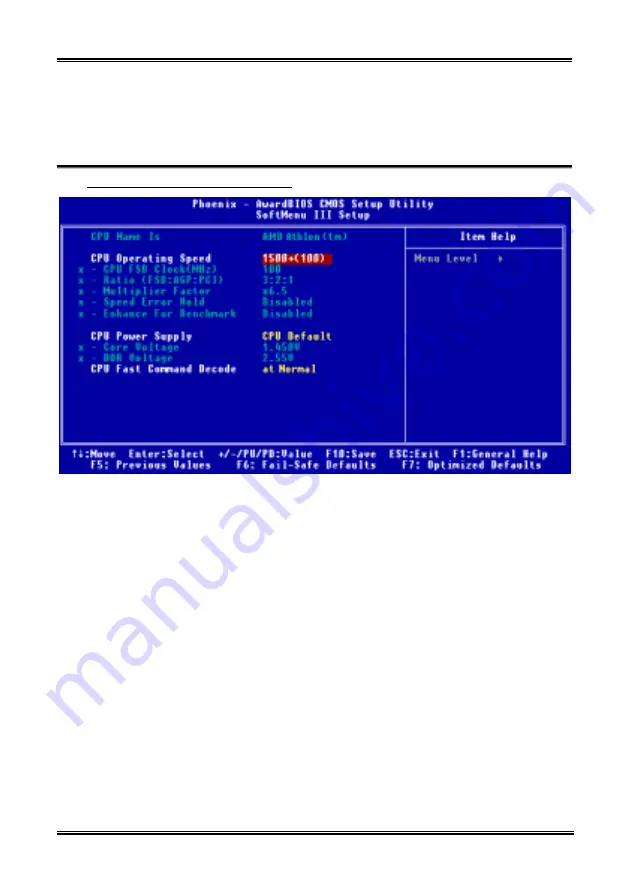
處理器參數的設定
[SOFT MENU
™
III]
當您將所有的
硬
體安裝完
畢
以後,就可以開啟電腦的電源並
進
入
BIOS
的
選項
。請
選擇
「
SoftMenu
III Setup
」的
項目
以
進行
處理器參數的設定。如您想要瞭解
相關
且更為詳細的資訊,請參閱我們的
完整版使用手冊,裡面會有
關
於
BIOS
各
種
項目
設定的詳細說明。
Summary of Contents for AB-AT7-MAX2
Page 2: ......
Page 34: ...Chapter 2 AT7 MAX2 2 6 ...
Page 54: ...Chapter 3 AT7 MAX2 3 20 ...
Page 94: ...Chapter 5 AT7 MAX2 5 6 ...
Page 98: ...Chapter 6 AT7 MAX2 6 4 ...
Page 102: ...7 4 Chapter 7 AT7 MAX2 ...
Page 106: ...A 4 Appendix A AT7 MAX2 ...
Page 110: ...Appendix B AT7 MAX2 B 4 ...
Page 118: ...Appendix D AT7 MAX2 D 4 ...
Page 122: ...Appendix E AT7 MAX2 E 4 ...
Page 136: ...H 4 Appendix H AT7 MAX2 ...


