BIOS Setup
3-41
User’s Manual
Computer Knowledge: ESCD (Extended System Configuration Data)
The ESCD contains the IRQ, DMA, I/O port, memory information of the system. This
is a specification and a feature specific to the Plug & Play BIOS.
Resources Controlled By:
Two options are available: Auto(ESCD) and Manual. Default setting is
Auto(ESCD)
. When
the setting is Auto(ESCD), the
IRQ Resources
and
Memory Resources
can not be changed.
When resources are controlled manually, the
IRQ Resources
and
Memory Resources
can
then be changed.
Legacy ISA
devices compliant with the original PC AT bus specification, requiring a specific
interrupt (such as IRQ4 for serial port 1).
PCI/ISA
PnP
devices compliant with the Plug and Play standard, whether designed for the
PCI or ISA bus architecture.
The Award Plug and Play BIOS has the capability to automatically configure all of the boot
and Plug and Play compatible devices. If you select
Auto (ESCD)
, The IRQ Resources item
will be disabled, as the BIOS automatically assigns them. But if you have trouble in
assigning the interrupt resources automatically, you can select
Manual
to set which IRQ and
DMA are assigned to PCI/ISA PnP or legacy ISA cards.
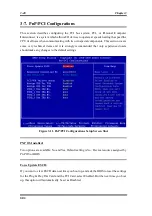
Figure 3-12 shows you the screen of IRQ resources. Each item has two options: PCI Device
and Reserved. The default setting is
PCI Device
.
PCI /VGA Palette Snoop:
This option allows the BIOS to preview VGA Status, and to modify the information
delivered from the Feature Connector of the VGA card to the MPEG Card. This option can
solve the display inversion to black after you have used the MPEG card.
PIRQ_0~PIRQ3:
Eleven options are available: Auto, 3, 4, 5, 7, 9, 10, 11, 12, 14, 15. Default setting is
Auto.
This item allows the system to automatically specify the IRQ number for the device installed
on PCI slots. Which means, the system can specify the fixed IRQ number for the device
installed on the PCI slots (PCI slot 1 to PCI slot 5). This is a useful function when you want
to fix the IRQ for a specific device.
Summary of Contents for SE6
Page 2: ......
Page 8: ...1 4 Chapter1 SE6 1 3 Layout Diagram Figure 1 1 SE6 Motherboard component location ...
Page 10: ...1 6 Chapter1 SE6 ...
Page 80: ...3 50 Chapter3 SE6 ...
Page 92: ...C 4 Appendix C SE6 ...
Page 96: ...D 4 Appendix D SE6 ...
Page 104: ...Appendix F SE6 F 4 ...
Page 118: ...Appendix I SE6 I 6 ...
Page 126: ...Appendix K SE6 K 4 ...
Page 138: ...N 4 Appendix N SE6 ...
Page 144: ...O 6 Appendix O SE6 ...

