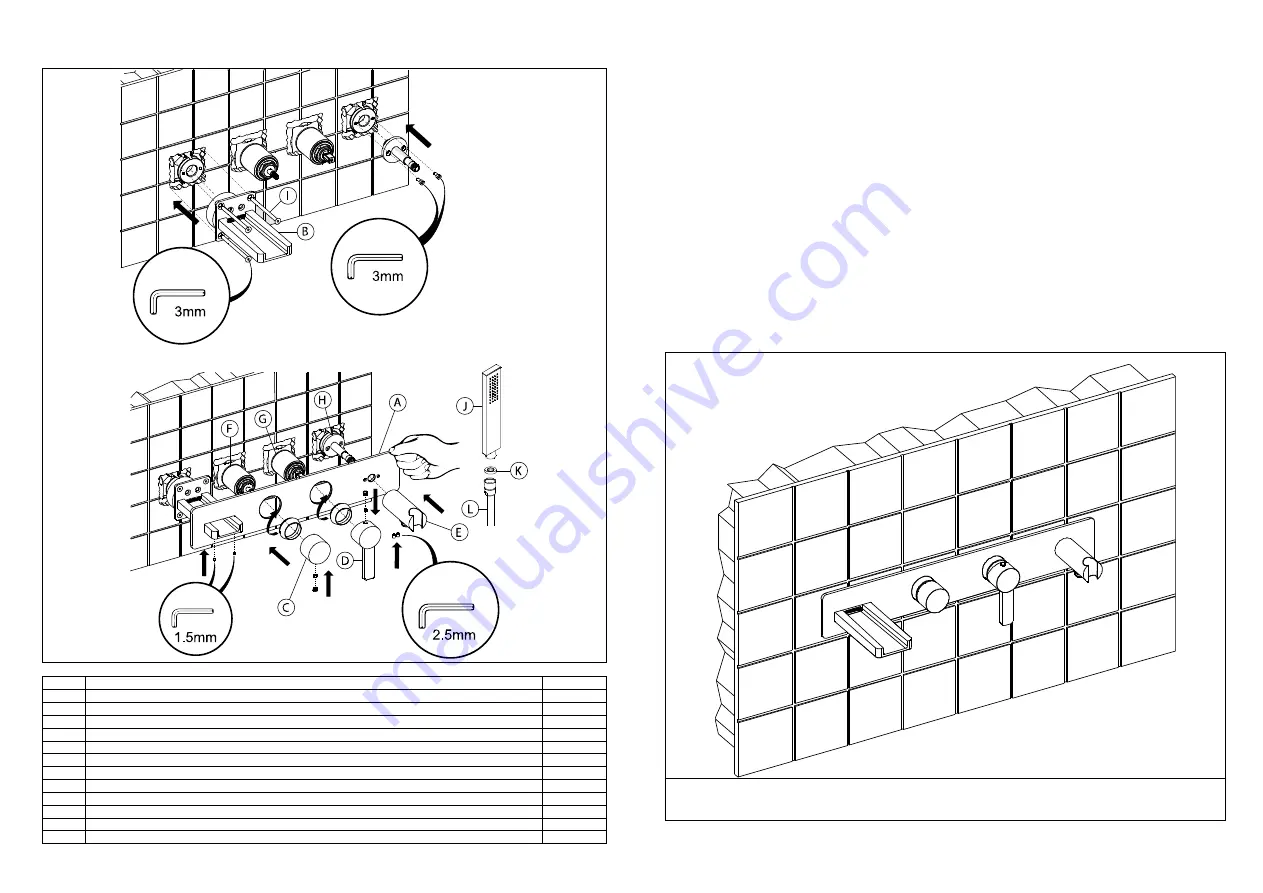
Parts and Contents
Key
Description
QTY
A
Decorative cover plate
1
B
Spout
1
C
Diverter handle
1
D
Single Lever handle
1
E
Hand shower holder
1
F
Diverter valve housing
1
G
Single lever valve housing
1
H
Hand shower holder connector
1
I
Bolts
4
J
Hand shower
1
K
Rubber seal
1
L
Shower hose
1
Installation Instructions:
1.
Fix spout (B) to back body using bolts (I) as shown using a 3mm allen key.
2.
Using a spirit level make sure that spout (B) is straight.
3.
Connect hand shower holder connector (H) to back body as shown using 2 x bolts supplied using a 3mm
allen key
4.
Connect hand shower holder (E) to decorative cover plate (A) as shown using 2 x screws supplied.
5.
Slot decorative cover (A) over parts (B & H) flush against the finished wall surface.
6.
Fix spout (B) onto decorative cover (A) by tightening the grub screws using a 1.5mm allen key.
7.
Fix hand shower holder (E) to connector (H) by tightening grub screws using a 2.5mm allen key.
8.
Fix diverter handle (C) to valve (F) by tightening grub screw using a 2.5mm allen key.
Note: Make sure diverter valve is in the central position before fitting the handle.
9.
Fix single lever handle (D) onto valve (G) by tightening grub screw using 2.5mm allen key.
10. Connect Hand shower (J) to shower hose (L) ensuring rubber seal (K) is in place.
11. Apply clear silicone bead around the rear perimeter of the back plate (A).


