background image

12

Soldering

When soldering ensure for maximum quality to use a soldering station with a variable temperature 

control, the recommend temperature setting is 260 to 280°C. Prior to soldering, wet the tip with 

solder 60% tin /40% lead and brush of the tip with a sponge. Do not dip the solder tip into the 

sponge or soak the sponge with water. A sufficient moist sponge will do the trick. It is recommend 

to hold the solder tip to the components for a maximum of 3 seconds. If the solder does not melt, 

increase the temperature to the extent where the solder begins to melt. The longer the soldering 

iron is heating the pins the chance of damaging the IC increases. Use forceps or needle nose to 

hold components in place. Hold the soldering iron with the hand that is comfortable to work with 

and place into stand when not in use. Feed solder to component on opposite side of the pin, do 

not put excess solder into pin as it may lead to cracking or shearing of the PCB contact, in some 

cases it can create a cold solder joint (something to avoid). Work in well ventilated areas. Always 

solder low overhead components first, for example diodes, resistors, surface mount components 

and then proceed to solder high overhead components like capacitors, potentiometers, switches 

and terminal blocks.

Troubleshooting / FAQ

The LM317 is overheating?

Please read the “Voltage Regulator” Subsection in the Theory Chapter of this manual, further details in power 

dissipation will explain the reason for overheating. A temporary solution is to place a heat sink on the LM317 

IC.   

I have no voltage output.


Please check if the solder contacts were soldered properly, you may use a diode checker or continuity checker 

to see if the connections are connected. Please be very careful in checking the temperature of the LM317 

with your finger. A safe alternative in checking the temperature of the IC is to place the eraser tip on the IC 

for a few seconds and thereafter touch the eraser end to feel the heat. If the IC is hot, unplug the cable from 

the wall socket and wait at most 10 minutes to cool down, place a heat sink on the IC. 

The transformer is overheating.

You may have accidently shorted both blue wires to the black wire; this creates a loop in which the transformer 

is supplying voltage to itself! Disconnect the Transformer from the wall socket and let the transformer cool 

down. It should still work; the chances of burning the TRF-170 are slim. The possibility of this scenario 

occurring is slim; however do not attempt to short the wires to replicate this problem you may end up with 

a burnt fuse and no power for the day. 

My Led won’t light up but I am getting power.

The first edition power supply boards have the Led layout printed backwards, please de-solder and reconnect 

in the opposite orientation. 

My led won’t light up and I am not getting any power.


Please check the switch is it turned on or off? If the switch is on, then proceed to troubleshooting with 

transformer disconnected from the wall socket. Please check the connections from transformer to the PCB 

with a continuity tester. 

Summary of Contents for AK-10

Page 1: ...s abra electronics com U S Toll Free 1 800 717 2272 Can Toll Free 1 800 361 5237 18 Volts AC output and a Variable 18 volts DC output Up to 1 Amp in current output Simple component placement guide On...

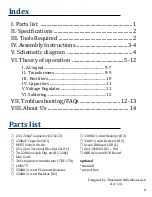
Page 2: ...oblueshooting FAQs 12 13 VIII About Us 14 Designed by Thushanth Sithambararajan Rev 1 0 1 Parts list 2x 220 F Capacitor C2 C3 2200 F Capacitor C1 DPDT Switch On On 2x 2 pin Terminal Block AC DC T0 220...

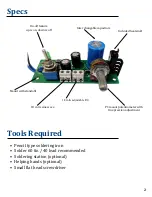
Page 3: ...ndoffs 18 volts sine wave 18 volts adjustable DC PC mount potentiometer with fine precsion adjustment Included heatsink Specs Tools Required Pencil type soldering iron Solder 60 tin 40 lead recommende...

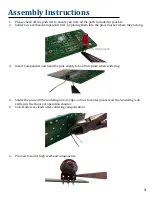
Page 4: ...em into the place marker where they belong 3 Insert Components and bend the pins slighty to hold into place when soldering 4 Solder the pin with the soldering iron for tips on how to solder please rea...

Page 5: ...d the two blue wires to the outside connections 10 Place on the LM317 the heat sink clip 11 Solder the terminal connection blocks and flick the switch to off position pointing downwards in reference t...

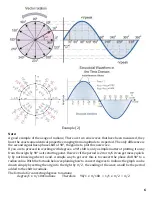
Page 6: ...r degrees but they often come back to where they started For example the figure below the voltage offset is 0 volts The sine wave starts at 0 volts and will end at 0v the length of this period is 2 or...

Page 7: ...imple matter of plotting it away from the origin by 90 as its starting point However if the period is 2 or 6 it can get messy quick ly by not knowing where to end A simple way to get over this is to c...

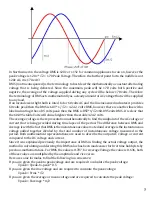
Page 8: ...mathematically to find the midpoint of the AC voltage or current that is being provided during time lapse of the period The difference between RMS and Average is with the fact that RMS is the instanta...

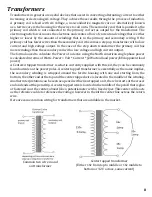
Page 9: ...lculate the Power of a device using the North American single phase power is calculated in terms of Watts Power Volt Current kW actual load power kVA apparent load power A Centered tapped transformer...

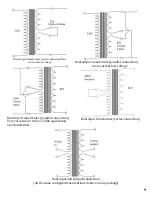
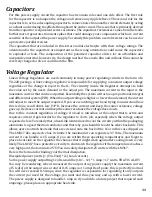
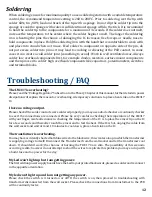
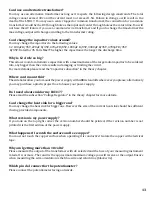
Page 10: ...ormer parallel connection more current less voltage Dual input transformer parallel connection Very versatile for 110v or 220v application one transformer Dual input transformer series connection Dual...

Page 11: ...e or half wave Full wave rectifiers Full wave rectifiers convert the entire waveform into one constant polarity at the output in essence they convert the AC to a DC wave In some sense a half wave rect...

Page 12: ...current will adjust to meet the output required If you are scratching your head trying to understand how this is done recall ohm s law V I R Increase the current and keep the same resistance voltage g...

Page 13: ...n power dissipation will explain the reason for overheating A temporary solution is to place a heat sink on the LM317 IC I have no voltage output Please check if the solder contacts were soldered prop...

Page 14: ...lease read the Capacitor subsection in the theory chapter Where can I mount this ThesideholesallowyoutomountthepowersupplywithABRAstandoffswhereeveryouplease alternatively you may purchase a plastic p...

Page 15: ...ts all with affordable pricing Feel Free to call us on our toll free numbers indicated below You will be greeted with our knowledgeable and courteous staff members You are also free to visit our websi...

Page 16: ......

Reviews: