background image

Contents 


22 | 

DE 


Contents 


Contents ....................................................................................................................................... 22


Introduction .................................................................................................................................. 23


Information on user guide .............................................................................................................................................. 23


Intended use .................................................................................................................................................................. 23


Limitation of liability ........................................................................................................................................................ 23


Safety information ........................................................................................................................ 24


Explanation of symbols .................................................................................................................................................. 24


Packaging ...................................................................................................................................................................... 24


Scope of delivery ......................................................................................................................... 24


Technical data .............................................................................................................................. 25


Functional principle and features ............................................................................................... 26


General .......................................................................................................................................................................... 26


Main features ................................................................................................................................................................. 26


Position and installation ................................................................................................................................................. 26


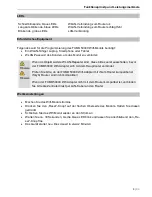
LEDs .............................................................................................................................................................................. 28


Required equipment ....................................................................................................................................................... 28


Default settings .............................................................................................................................................................. 28


Configuration................................................................................................................................ 29


Step 1: Logging on ......................................................................................................................................................... 29


Step 2: Initial connection to router ................................................................................................................................. 30


Step 3: Additional connections to the router .................................................................................................................. 33


System settings............................................................................................................................ 34


User name and password .............................................................................................................................................. 34


Firmware upgrade .......................................................................................................................................................... 35


Network settings .......................................................................................................................... 36


Local network connection type ...................................................................................................................................... 36


Warranty ....................................................................................................................................... 38


Disposal ........................................................................................................................................ 38


Declaration of conformity ............................................................................................................ 38


Summary of Contents for FUMO50040

Page 1: ...FUMO50040 Version 1 Secvest WIFI Modul DE Secvest WIFI Modul Installations und Bedienungsanleitung EN Secvest Wi Fi module Installation instructions and user manual ...

Page 2: ...9 Werkseinstellungen 9 Konfiguration 10 Schritt 1 Einloggen 10 Schritt 2 Erste Verbindung zum Router 11 Schritt 3 Weitere Verbindungen zum Router 15 Systemeinstellungen 16 Nutzernamename und Passwort 16 Firmware Upgrade 17 Netzwerk Einstellungen 18 Lokaler Netzwerk Anschlusstyp 18 Gewährleistung 20 Entsorgung 20 Konformitätserklärung 20 Contents 22 Introduction 23 Information on user guide 23 Inte...

Page 3: ...efault settings 28 Configuration 29 Step 1 Logging on 29 Step 2 Initial connection to router 30 Step 3 Additional connections to the router 33 System settings 34 User name and password 34 Firmware upgrade 35 Network settings 36 Local network connection type 36 Warranty 38 Disposal 38 Declaration of conformity 38 ...

Page 4: ... www a bus com auf der allgemeinen Seite oder für Händler und Installateure im Partnerportal Hinweis Beachten Sie die Anweisungen und Hinweise in dieser Anleitung Sollten Sie sich nicht an diese Anleitung halten erlischt Ihr Garantieanspruch Für Folgeschäden wird keine Haftung übernommen Das gesamte Produkt darf nicht geändert oder umgebaut werden Bitte beachten Sie die lokalen gesetzlichen Bestim...

Page 5: ...hend den geltenden gesetzlichen Vorschriften und getrennt vom Hausmüll bzw Gewerbemüll entsorgt werden muss Die Entsorgung des Altgeräts kann über entsprechende offizielle Rücknahmestellen in Ihrem Land erfolgen Befolgen Sie die örtlichen Vorschriften bei der Entsorgung der Materialien Weitere Einzelheiten über die Rücknahme auch für Nicht EU Länder erhalten Sie von Ihrer örtlichen Verwaltung Durc...

Page 6: ...digkeit Max 300 Mbps Ethernet Kabel Länge 200 mm Funk 2 4 GHZ 100mW max Betriebstemperatur 10 C bis 55 C Luftfeuchtigkeit max max 93 nicht kondensierend Abmessung BxHxT 210 x 277 x 75 mm Gewicht 20g Wifi Modul 22g Gleichspannungswandler Ausführungsart der Stromversorgung Ausführungsart W EN 50131 4 2009 5 6 3 2 Stromverbrauch Ener gieverbrauch Max 220 mA 5VDC Betriebsspannung 5V DC Gleichspannungs...

Page 7: ...talliert Hauptmerkmale Kompatibel mit Secvest Zentrale Einbau direkt im Secvest Gehäuse Fungiert als Verbindung zum heimischen Rou ter und ersetzt somit den Anschluss über LAN Kabel Nicht batteriebetrieben Gefahr Bevor Sie mit Installations und Wartungsarbeiten beginnen gehen Sie bei der Secvest Zentrale in den Errichter Modus und schalten Sie die Anlage komplett span nungslos Position und Einbau ...

Page 8: ...ießen Sie das Ethernet Kabel des Wifi Moduls an 3 Positionieren Sie das Wifi Modul und den Konverter in der Nähe des Ethernet Anschlusses in der Secvest Ein Positionierungsbeispiel sehen Sie in folgender Abbildung ...

Page 9: ...schalten bevor der FUMO50040 Wifi Adapter sich mit dem Hauptrouter verbindet Hinweis Prüfen Sie bitte ob der FUMO50040 Wifi Adapter mit ihrem Router kompatibel ist Sky Q Router sind nicht kompatibel Wenn der FUMO50040 Wifi Adapter nicht mit dem Router kompatibel ist verbinden Sie bitte die Zentrale direkt per LAN Kabel an den Router Werkseinstellungen Machen Sie das Wifi Modul stromlos Drücken Sie...

Page 10: ...den Netzwerkeinstellungen und verbinden sich mit dem Netzwerk FUMO50040 Das Standardpasswort ist 12345678 Öffnen Sie den Internet Browser und geben oben in der Adresszeile http fumo50040 cfg ein Sie kommen auf die Log In Seite für das Wifi Modul Melden Sie sich mit dem Benutzernamen abus und dem Passwort abus an Klicken Sie auf Login ...

Page 11: ...Kunden aus Klicken Sie auf Weiter Hinweis Wenn im Objekt weitere WLAN Repeater sind diese bitte zuerst ausschalten bevor das FUMO50040 Wifi Modul sich mit dem Hauptrouter verbindet Wenn das Netzwerk des Routers nicht in der Liste erscheint klicken Sie auf den Punkt SSID siehe rote Markierung im Bild Geben Sie das Netzwerk manuell ein Klicken Sie auf Weiter ...

Page 12: ...m Router vorgegeben 4 Network Password Passwort des ausgewählten Netzwerks 5 WLAN Repeater SSID greift nur wenn 6 Aktiviert 6 Lokaler Hotspot freigeben Mit dem Setzen des Hakens kann ihr Wifi Modul einen eigenen Hotspot erstellen Diesen können Sie dann mit einem eigenen Namen versehen 7 DHCP Servereinstellungen Unter diesem Punkt stellen Sie Ihre DHCP Servereinstellung ein Sie können entweder den ...

Page 13: ...en um die verfügbaren Optionen anzuzeigen Diese Option erlaubt dem FUMO50040 Modul die WLAN Verbindungen automatisch zu wechseln Wenn Sie wollen dass das Wifi Modul dem Netzwerkrouter eine andere SSID übermittelt er erstellt einen lokalen Hotspot dann ändern Sie die SSID nach Ihrer Wahl Wenn Sie wollen dass der eigene Hotspot nicht aktiv ist dann setzen Sie kein Häkchen bei lokaler Hotspot freigeb...

Page 14: ...as FUMO kann sich mit verschiedenen Geräten gleiche SSID und PW verbinden die Geräte in der Liste sind expliziet ausgenommen 3 Einstellungen bei Ortsveränderungen Unter diesem Punkt ist keine Funktion hinterlegt Des wegen empfehlen wir Ihnen den Punkt zu ignorieren und nicht anzuklicken Klicken Sie auf Übernehmen um sich mit dem Router zu verbinden Klicken Sie auf Neu starten Das Wifi Modul starte...

Page 15: ...ig Da das Wifi Modul nach der ersten Einrichtung und Verbindung mit dem Heimnetz werk eine IP Adresse zugewiesen bekommt müssen Sie um wieder auf den Wifi Adapter zuzugreifen die IP Adresse des Wifi Moduls eingeben Diese finden Sie in den Routereinstellungen des Kunden ...

Page 16: ...ter Anmeldeoptionen können Sie den Benutzernamen und das Passwort des FUMO50040 ändern Klicken Sie Übernehmen um die Einstellungen zu speichern Hinweis Benutzen Sie sichere Benutzernamen und Codes Genauere Informationen entneh men Sie diesbezüglich bitte der Installationsanleitung der Zentrale ...

Page 17: ... auf Systemeinstellungen und anschließend auf Firmware Upgrade Klicken Sie auf Update Der Wifi Adapter verbindet sich mit dem Server um die neue Fir meware herunterzuladen Das Wifi Modul informiert Sie wenn der Download erfolgreich war Klicken Sie auf Update starten Das Wifi Modul informiert Sie wenn das Update der neuen Firmware erfolgreich war Klicken Sie auf Neustart Gerät um das Wifi Modul neu...

Page 18: ...HCP Modus Wenn Sie DHCP auswählen übernimmt der Router hier die Konfiguration und vergibt automatisch dem Wifi Modul eine IP Adresse Diese können Sie über den Router herausfinden Hinweis Die Einstellung gesperrt des DHCP Servers sollte übernommen werden da sich bei einem Verbindungsabbruch und Wiederverbindung mit dem Router die IP Ad resse des Wifi Modul ändern kann ...

Page 19: ...en die Rah menparameter des verbundenen Netzwerkes übernommen werden Dazu gehört die Subnetz maske Das Standard Gateway und der DNS Server entspricht den IP Einstellungen des Netz werkrouters In der obersten Zeile vergeben Sie de Wifi Modul eine im Netzwerk noch nicht be legte IP Adresse Zum Schluss klicken Sie auf übernehmen ...

Page 20: ...nale Kaufbeleg mit Kaufdatum und eine kurze schriftli che Fehlerbeschreibung beizufügen Sollten Sie an dem Wifi Modul einen Mangel feststellen der beim Verkauf be reits vorhanden war wenden Sie sich innerhalb der ersten zwei Jahre bitte di rekt an Ihren Verkäufer Entsorgung Entsorgen Sie das Gerät gemäß der Elektro und Elektronik Altgeräte EU Richtlinie 2012 19 EU WEEE Waste Electrical and Electro...

Page 21: ...FUMO50040 Version 1 Secvest Wi Fi module DE Secvest WIFI Modul Installations und Bedienungsanleitung EN Secvest Wi Fi module Installation instructions and user manual ...

Page 22: ...onal principle and features 26 General 26 Main features 26 Position and installation 26 LEDs 28 Required equipment 28 Default settings 28 Configuration 29 Step 1 Logging on 29 Step 2 Initial connection to router 30 Step 3 Additional connections to the router 33 System settings 34 User name and password 34 Firmware upgrade 35 Network settings 36 Local network connection type 36 Warranty 38 Disposal...

Page 23: ...bus com on the general page or for dealers and installers in the Partner portal Note Please observe the notes and instructions in this user manual If you do not follow these instructions any guarantee claim is invalidated No liability can be accepted for resulting damage No part of the product may be changed or modified in any way Please observe the local legal requirements In some European countr...

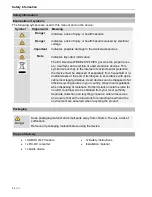
Page 24: ...arately from household or in dustrial waste at the end of its lifespan in accordance with appli cable local legal guidelines Used devices can be disposed of at official recycling centres in your country Obey local regulations when disposing of materials Further details on returns also for non EU countries can be obtained from your local authority Separate collection and recycling conserve natural ...

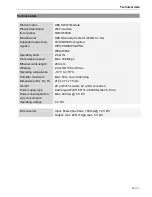
Page 25: ... Transmission speed Max 300 Mbps Ethernet cable length 200 mm Wireless 2 4 GHZ 100 mW max Operating temperature 10 C to 55 C Humidity maximum Max 93 non condensing Dimensions W x H x D 210 x 277 x 75 mm Weight 20 g Wi Fi module 22 g DC converter Power supply type Cable type W EN 50131 4 2009 Section 5 6 3 2 Power consumption en ergy consumption Max 220 mA 5 V DC Operating voltage 5 V DC DC convert...

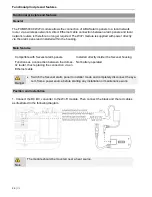
Page 26: ...housing Main features Compatible with Secvest alarm panels Installed directly insider the Secvest housing Functions as a connection between the domes tic router thus replacing the connection via an Ethernet cable Not battery operated Danger Switch the Secvest alarm panel to installer mode and completely disconnect the sys tem from a power source before starting any installation or maintenance work...

Page 27: ...nciple and features 27 DE 2 Connect the Wi Fi module s Ethernet cable 3 Position the Wi Fi module and the converter near the Ethernet connection in the Secvest The following diagram illustrates one possible position ...

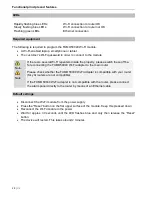
Page 28: ... off be fore connecting the FUMO50040 Wi Fi adapter to the main router Note Please check whether the FUMO50040 Wi Fi adapter is compatible with your router Sky Q routers are not compatible If the FUMO50040 Wi Fi adapter is not compatible with the router please connect the alarm panel directly to the router by means of an Ethernet cable Default settings Disconnect the Wi Fi module from the power su...

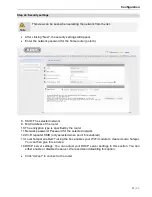
Page 29: ...s required Go to the network settings and connect to the FUMO50040 network The default password is 12345678 Open the Internet browser and enter http fumo50040 cfg in the address line at the top You will be taken to the Wi Fi module login page Log in with the user name abus and the password abus Click on Login ...

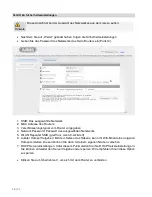
Page 30: ...network from the list Click on Next Note If there are several Wi Fi repeaters inside the property please switch these off be fore connecting the FUMO50040 Wi Fi module to the main router If the router s network does not appear in the list click on menu option SSID marked in red on image above Enter the network manually Click on Next ...

Page 31: ...cryption type is specified by the router 11 Network password Password for the selected network 12 Wi Fi repeater SSID only selected when point 6 is enabled 13 Local hotspot enabled Ticking the box enables your Wi Fi module to create its own hotspot You can then give this a name 14 DHCP server settings You can adjust your DHCP server settings in this section You can either enable or disable the ser...

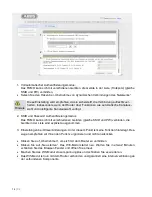
Page 32: ...gs to display the available options This option allows the FUMO50040 module to switch Wi Fi connections automatically If you want the Wi Fi module to transmit another SSID to the network router it will create a local hotspot change the SSID to the one you want If you do not want the hotspot to be active do not tick the box for Local hotspot enabled 1 2 3 8 ...

Page 33: ...ons 6 Settings for changes of location There is no function allocated to this point We therefore recommend ignoring this and not clicking on it Click Accept to connect to the router Click on Restart The Wi Fi module will restart Wait for around 2 minutes then close and reopen the browser window De energize the Wifi module and reconnect it The Wi Fi module is now connected to the router and guarant...

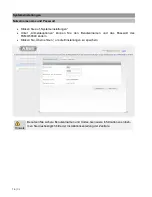
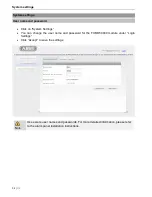
Page 34: ...on System Settings You can change the user name and password for the FUMO50040 module under Login Settings Click Accept to save the settings Note Use secure user names and passwords For more detailed information please refer to the alarm panel installation instructions ...

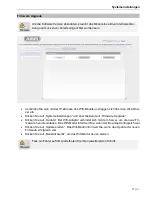
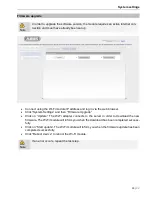
Page 35: ...rowser Click System Settings and then Firmware Upgrade Click on Update The Wi Fi adapter connects to the server in order to download the new firmware The Wi Fi module will inform you when the download has been completed success fully Click on Start update The Wi Fi module will inform you when the firmware update has been completed successfully Click Reboot device to reboot the Wi Fi module Note If...

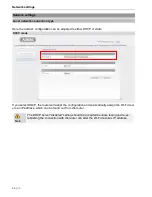
Page 36: ... static DHCP mode If you select DHCP the router will adopt the configuration and automatically assign the Wi Fi mod ule an IP address which can be found out from the router Note The DHCP server disabled setting should be accepted because losing and re es tablishing the connection with the router can alter the Wi Fi module s IP address ...

Page 37: ...ally The framework parameters of the connected network must be adopted This includes the subnet mask The default gateway and DNS server correspond to the IP settings of the network router In the top line allocate an IP ad dress that has not yet been assigned within the network Then click Accept ...

Page 38: ...ate of purchase and a short written description of the problem must be supplied with the product If you discover a defect with your Wi Fi module that existed at the time of pur chase contact your dealer directly within the first two years Disposal Dispose of the device in accordance with EU Directive 2012 19 EU WEEE Waste Elec trical and Electronic Equipment If you have any questions please contac...

Reviews: