18
3. Connections and functions
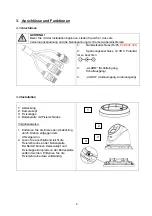
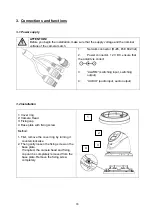
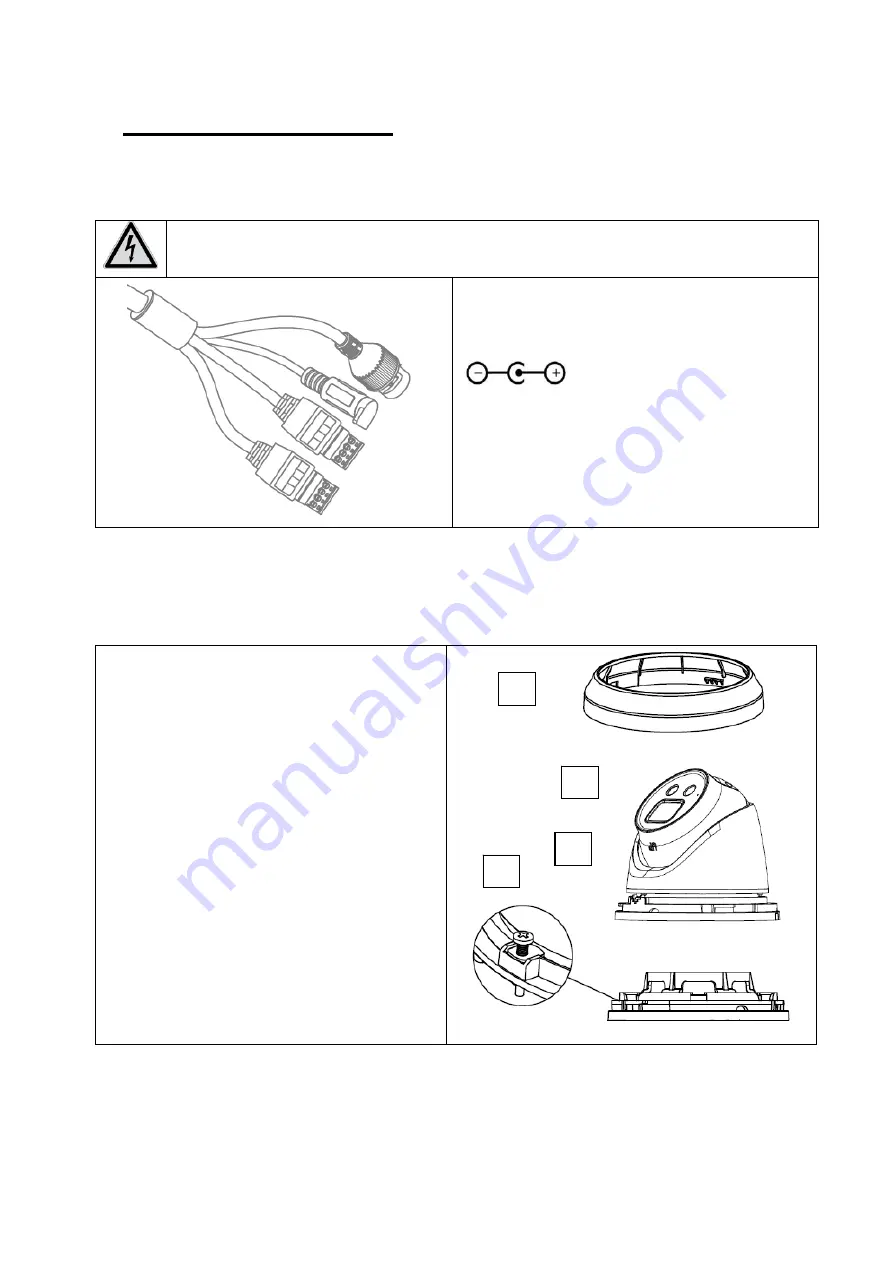
3.1 Power supply
ATTENTION!
Before you begin the installation, make sure that the supply voltage and the nominal
voltage of the camera match.
1:
Network connector (RJ45, PoE 802.3af)
2:
Power connector, 12 V DC, ensure that
the polarity is correct
3:
“ALARM” (switching input, switching
output)
4:
“AUDIO” (audio input, audio output)
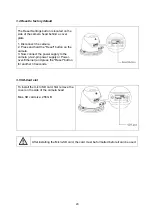
3.2 Installation
1: Cover ring
2: Camera Head
3: Fixing cap
4: Base plate with fixing screw
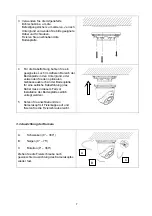
Method:
1. First, remove the cover ring by turning it
counterclockwise.
2. Then gently loosen the fixing screw on the
base plate.
If required, the camera head and fixing
cap can be completely removed from the
base plate. Remove the fixing screw
completely.
1
2
3
4


