background image


English 

2. Hardware description  

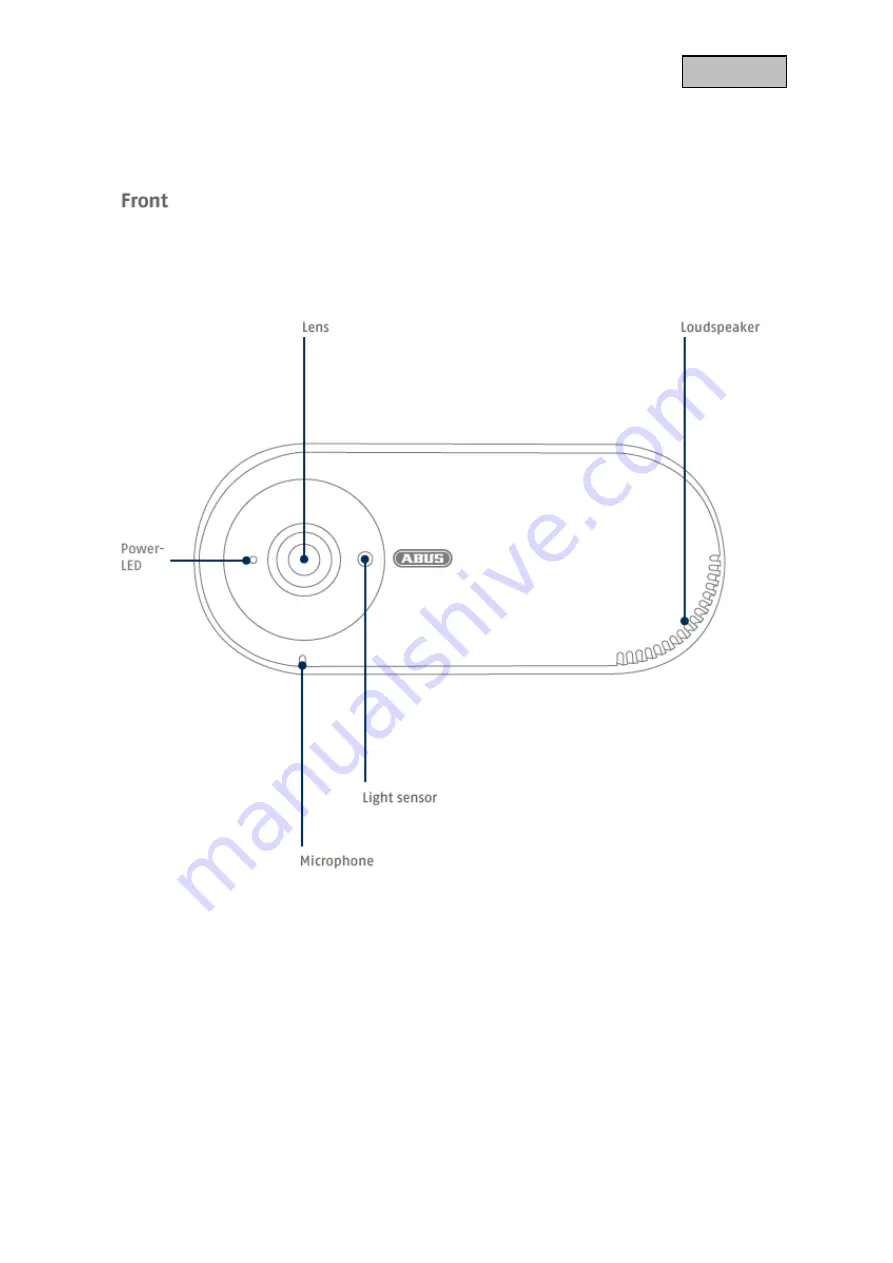
2.1. WiFi Privacy Indoor Camera  


Summary of Contents for PPIC31020

Page 1: ...ting instructions Important information and FAQs about this product and other products can be found on the website http www abus com Version 1 0 Original operating instructions in German language Keep...

Page 2: ...is available at the following Internet addresses http www abus com product PPIC31020 In order to maintain this condition and to ensure safe operation you as the user must observe these operating instr...

Page 3: ...utmost care Should you nevertheless notice any omissions or inaccuracies please let us know in writing at the above address ABUS Security Center GmbH accepts no liability whatsoever for technical and...

Page 4: ...setup 17 4 3 3 Setup via network cable 19 4 3 4 Add cameras that are already set up 20 4 4 App2Cam Plus Compatibility 21 4 5 App2Cam Plus Overview 21 4 5 1 Menu bar 22 4 5 2 Camera bar 22 4 5 3 Info...

Page 5: ...ion Settings 37 4 9 10 Storage settings 39 4 9 11 Schedule settings 41 4 9 12 Device settings 42 4 9 13 Device information 43 5 Update firmware 44 5 1 Update via server 44 5 2 Current firmware version...

Page 6: ...PPIC31020 PPIC31020 1 2 3 4 5 6 8 9 PPIC31020 WiFi Privacy Indoor Camera 1 Power supply 5V DC 2A 2 Wall mount 3 Drilling template 4 Mounting material 5 Reset tool 6 microSD card preinstalled 7 Micro U...

Page 7: ...7 English 2 Hardware description 2 1 WiFi Privacy Indoor Camera...

Page 8: ...8 English...

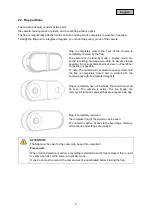
Page 9: ...To note The camera will not switch to privacy mode until the flap is completely closed and in contact with the camera body with its integrated magnets Flap is completely open on half side the camera l...

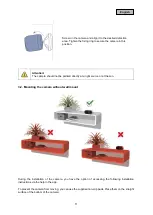
Page 10: ...within the allowable ambient temperature range 10 50 C 3 1 Mounting the camera with wall bracket During the installation of the camera you have the option of accessing the following installation instr...

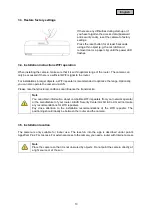
Page 11: ...be pointed directly at a light source or at the sun 3 2 Mounting the camera without wall mount During the installation of the camera you have the option of accessing the following installation instru...

Page 12: ...et up and can be moved unintentionally thus changing the detection range The camera must be positioned as freely as possible on the edge of the installation surface to avoid light reflections between...

Page 13: ...range Optionally you can also operate the camera via LAN Please note that structural conditions can influence the transmission Note You can obtain information about compatible WiFi repeaters from your...

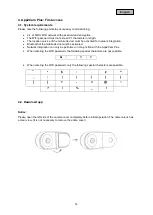
Page 14: ...network integration Bluetooth of the mobile device must be activated Network integration can only be performed in conjunction with the App2Cam Plus When entering the WiFi password the following speci...

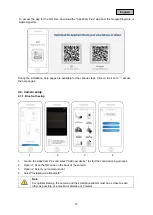
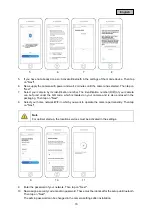
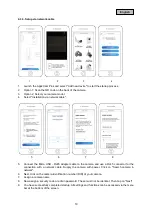
Page 15: ...ss the help pages 4 3 Camera setup 4 3 1 Bluetooth setup 1 2 3 4 1 Launch the App2Cam Plus and select Add new device to start the commissioning process 2 Option 1 Scan the QR code on the back of the c...

Page 16: ...r the QR code which is located on your camera and is also enclosed in the packaging Then tap on Next 8 Select your home network WiFi in which you want to operate the camera permanently Then tap on Nex...

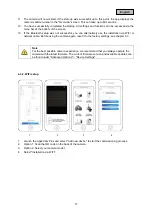
Page 17: ...alternatively use the installation via WiFi or network cable Before using the camera again reset it to the factory settings see chapter 3 3 Note For the best possible camera experience we recommend th...

Page 18: ...or admin password These must not be identical when setting up via WiFi Then tap on Next 11 The camera will now restart If the start up was successful up to this point the app displays the camera s ar...

Page 19: ...icro USB RJ45 adapter cable to the camera and use a RJ45 connector for the connection with a network cable Supply the camera with power Click on Search camera in network 6 Next click on the camera ide...

Page 20: ...ch for the camera in the network with the Search button or enter the DID of the camera manually The camera s default security code is 123456 If the camera has already been set up enter the security co...

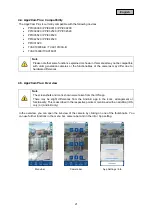
Page 21: ...be compatible with older generation cameras or the functionalities of the cameras may differ due to hardware differences 4 5 App2Cam Plus Overview Note The screenshots and icons shown were taken from...

Page 22: ...this is requested with every app start Via Via Check out the latest app version privacy policy and API version here User manual Instruction Instructions Call up the product page of the selected camera...

Page 23: ...rating Rate our app and send us your suggestions for improvement 4 6 App2Cam Plus Live View Various functions are available in Live View depending on the camera model The functions are additionally av...

Page 24: ...6 1 Live View Functions 4 6 2 Camera indicators Camera name You can change the name of the camera in the advanced settings Connected Connection status of the cameras WiFi indoor camera Connected WiFi...

Page 25: ...at your end device can obtain the data from the server This causes a delay of the stream Low Normal Good Display of the current assessment of the connection This represents the connection between the...

Page 26: ...st seven days Images with object detection are displayed with icons for the detection Click on the preview image to view it here the triggering object is shown 4 7 2 Event list functions Delete all ev...

Page 27: ...playback bar can be hidden Please note that the playback of the recordings is done in the 180 view The events usually need a short buffer time until the event can be played Note When playing back eve...

Page 28: ...load Forwarding To download a file to your smartphone click on the download icon to the right of the event The file will now be downloaded and displayed in red in the event list Now you have the possi...

Page 29: ...dmin password is a purpose password not a security password and is intended to help you allow other people to view the camera live and receive notifications but to prevent them from accessing the adva...

Page 30: ...gs on your terminal device This does not apply to access from other end devices 4 9 4 Advanced settings The individual menu items are grouped and can be expanded and collapsed using the arrows Note Th...

Page 31: ...for about 3 seconds and assign a new security code After resetting remove the camera from App2Cam Plus and begin setup using the setup wizard The default security code is 123456 Attention All settings...

Page 32: ...ttings Make the video settings for your camera here The changes in the settings are only applied after exiting the menu Video quality Here you have the possibility to change the resolution for the liv...

Page 33: ...night image A higher level brightens the image more a lower level less As soon as there are objects in the immediate vicinity of the camera it is recommended to set the intensity to low to avoid refle...

Page 34: ...hem individually by drag and drop The drawn area is made unrecognizable in black and is therefore not visible in the live image or in the recording Click the check mark in the upper right corner to sa...

Page 35: ...rd entry window will also show you the signal strength to the network make sure you have sufficient signal strength to avoid transmission problems Enter the password and confirm with OK To prevent acc...

Page 36: ...occur but is not guaranteed Software Make the settings for motion detection here There is no differentiation between objects every moving object triggers a recording Use the sliders to change the sens...

Page 37: ...The language setting for the app remains and must be changed in the smartphone E mail notification e mail E mail settings The e mail settings are required for sending a notification Use SSL TLS Activ...

Page 38: ...settings by pressing OK When exiting the advanced settings press Confirm Only then will the e mail settings be applied We recommend using googlemail to send e mails Activate the e mail notification af...

Page 39: ...torage here The changes in the settings are only applied after exiting the menu Format memory card Format the SD card For permanent use of an SD card please use an SD card of class 10 or U1 Formatting...

Page 40: ...Enabled If this function is activated the oldest recordings are overwritten with newer ones as soon as the SD card is full 3 7 30 cycle The data on the SD card is deleted or overwritten after the sele...

Page 41: ...e days for the recurrence and the action Enable Disable for the start time Save by clicking Done For the end time press the plus symbol again Now enter the end time schedule name and repeat Please sel...

Page 42: ...the menu Camera name Change the camera name here The name is displayed in the live view as well as in the push notifications Time Zone Daylight Saving Time The world time zones are listed in the sele...

Page 43: ...his exit the settings of the camera After about 5 minutes you will receive a PUSH notification or after re entering Advanced Settings a notice that a new update has been successfully downloaded Now cl...

Page 44: ...ply during this time 5 1 Update via server Option 1 The camera checks for new firmware on the firmware server for the camera at 6 hour intervals Insert a microSD card into your camera so that it can d...

Page 45: ...take up to 5 minutes exit the settings of the camera After the camera has downloaded the firmware the next time you enter the advanced settings a notice will appear or you will receive a PUSH message...

Page 46: ...ld be 1 WiFi network devices can interfere with signal transmission ensure sufficient distance between the camera and other WiFi devices Possible interfering factors can be thick brick walls exterior...

Page 47: ...licensed by the rights holders as free software or open source software hereinafter referred to as OSS The corresponding licenses are enclosed with the product in printed form and or can be accessed...

Reviews: