12
English
3. Assembly / Installation
ATTENTION!
During installation, the camera must be disconnected from the mains voltage.
Installation Site
The camera is suitable for both outdoor and indoor use.
Do not place the camera near heaters, stoves, other heat sources or in direct sunlight.
Operate the device only in locations with temperatures within the permissible ambient
temperature range of -20°~50°C.
3.1. Camera mounting
3.1.1. Wi-Fi Pan Tilt Outdoor Camera (flush-mounted)
During the installation of the camera, you have the option of accessing the following installation
instructions via the help in the app.
Attention!
Place the camera under a canopy or similar to avoid direct sunlight. The camera should
not be pointed directly at a light source or at the sun.
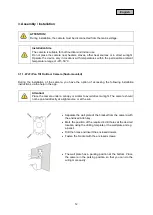
•
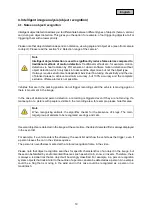
Separate the wall plate of the bracket from the camera with
the enclosed Allen key.
•
Mark the position of the required 4 drill holes at the desired
location using the drilling template or the wall plate and e.g.
a pencil.
•
Drill the holes and insert the enclosed dowels.
•
Fasten the bracket with the enclosed screws.
•
The wall plate has a parking position at the bottom. Place
the camera in the parking position so that you can do the
wiring more easily.
Summary of Contents for PPIC42520
Page 8: ...8 English 2 Hardware description 2 1 Wi Fi Pan Tilt Outdoor Camera ...
Page 9: ...9 English ...
Page 10: ...10 English 2 2 Wi Fi Outdoor Camera ...
Page 11: ...11 English ...


