8
M O N T E R A K A M E R A N
C A M E R A I N S T A L L A T I O N
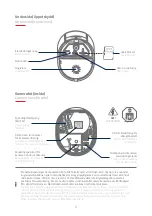
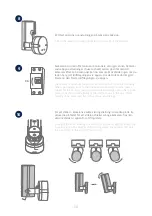
Markera med hjälp av borrmallen de nödvändiga borrhålens
position, borra hålen och sätt in pluggar.
Using the drilling template, mark the position of the required
drill holes, drill the holes and insert the dowels.
2
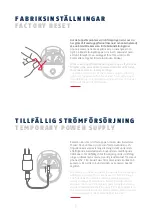
Installation av apparaten är ett arbete med nätspänning. Den måste
därför utföras av en utbildad elektriker i enlighet med de nationellt
gällande installationsföreskrifterna och anslutningsförhållandena.
Under monteringen måste den elkabel som ska anslutas vara frånkop
-
plad från elnätet. Stäng därför av strömmen först. Se till att dvärgbry
-
taren förblir avstängd under hela installationen. Se om möjligt till att
dvärgbrytaren inte är åtkomlig. Därefter ska du säkerställa att det inte
finns någon spänning vid alla poler med hjälp av lämplig mätanordning.
Installation of the device involves work on the mains power supply.
It must therefore be carried out
by a specialist in accordance with
the national installation regulations and connection requirements
.
Electrical wires must be disconnected from the power supply during
installation. Therefore, switch off the power first. Make sure that the
circuit breaker remains switched off during the entire installation
process. If possible, ensure that this circuit breaker is not accessible.
Afterwards, determine the absence of voltage at all poles using a
suitable measuring device.
1
OFF
OBS!
IMPORTANT!
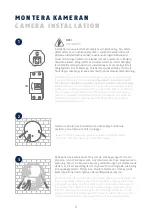
På baksidan av kamerahuset finns det tre små öppningar för de tre
kärnorna i den strömkabel som, som standard, ska förse kameran med
spänning. Dra de tre kärnorna genom gummitätningen på motsvarande
ställen. Se till att kabellängden är anpassad för den följande anslutning
till kopplingsplinten i fästets bas. Montera fästets bas i den avsedda
kamerapositionen med hjälp av de medföljande skruvarna.
On the back of the camera base, three small holes are indicated for the
three wires of the power cable that is supposed to supply the camera
with regular voltage. Feed the three wires through the rubber seal at
the through the rubber seal at the corresponding points. Make sure
that the cable length is suitable for the following connection to the
screw terminal block in the base of the mount. Install the base of the
mount in the intended camera position using the supplied screws.
3

