63
7. Diagnostic
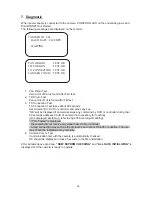
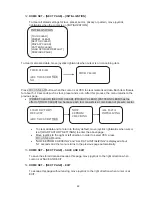
When power supply is connected to the camera, POWER ON LED on the underside glows and
DIAGONOSTIC is started.
The following messages are displayed on the monitor.
1. Pan Origin Test
Zero point of Pan is found after Pan test.
2. Tilt Origin Test
Zero point of Tilt is found after Tilt test.
3. TX
Connection
Test
TX Connection Test takes about 60 seconds.
Set camera ID in DVR or controller and press any key.
“OK” will be displayed if camera receives any command by DVR or controller during that
60 seconds addressed to ID of camera (not necessary for function).
(ID is displayed at start-up, refer to page 78 according ID setting).
* If “No Tested” is displayed
- the camera did not receive any signal from DVR or controller
- wrong connecting way such as the protocol, baud rate or RS-485 connection. The user
may check the installation way carefully.
4. Camera Comm. Test
Communication test with the camera is automatically checked.
OK should be displayed in these four tests in the first installation.
After all tests above are done,
“NOW EEPROM CHECKING”
and
“ALL DATA INITIALIZING”
is
displayed and the camera is ready to operate.
CAMERA ID : 001
BAUD RATE : 2400 BPS
WAITING…
PAN ORIGIN
TEST OK
TILT ORIGIN
TEST OK
TX CONNECTION TEST OK
CAMERA COMM
TEST OK

