background image

14

Step 2

• 

Insert the hardened InTop pin into the 1st 
chamber

• 

Attention: Pull the key a little and insert 
it again

Step 4

• 

Position the pinned core with the inserted 
cut key and rotate the core to the 2 o’clock 
position

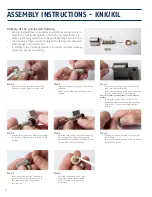
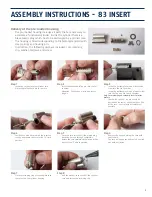
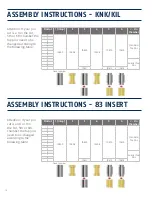
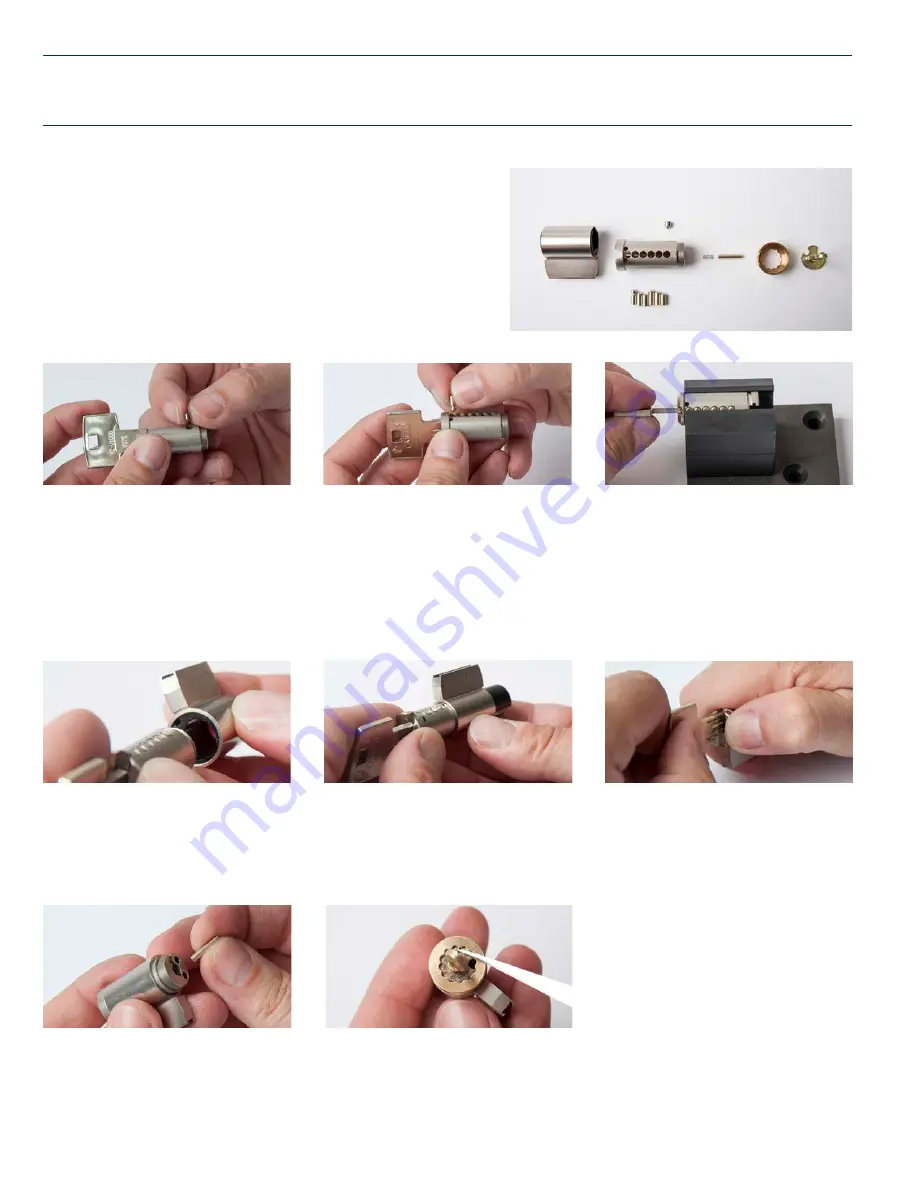
ASSEMBLY INSTRUCTIONS - KNK/KIL

Delivery of the pre-loaded housing

•  Our pre-loaded housing includes all parts that are necessary to 

assemble a functional cylinder. Inside the cylinder there is a 
black plastic plug which has to be exchanged by a pinned core.  

•  The housing is filled corresponding to the factory standard with 

steel springs and housing pin

•  In addition, the following parts are included: tailpiece package, 

screw cap, tappet and spring 

Step 1

• 

Insert the cut key into the cylinder core

• 

Place the profile check pin in the core

Step 3

• 

Insert the bottom pins made of hardened 
steel into the 3rd chamber

• 

Insert the bottom pins made of nickel silver 
into the 2nd and 4th to 6th chamber 

Only for master keyed systems: Insert master 
wafers
• 

Check with cut key – no pin should be 
positioned too low or above the shear line 
of the core – control with assembly tool 
possible 

Step 5

• 

Push the core inside until the plastic plug 
has been pushed through completely.

• 

Rotate the core forward clockwise until the 
key is at the 12 o’clock position

Step 6

• 

Remove the key by holding the core with 
your thumb

• 

The core isn’t fixed yet and could be pulled 
out with key inside

Step 7

• 

Insert the spring and the tappet into 
the drill hole on the backside of the 
core  (flat  side  of  the  tappet  goes                                                                                                                                     
into the core)

Step 8

• 

Push the tappet down and insert 
the tailpiece and screw together 
with  screw  cap  on  the  backside                                                                                                                    
of the core

Summary of Contents for Vitess Rim

Page 1: ...1 Vitess High Security Service Manual ABUS USA LLC www abus com...

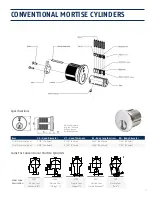
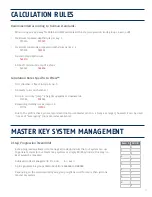
Page 2: ...ers 8 Deadbolts 8 83 Series Cylinder 9 Key Bitting Specification 10 Calculation Rules 11 Master Key System Management 11 Assembly Instructions Rim 12 Assembly Instructions Mortise 13 Assembly Instruct...

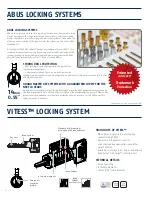
Page 3: ...systems are constructed and manufactured in Germany ensuring that consumers receive precision products that maintain their high level of performance after many years LOCKING SYSTEMS FOR BUILDING SECUR...

Page 4: ...large and complex grand master key systems with ABUS possible These locking systems offer 1 5 million true key differs STRONG DRILL PROTECTION ABUS locking systems offer superior drilling protection c...

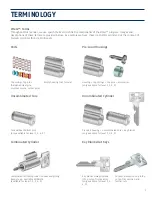
Page 5: ...of these terms are provided below As a sample we have chosen a KnK KiL cylinder but the concept of formats is similar for Rim Mortise etc Parts Top springs top pins hardened steel pins mushroom pins...

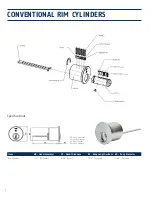
Page 6: ...RS Item HD Head Diameter HT Head Thickness BL Body Length w cam BD Body Diameter Rim Cylinder 1 337 33 95mm 0 118 3mm 1 075 27 3mm 1 146 29 1mm Specifications HD Head Diameter HT Head Thickness BL Bod...

Page 7: ...mm 1 150 29 2mm 1 1 4 Mortise Cylinder 1 370 34 8mm 0 138 3 5mm 1 200 30 47mm 1 150 29 2mm Specifications HD Head Diameter HT Head Thickness BL Body Length BD Body Diameter Cams for Conventional Morti...

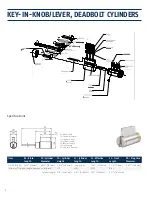
Page 8: ...KIL Cylinder 1 024 26mm 0 634 16 1mm 1 039 26 4mm see below 1 290 32 76mm 0 110 2 8mm 0 622 15 8mm Tailpieces Cylinder length depends on tailpiece STD KF03 KF01 KS03 Cylinder Length 2 15 54 66mm 3 62...

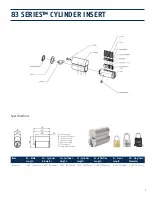
Page 9: ...r length EL Effective Length FL Front Length PD Plug Face Diameter 83 Insert 1 283 32 6mm 0 632 16 05mm 1 053 26 75mm 1 526 38 75mm 1 490 37 85mm 0 035 0 9mm 0 587 14 9mm Specifications BL Bible Lengt...

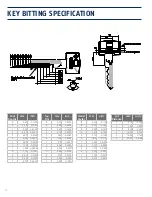
Page 10: ...3634 8 8 88 0 3496 7 8 53 0 3358 6 8 18 0 3220 5 7 83 0 3083 4 7 48 0 2945 3 7 13 0 2807 2 6 78 0 2669 1 6 43 0 2531 0 6 08 0 2394 X 5 73 0 2256 Y 5 38 0 2118 Z 5 03 0 1980 Master Wafer mm inch 13 4 5...

Page 11: ...downwards 513624 503624 Remaining chambers max jump is 6 517174 518184 Due to the profile check pin we recommend not to use master pins no 2 only 4 or larger however 2 can be used in case of emergenc...

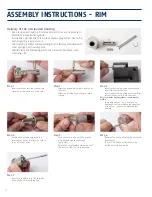
Page 12: ...piece core retaining clip Step 1 Insert the cut key into the cylinder core Place the profile check pin in the core Step 3 Insert the bottom pins made of hardened steel into the 3rd chamber Insert the...

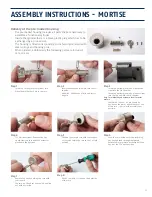
Page 13: ...t key into the cylinder core Place the profile check pin in the core Step 3 Insert the bottom pins made of hardened steel into the 3rd chamber Insert the bottom pins made of nickel silver into the 2nd...

Page 14: ...Place the profile check pin in the core Step 3 Insert the bottom pins made of hardened steel into the 3rd chamber Insert the bottom pins made of nickel silver into the 2nd and 4th to 6th chamber Only...

Page 15: ...rt the cut key into the cylinder core Place the profile check pin in the core Step 3 Insert the bottom pins made of hardened steel into the 3rd chamber Insert the bottom pins made of nickel silver int...

Page 16: ...9 in the 3rd 5th or 6th chamber the top pins need to be changed according to the following table Pin Cut 1 intop 2 3 4 5 6 Pin Chamber Z 10609 10608 10609 10608 10610 10610 Standard Top Pins Y X 0 1 2...

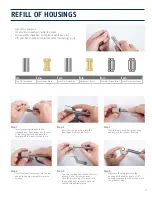
Page 17: ...sert the lever from above into the slot and push the pins completely into the housing 1st 2nd 3rd 4th 5th 6th Top Pin Hardened Mushroom Brass Top Pin Hardened Mushroom Brass Top Pin Nickel Silver Top...

Page 18: ...18 NOTES...

Page 19: ...2010 Burj Al Arab UAE Coll ge Paul Langevin France Centre Hospitalier Universitaire France Herdecke Power Station Germany Donauw rth Volkshochschule Germany Ozeaneum Germany German Clock Museum Germa...

Page 20: ...3910 N 19th Avenue 56 Phoenix AZ 85085 Phone 623 516 9933 Fax 623 516 9934 Email vitesscustomerservice us abus com Internet www abus com 08 16 HS Service Man Part 95573 0 78217 95573 4 2016 ABUS USA L...

Reviews: