background image

- M o n t a g e a n l e i t u n g -

Heckschürzenaufsatz

–   F 1 0   /   F 1 1   –

Teile-Nr.: 5112 210 110

Summary of Contents for 5112 210 110

Page 1: ... M o n t a g e a n l e i t u n g Heckschürzenaufsatz F10 F11 Teile Nr 5112 210 110 ...

Page 2: ...ach ca 48 Stunden Der AC Schnitzer Heckschürzenaufsatz kann nur in Verbindung mit verbaut werden AC Schnitzer Doppel Sportnachschalldämpfer Teile Nr 1812 210 xxx Lackieren Vor dem Lackieren müssen alle AC Schnitzer Karosserie Komponenten am Fahrzeug auf Passgenauigkeit z B Anlageflächen konturen überprüft werden Bei Fahrzeugen mit Anhängerkupplung vor dem Lackieren Seite 6 Abb 2a beachten Mögliche...

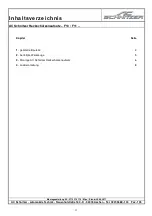
Page 3: ...el Seite 1 gelieferte Bauteile 4 2 benötigte Werkzeuge 5 3 Montage AC Schnitzer Heckschürzenaufsatz 6 4 Lackieranleitung 8 Montageanleitung Nr 5112 210 110 Mpu Stand 29 09 2011 AC Schnitzer automobile Technik Neuenhofstraße 160 D 52078 Aachen Tel 0241 5688 130 Fax 135 ...

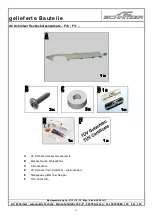
Page 4: ...zbuchse D AC Schnitzer Vitro Aufkleber silber schwarz E Klebepackung 80ml inkl Reiniger F TÜV Gutachten Montageanleitung Nr 5112 210 110 Mpu Stand 29 09 2011 AC Schnitzer automobile Technik Neuenhofstraße 160 D 52078 Aachen Tel 0241 5688 130 Fax 135 1x 1x 1x 1x 1x 1x 1x 1x 1x 1x 1x 1x 1x 1x 1x 1x 3x 3x 3x 3x 3x 3x 3x 3x 1x 1x 1x 1x ...

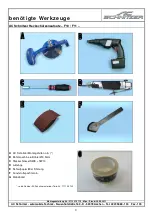
Page 5: ...er Ø3 5mm C Steckschlüssel SW8 SW10 D Luftsäge E Schleifpapier 80er Körnung F Kunststoffspachtel o ä G Klebeband erhältlich bei AC Schnitzer unter der Teile Nr 7111 99 130 Montageanleitung Nr 5112 210 110 Mpu Stand 29 09 2011 AC Schnitzer automobile Technik Neuenhofstraße 160 D 52078 Aachen Tel 0241 5688 130 Fax 135 ...

Page 6: ...Heckschürzenaufsatz gekennzeichnete Bereich 1 mit einer Luftsäge o ä ausgeschnitten und die Körnungen 2 mit einem 6mm Bohrer aufgebohrt werden Hinweis Bauteile und Flächen die miteinander verklebt werden müssen grundsätzlich mit Reiniger gesäubert werden Abb 3 Klebenuten 1 von Lack und Grundierungsresten befreien anschleifen und mit dem mitgelieferten Reiniger säubern Abb 4 Mitgelieferten Kleber i...

Page 7: ...tunden Waschanlagenfest nach ca 48 Stunden Abb 7 Abb 8 Den AC Schnitzer Heckschürzenaufsatz mit den mitgelieferten Blechschrauben Ø4 8x22mm 1 und Distanzbuchsen 2 von unten befestigen Dazu mit einem Ø3 5mm Bohrer an den entsprechenden Stellen Abb 7 vorbohren Abb 9 Mitgelieferten AC Schnitzer Vitro Aufkleber in die dafür vorgesehene Aussparung einkleben Irrtum Änderung sowie technische Weiterentwic...

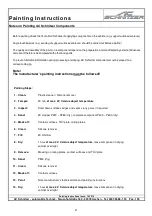
Page 8: ...hritte 1 Reinigen Kunststoffreiniger Silikonentferner 2 Tempern 30Min bei max 40 Celsius Objekttemperatur 3 Prüfen Kanten und Nähte der Oberfläche evtl Poren ggf schleifen 4 Schleifen 2K Spachtel P220 P280 trocken komplettes Bauteil P400 P600 trocken 5 Abkleben Klebeflächen TÜV Kennzeichnung Typschilder 6 Reinigen Silikonentferner 7 Füllern 2K HS Füller 8 Trocknen 1Std bei max 40 Celsius Objekttem...

Page 9: ... F i t t i n g I n s t r u c t i o n s Rear Skirt Extension F10 F11 Part No 5112 210 110 ...

Page 10: ...fter approx 48 hours The AC Schnitzer rear skirt extension can only be fitted in conjunction with AC Schnitzer twin sports silencer part no 1812 210 XXX Painting Before painting all AC Schnitzer bodystyling components must be checked for fit on the vehicle e g contact surfaces contours On vehicles with trailer coupling before painting see page 6 fig 2a Any retouching work e g sanding of contact su...

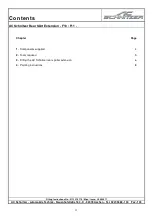
Page 11: ... Components supplied 4 2 Tools required 5 3 Fitting the AC Schnitzer rear spoiler extension 6 4 Painting instructions 8 Fitting Instructions No 5112 210 110 Mpu Issue 29 09 2011 AC Schnitzer automobile Technik Neuenhofstraße 160 D 52078 Aachen Tel 0241 5688 130 Fax 135 ...

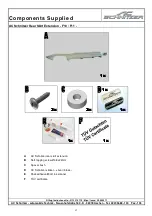
Page 12: ... Spacer bush D AC Schnitzer sticker silver black E Pack adhesive 80ml inc cleaner F TÜV certificate Fitting Instructions No 5112 210 110 Mpu Issue 29 09 2011 AC Schnitzer automobile Technik Neuenhofstraße 160 D 52078 Aachen Tel 0241 5688 130 Fax 135 1x 1x 1x 1x 1x 1x 1x 1x 1x 1x 1x 1x 1x 1x 1x 1x 3x 3x 3x 3x 3x 3x 3x 3x 1x 1x 1x 1x ...

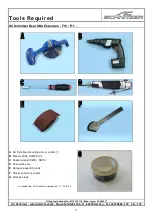
Page 13: ...Ø3 5mm C Socket wrench SW8 SW10 D Pneumatic saw E Abrasive paper 80 grade F Plastic spatula or similar G Adhesive tape available from AC Schnitzer under part no 7111 99 130 Fitting Instructions No 5112 210 110 Mpu Issue 29 09 2011 AC Schnitzer automobile Technik Neuenhofstraße 160 D 52078 Aachen Tel 0241 5688 130 Fax 135 ...

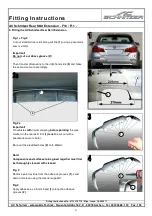
Page 14: ...ing before painting the area marked in the rear skirt trim 1 must be cut out with a pneumatic saw or similar Bore out the predrilled holes 2 onto Ø6mm Note Components and surfaces to be glued together must first be thoroughly cleaned with cleaner Fig 3 Remove paint residue from the adhesive grooves 1 sand down and clean using the cleaner supplied Fig 4 Apply adhesive as a 5 mm bead 1 along the adh...

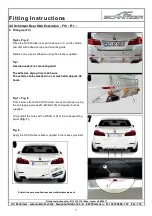
Page 15: ...n be washed in a car wash after approx 48 hours Fig 7 Fig 8 From below attach the AC Schnitzer rear skirt extension using the self tapping screws Ø4 8x22mm 1 and spacer bushes supplied First predrill the holes with a Ø3 5mm bit at the corresponding points Fig 7 Fig 9 Apply the AC Schnitzer sticker supplied in the recess provided Subject to errors modifications and technical development Fitting Ins...

Page 16: ...ing Steps 1 Clean Plastic cleaner Silicone remover 2 Temper 30 min at max 40 Celsius object temperature 3 Inspect Sand down surfaces edges and seams any pores if required 4 Sand 2K stopper P220 P280 dry complete component P400 P600 dry 5 Mask off Contact surfaces TÜV plate rating plates 6 Clean Silicone remover 7 Fill 2K HS filler 8 Dry 1 hour at max 40 Celsius object temperature leave component i...

Reviews: