background image

Page 3                                                                                                         Revision 2 January 2001

BEFORE INITIAL START-UP ENSURE THAT THE COMPRESSOR OIL CHAMBER IS FILLED TO THE

CORRECT LEVEL WITH AIR SYSTEMS APPROVED OIL.

O

VERVIEW

The TA-3  is a portable, 3-man breathing air compressor designed exclusively for use with pressure demand

respirators.  This system operates on standard 115 volt/60hz/20 amp electrical service.  The system produces
pressure up to 110psi (7.5 bar) that is monitored by a built in pressure gauge.  

Note:  The TA-3 must have a Grade-D

filtration unit attached to the compressor to make a complete breathing air package.

  Any 30 or 60 minute air

cylinder can be slid into the TA-3 frame and with the addition of a pressure reducing regulator and an Auto-Air
Breather Box™, you now have a 3-man compressor with full automatic backup air for IDLH operation (Model COMP-
3EA).    The compressor should be connected to the filtration unit with a 

minimum

 0.5 inch I.D. breathing air hose.

CONSTANT FLOW RESPIRATORS CANNOT BE USED WITH THIS SYSTEM!

Note:  Always run, store, or ship the compressor in the horizontal position.

  Never stand the unit upright as

oil will drain from the sump and cause damage to the compressor.  Check compressor oil level before each usage.
A 7/8" wrench is required to loosen the nut on the oil sump.  Oil should be level with the bottom of the internal
threads.  

DO NOT OVERFILL

.  If oil level is low, add only Air Systems' approved oil.  Order part number HP-268

USDA synthetic lubricant.

S

ETUP

 P

ROCEDURE

 - M

ODEL

 TA-3 (COMP-3 S

YSTEM

)

Warning: Always locate compressor in a fresh air environment away from toxic dusts, vapors, and fumes.

STEP 2)

Plug compressor into a 115 volt
receptacle with a dedicated 20 amp
service.  

Note:  If an extension

cord is going to be used, the cord
must be rated for a minimum 20
amp service (12/3 gauge).

STEP 1)

Compressor must be attached to a Grade-
D filtration unit. A minimum 1/2” I.D. hose
is to be used between the compressor and
the Grade-D filtration unit.

STEP 4)

Attach respirator supply hose to outlet fittings
on Grade-D filtration unit.  Never leave an open
(unused) respirator attached to the system as
output pressure will not be maintained.

STEP 3)

Turn on the compressor and note the gauge
pressure reading on the compressor.  Al-
low twin receiver tanks to fill to system
pressure 110psi (7.5 bar) output.

STEP 5)

Adjust the regulator on the Grade-D filtration unit to the required
output pressure (psi) of the pressure demand respirator.  Review
manual on the Grade-D filtration unit and carbon monoxide monitor
for details on operation, service, and calibration before commencing
work.  Attach and don respirator.

Note:  Do not replace the coupling supplied on the compres-

sor tank outlet except with a checked style coupling of at least 1/2”
I.D.   Do not use a Chicago style coupling on this type of compres-
sor.

actoolsupply.com

actoolsupply.com

Summary of Contents for TA-3

Page 1: ...ctoolsupply com actoolsupply com Air Systems International TA 3 Breathing Air Compressor Air Systems International COMP 3 TA 3 Breathing Air Air Systems International COMP 1 TA 1 Breathing Air Compres...

Page 2: ...friador deAceite 10 Remonci n del Filtro deAdmisi n deAire 11 C mo Retirar el Elemento Separador deAceite 11 Sustituci n del Filtro deAdmisi n deAire 11 Programa de Servicio 12 Informaci n Para Ordena...

Page 3: ...ternal threads DO NOT OVERFILL If oil level is low add only Air Systems approved oil Order part number HP 268 USDA synthetic lubricant SETUP PROCEDURE MODEL TA 3 COMP 3 SYSTEM Warning Always locate co...

Page 4: ...ined STEP 5 Turn on the compressor and note the gauge pressure reading on the compressor Al low twin receiver tanks to fill to system pressure 110psi 7 5 bar output Note Do not replace the coupling su...

Page 5: ...oil part no HP 268 approximately 8 liters 7 Oil should just reach the bottom of the threads when the filler plug dipstick A and the gasket B are fitted 8 Refit filler plug A using the gasket 8 Tighte...

Page 6: ...MENT 1 Remove cap head screws G 2 Gently tap the end cover H until it is clear of the separator casing 3 Unscrew the oil separator element J and discard 4 Fit a new separator element Model COMPA022 En...

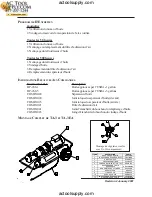
Page 7: ...lon COMPA022 OilSeparator COMPA028 O Ring Oil Separator front COMPA023 O RingOilSeparator rear COMPA021 IntakeAirFilter COMPA041 OilFillPlugGasket COMPA043 OilDrainPlugGasket ITEM DESCRIPTION PART 1 O...

Page 8: ...LENAR Si el nivel de aceite est bajo a adir aceite aprobado por Air Systems solamente Ordenar lubricante sint tico No de Parte HP 268 PROCEDIMENTO DE PREPARACI N MODELO TA 3 SISTEMA COMP 3 Advertencia...

Page 9: ...manguera de aire de reserva al regulador de aire de reserva y el accessorio de entrada de aire de respaldo en la unidad de filtraci n de Grado D Auto Air Se proporciona en el regulador de aire de res...

Page 10: ...Nota Cualquier aceite de desecho acummulado se tiene que desechar de una manera aprobado 5 Colocar nuevamente el tap n de drenajo D con un nuevo sello pegado C Apretar a un torque de 20 Nm 14 75 pies...

Page 11: ...G 2 Golpear suavemente la cubierta de extremo H hasta que est fuera de la carcasa del separador 3 Desenroscar el elemento separador de aceite J y desecharlo 4 Colocar un elemento separador nuevo Mode...

Page 12: ...ador de aceite frontal COMPA023 Anillo de O de separador de aceite posterior COMPA021 Filtro de admisi n de aire COMPA041 Empaquetadura de tap n de llenado de aceite COMPA043 Empaquetadura de tap n de...

Page 13: ...veau d huile est bas ajoutez de l huile approuv par Air Systems uniquement Commandez le lubrificant synth tique num ro de pi ce HP 268 PROCEDURE D INSTALLATION MODELE TA 3 SYSTEME COMP 3 Advertissemen...

Page 14: ...D et du d tecteur d oxyde de carbone pour obtenir des informations d taill es sur le fonctionnement l entretien et l talonnage avant de commencer votre travail Raccordez et fixez le respirateur tape 2...

Page 15: ...bague composite C 4 Vindagez l huile 0 8 litres dans un conteneur adapt plac sous le compresseur Remarque L huile usag e recueillie doit tre limin e conform ment aux normes en vigueur 5 Remettez le bo...

Page 16: ...tirez les vis t te G 2 Donnez des petits coups sur couvercle du fond H jusqu ce qu il se s pare du bo tier du s parateur 3 D vissezl l ments parateurd huile J etretirez le 4 Montez un nouvel l ment s...

Page 17: ...lons COMPA022 S parateurd huile COMPA028 Joint torque du s parateur d huile devant COMPA023 Joint torque du s parateur d huile arri re COMPA021 Filtred admissiond air COMPA041 Jointd tanch it duboucho...

Page 18: ...ION QUALITY MERCHANTABILITY FITNESS FORAPARTICULAR PURPOSE ORANY OTHER MATTER IS GIVEN BYAIR SYSTEMS IN CONNEC TION HEREWITH UNDER NO CIRCUMSTANCES SHALLTHE SELLER BE LIABLE FOR LOSS OFPROFITS ANY OTH...

Page 19: ...IPCI N CALIDAD COMERCIABILIDAD APLICACI N CORRECTAPARAUN MOTIVO ESPEC FICO O CUALQUIER OTRO TEMA EN CONEXI N CON ESTE DOCUMENTO BAJO NINGUNA CIRCUNSTANCIA SER RESPONSABLE EL VENDEDOR EN CUANTO A P RDI...

Page 20: ...U TACITE QUANT LADESCRIPTION LA QUALIT LAVALEUR MARCHANDE LACONVENANCE UN USAGE PARTICULIER OUTOUTEAUTRE FONC TION LI EAU PRODUIT CI JOINT LE VENDEUR NE POURRAENAUCUN CAS TRE TENU RESPONSABLE DES PERT...

Reviews: