2.3 HDD Installation
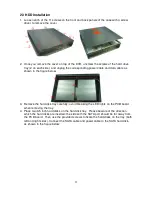
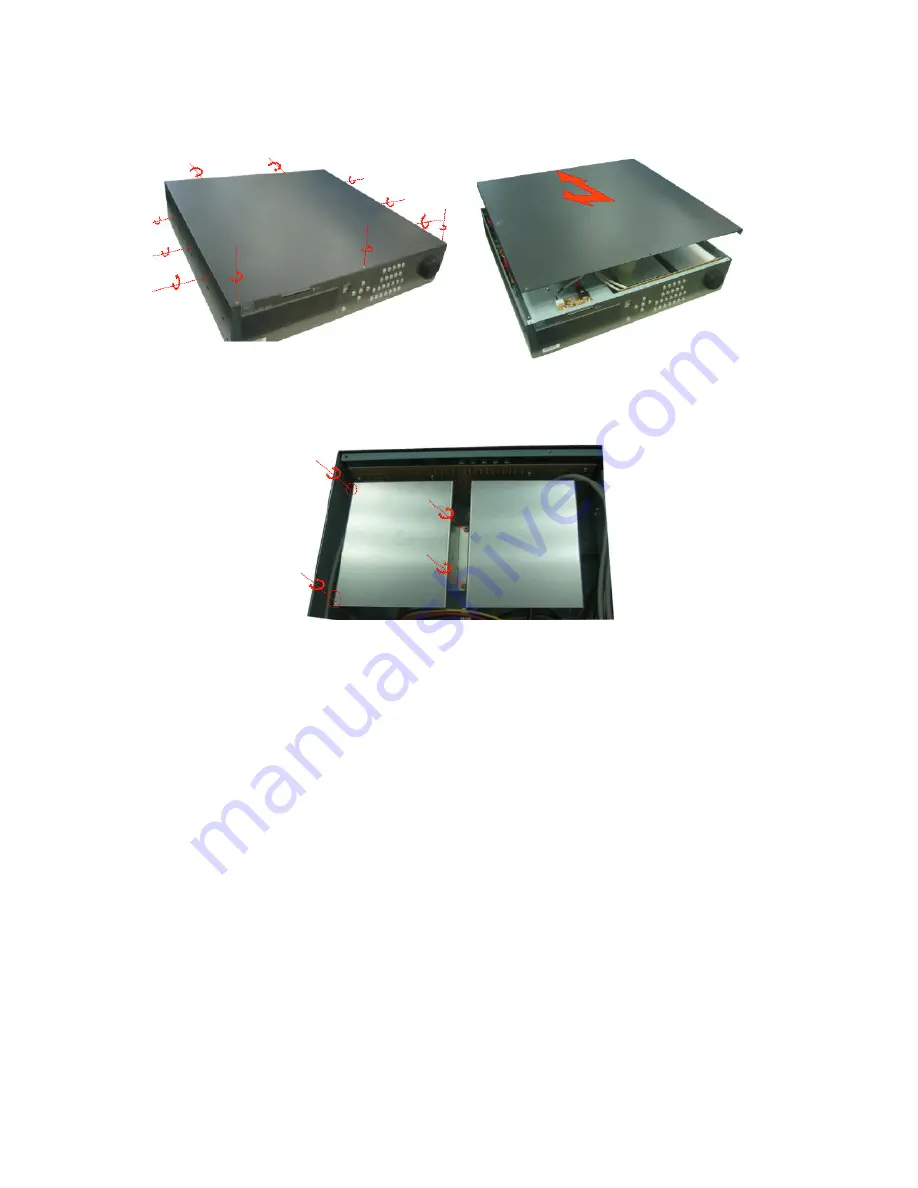
1. Loosen each of the 11 screws on the front and back panels of the case with a screw
driver to remove the cover.
2. Once you remove the cover on top of the DVR, unscrew the screws of the hard drive
tray (2 on each side), and unplug the corresponding power cable and data cable as
shown in the figure below.
3. Remove the hard disk tray carefully; avoid breaking the LED lights on the PCB board
when removing the tray.
4. Place two 3.5 inch hard disks on the hard disk tray. Please beware of the direction
which the hard disks are inserted; the side with the SATA port should be far away from
the PCB board. Then use the provided screws to fixate the hard disks on the tray (both
left and right sides). Connect the SATA cable and power cable to the SATA hard disk,
as shown in the figure below:
11


