2) OSD BUTTONS for mouse input
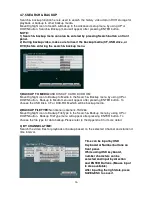
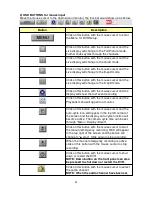
Move the mouse cursor to the down side of monitor, the tool-bar would show up as below.
Button
Description
Click on this button with the mouse cursor to enter
the Menu for DVR Setup.
Click on this button with the mouse cursor and the
Live display will change to the Full Picture mode.
Further clicks cycles through the channels.
Click on this button with the mouse cursor and the
Live display will change to the Quad mode.
Click on this button with the mouse cursor and the
Live display will change to the 8-split mode.
Click on this button with the mouse cursor and the
Live display will change to the 9-split mode.
Click on this button with the mouse cursor and the
display will show the last event recording
Click on this button with the mouse cursor and the
Playback menu will appear on monitor.
Click on this button with the mouse cursor and the
auto-cycle icon will appear in the top left corner of
the screen and the display auto-cycle function will
become active. The camera cycle time can be set
through "Menu / Display / Dwell".
Click on this button with the mouse cursor to start
the manual emergency recording. REC will appear
in the top right of the screen and the button will
change to "
■
stop". Click again to stop recording.
When the manual emergency recording is active,
click on this button with the mouse cursor to stop
recording.
Click on this button with the mouse cursor to shut
down or restart the DVR.
NOTE: Down button on the front panel can also
be pressed to shut down or restart the DVR.
Click on this button with the mouse cursor to select
the audio channel.
NOTE: When the audio channel have been set,
41


