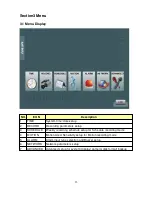
This button is pressed to enter menu for system setting.
i) Save & Esc
After system setting in menu, this button is used to save the settings and escape to
upper menu.
3. Direction buttons and Enter Button
a)
Direction buttons
are used to move LEFT, RIGHT, UP and DOWN in menu.
b) ENTER
button is used to select parameter in the menu. And in playback, it is used to
select one of listed file for playback after searching recorded files.
4. REC/ STOP, REW(
◄◄
), PLAY/ PAUSE (
►
/ II), STOP(
■
) ,and FF(
►►
)buttons
a)
●
/
■
button can be pressed to start recording while emergency recording is
be pressed manually for all channel recording while emergency happens.
b) REW
button can be used for high speed backward playback. It support 2 to 16 times
playback speed.
c) PLAY/ PAUSE
is used to freeze playback and also restart playback while pause.
d) STOP
button is used to stop playback
e) FF
button to do high speed forward playback. It support 2 to 16 times playback
speed.
5. LED Indicators
a) REC/HDD
This red LED will turn “ON” during recording or playback .
b) ALARM
This red LED will turn “ON” when motion detection or alarm have been triggered.
c) NET
This green LED will turn “ON”, while data through network is transmitting.
d) USB
This red LED will turn “ON” during data backup or F/W upgrade through USB drive.
e) LOCK
This red LED will turn “ON” while LOCK button is working.
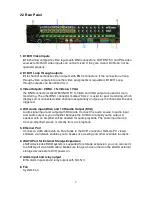
6. USB port
Inserting USB 2.0 Drive for data backup and FW upgrade; supports USB DVD-RW
only.
7. Power Button (Power On/ Off button)
This Power button can be pressed to turn off DVR power. When this button is
pressed,password is requested. When right password is input, DVR power will be
turned off.
8. CF slot
inserting CF card for F/W upgrade and data backup.
Please refer to Appendix2 for CF compatible list
9. Jog and Shuttle
Jog and shuttle enable user to operate DVR easier in handling such as fast forward, fast
reverse playback and one frame movement in still picture.
8


