4: Port configuration
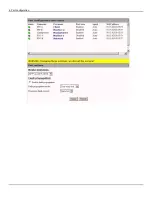
These four options are available on the MetroNID TE-S:
•
SFP-A with SFP-B
•
SFP-A with SFP-D
•
SFP-C with SFP-B
•
SFP-C with SFP-D
If you change the setting and then click Apply, all the associations between connectors and ports will be reflected in the
Port configuration and status table.
The two other connectors on the device will be monitor ports. When used as monitor ports, connectors RJ45-A and SFP-A
are mapped to port Monitor-1, and RJ45-B and SFP-B are mapped to port Monitor-2.
For example: By default, SFP-A with RJ-45-B is selected. This denotes Traffic-A is connected to the SFP-A connector and
Traffic-B is connected to the RJ-45-B connector
Fault propagation
Enable fault propagation
Select this check box to enable fault propagation. When this feature is enabled the EtherNID will propagate link faults
between the Client and Network ports.
Fault propagation mode
Select fault propagation operation mode:
•
One-way link: Propagate fault in one direction based on opposite port link status.
•
One-way EVC: Propagate fault in one direction based on opposite port link status and EVC status.
•
Two-way link: Propagate fault in both direction based on opposite port link status.
Fault propagation could be based on link status only or link status and EVC status.
For link status only operation mode, a link down on the opposite port is propagated to the specified port.
For EVC status operation mode, the status of PAA probe(s) and/or CFM MEP(s) are propagated to the specified port. At
least one PAA probe or CFM MEP should be free of connectivity errors to enable the specified port. If there is no PAA
probe and no CFM MEP configured in EVC fault propagation mode for the specified port, that port will stay down.
Propagate fault on port
Select the port that the EtherNID will use for fault propagation. Select one of the following options:
•
Client: If the EtherNID detects a link down condition on the Network port it will also bring down the Client port.
•
Network: If the EtherNID detects a link down condition on the Client port it will also bring down the Network port.
Summary of Contents for EtherNID EE
Page 8: ...8 Alarms 199 1 APPENDIX B MIB SUPPORT 203 Public MIBs 203 Private MIBs 205...
Page 71: ...4 Port configuration...
Page 121: ...6 Alarms Alarm configuration The Alarm Configuration page lists all defined alarms...
Page 164: ...9 Performance Assurance Agent 3 Configure parameters and click Apply...
Page 191: ...11 CFM 10 Open the CFM DMM Configuration and select add...


