background image

3

CERTIFICATION: 

CETL WET

NO. 

20347

5

6

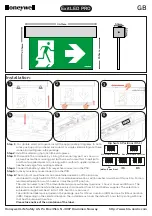
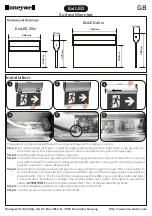
MOUNT THE BACK PLATE

Feed the nipple from the crossbar through the

designated hole in the back plate. Use the supplied

thumb nut to secure the nipple to the back plate. Hold

the back plate up to the mounting surface, insert the

supplied screws in the mounting plugs and secure the

back plate to the mounting surface.

INSERT TUBE

Insert the Tubes.

MAXIMUM WATTAGE 24W.

DO NOT EXCEED THE WATTAGE AS STATED

ON THE WARNING LABEL AND IN THE INSTRUCTION

SHEETS

SECURE THE GLASS DIFFUSER

Position the glass diffuser over the back plate.  

Align the holes at the left and right of the plates. 

Secure with the supplied allen screws and 

L-type screw driver. 

7

Summary of Contents for 20347

Page 1: ... is not sufficient to prevent electrical shock MARK BACK PLATE LOCATION Determine the desired location of your fixture Hold the back plate up to the surface and mark with a pencil the location of the mounting plugs small hole on the up and down side of the back plate Drill a hole and insert the mounting plugs into the mounting surface 1 GENERAL INFORMATION All electrical connections must be in acc...

Page 2: ...ough the hole in the crossbar Gently feed the fixture wire through one of the slits in the back plate and then through the hole floating canopy Connect the black supply wire to the black fixture wire Secure with the supplied wire nuts Connect the white supply wires to the white fixture wire Secure with the supplied wire nuts Either wrap the green wire around one of the protruding screws or connect...

Page 3: ...unting surface insert the supplied screws in the mounting plugs and secure the back plate to the mounting surface INSERT TUBE Insert the Tubes MAXIMUM WATTAGE 24W DO NOT EXCEED THE WATTAGE AS STATED ON THE WARNING LABEL AND IN THE INSTRUCTION SHEETS SECURE THE GLASS DIFFUSER Position the glass diffuser over the back plate Align the holes at the left and right of the plates Secure with the supplied...

Page 4: ...the holes at the left and right of the plates Secure with the supplied screws Please ensure that the fitting is cool and switched off before replacing the bulb DO NOT use bulbs that might exceed the maximumwattage statedoncautionlabel CAUTION RESTORE THE ELECTRICITY AND CHECK THE OPERATION OF YOUR NEW ACCESS FIXTURE ...

Reviews: