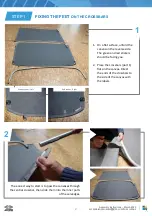
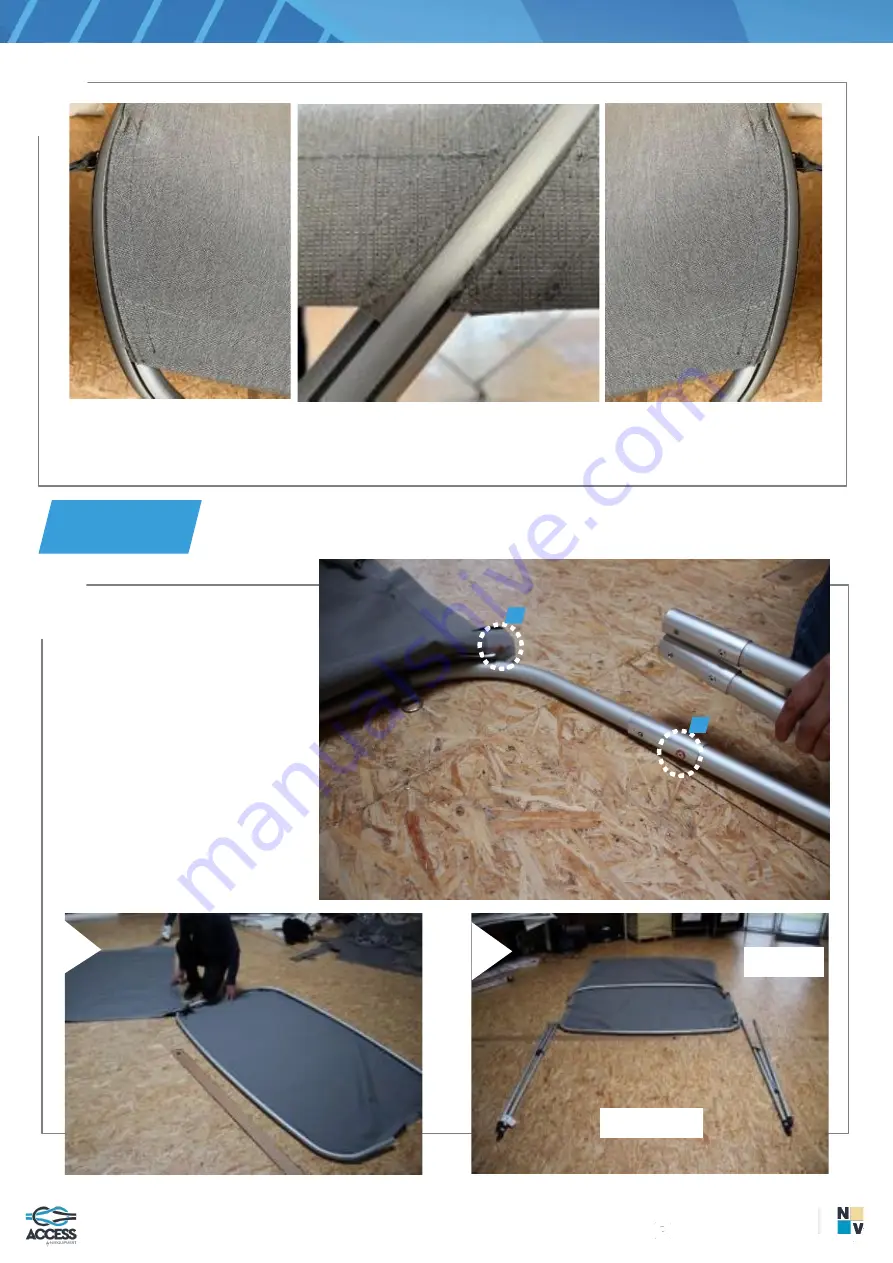
background image

Rear of the 

product

Front of the 

product

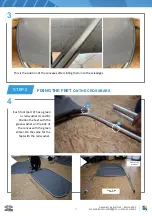
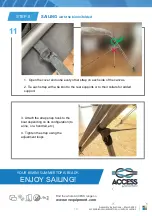
Each foot (part 2) has a green 

or red washer (A and B). 

Position the feet with the 

green washer on the side of 

the canvas with the green 

sticker. Do the same for the 

feet with the red washer.

4

A

B

3

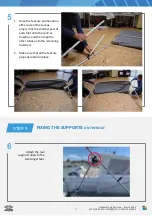
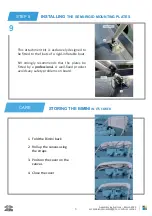
This is the position of the canvases after sliding them into the selvedges.

3

FIXING THE FEET 

ON THE CROSSBARS

STEP 2

Assembly instructions 

– March 2023

ACCESS BIMINI SUMMERTOP ALU WITH SELVEDGE

Summary of Contents for BIMINI

Page 1: ...ng tape and pencil ESSENTIAL TOOLS X2 3hrs FIRST KIT COMPOSITION 1 ASSEMBLY INSTRUCTIONS NOT03128 Assembly instructions March 2023 ACCESS BIMINI SUMMERTOP ALU WITH SELVEDGE 1 3 2 7 4 5 6 1 CROSSBARS x...

Page 2: ...t the ends of the crossbars to the side of the canvas with the labels FIXING THE FEET ON THE CROSSBARS STEP 1 1 Green sticker Left Red sticker Right The easiest way to start is to pass the canvases th...

Page 3: ...h the green washer on the side of the canvas with the green sticker Do the same for the feet with the red washer 4 A B 3 This is the position of the canvases after sliding them into the selvedges 3 FI...

Page 4: ...the central crossbar and then snap the other tubes onto the remaining crossbars 2 Make sure that all the feet are properly locked in place FIXING THE SUPPORTS ON THE BOAT STEP 3 Attach the rear suppor...

Page 5: ...agrams opposite 4 Once correctly positioned mark the location of each of the attachments with a pencil for the feet and for the rear supports 8 NO NO YES 5 Assembly instructions March 2023 ACCESS BIMI...

Page 6: ...y a professional A well fixed product avoids any safety problems on board CARE STORING THE BIMINI IN ITS COVER 1 Fold the Bimini back 2 Roll up the canvas using the straps 3 Position the cover on the...

Page 7: ...tie every other strap on each side of the canvas 2 Tie each strap with a tie knot to the rear supports or to their collars for added support 3 Attach the strap snap hook to the boat depending on its c...

Reviews: