EXC-400 MICROSCOPE SERIES
ACCU-SCOPE
®
73 Mall Drive, Commack, NY 11725 • 631-864-1000 • www.accu-scope.com
14
ADJUSTMENT & OPERATION
(continued)
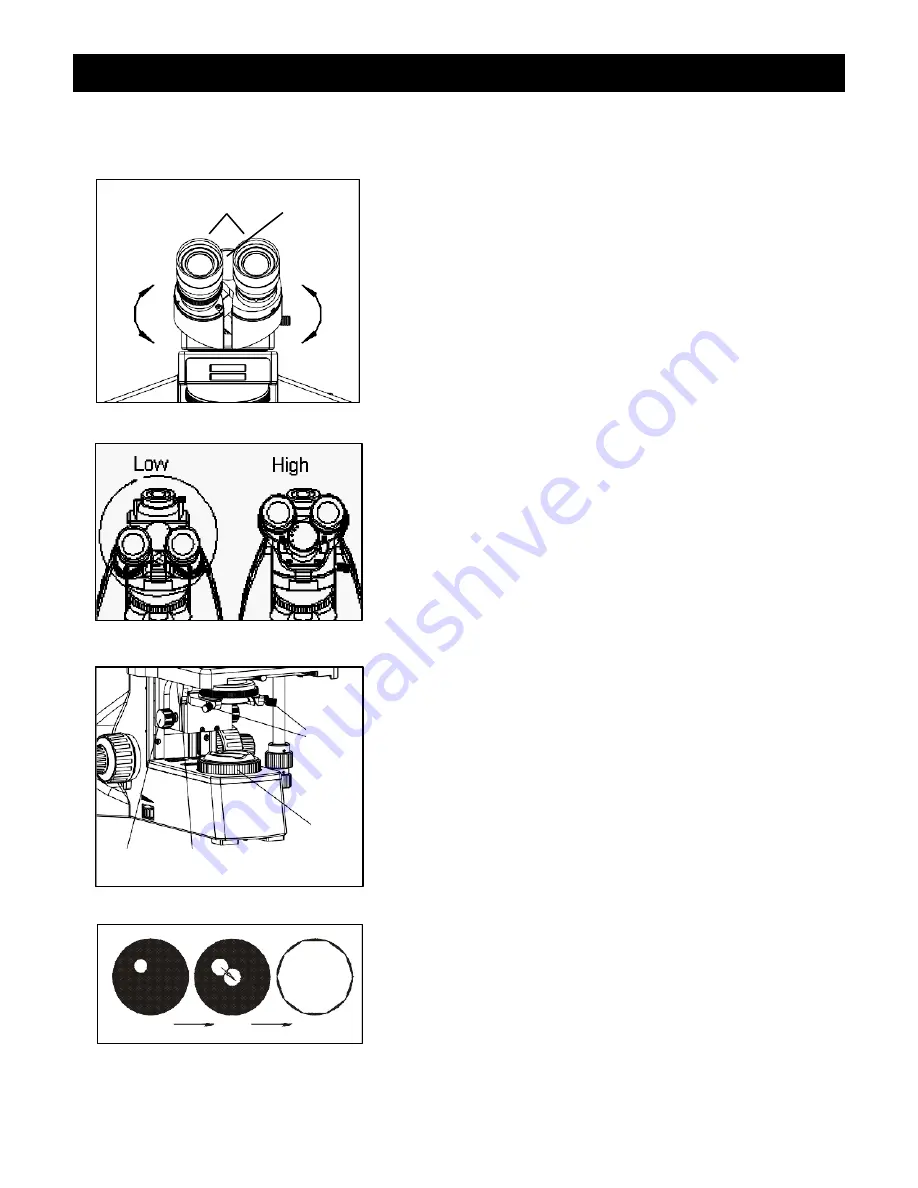
Adjusting the Interpupillary Distance -
(Fig. 17 & 18)
To adjust the interpupillary distance, hold the left and right
eyetubes while observing a specimen. Rotate the
eyetubes around the central axis until the fields of view
of both eyetubes
①
coincide completely. A complete
circle should be seen in the viewing field when viewing
the specimen slide. An improper adjustment will cause
operator fatigue and will disrupt the objective
parfocality.
Where
“
●
”
on the eyepiece tube lines up to the
interpupillary scale
②
, then that is the number for the
interpupillary distance. Range
:
50
~
76mm.
Remember your interpupillary number for future
operation.
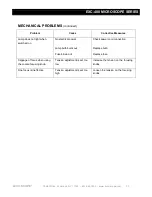
NOTE:
The eyepiece tubes can be rotated 180° to
increase the eyepoint height by 34mm to accommodate
the needs of different users. (Fig. 18)
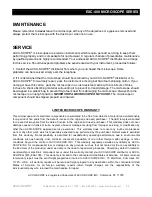
Centering the Condenser - (Fig. 19 & 20)
Rotate the condenser knob
①
to raise it to the highest
position (Fig. 19).
Rotate the 10x objective into the light path and focus the
specimen.
Rotate the field iris diaphragm adjustment ring
③
to put
the field iris diaphragm to the smallest position.
Rotate the condenser knob and adjust the image to be
its sharpest.
Adjust the center adjustment screws
④
and move the
specimen to the center of the field of view (Fig. 20).
Open the field iris diaphragm gradually. If the image is in
the center all the time and inscribed to the field of view,
the condenser has been centered correctly.
Fig. 17
①
②
Fig. 19
①
②
③
④
Fig. 20
Fig. 18
A
B
C
Summary of Contents for EXC-400 Series
Page 2: ......


