background image

EXS-210 STEREO MICROSCOPE 

ACCU-SCOPE

® 

9

ADJUSTMENT & OPERATION 

(continued)


IMPORTANT 

USE ONLY 1.2v NiMH AA 
1300mAh (Nickel Metal 
Hydride) rechargeable 
batteries in your microscope. 
Using any other type of 
battery may damage to your 
microscope

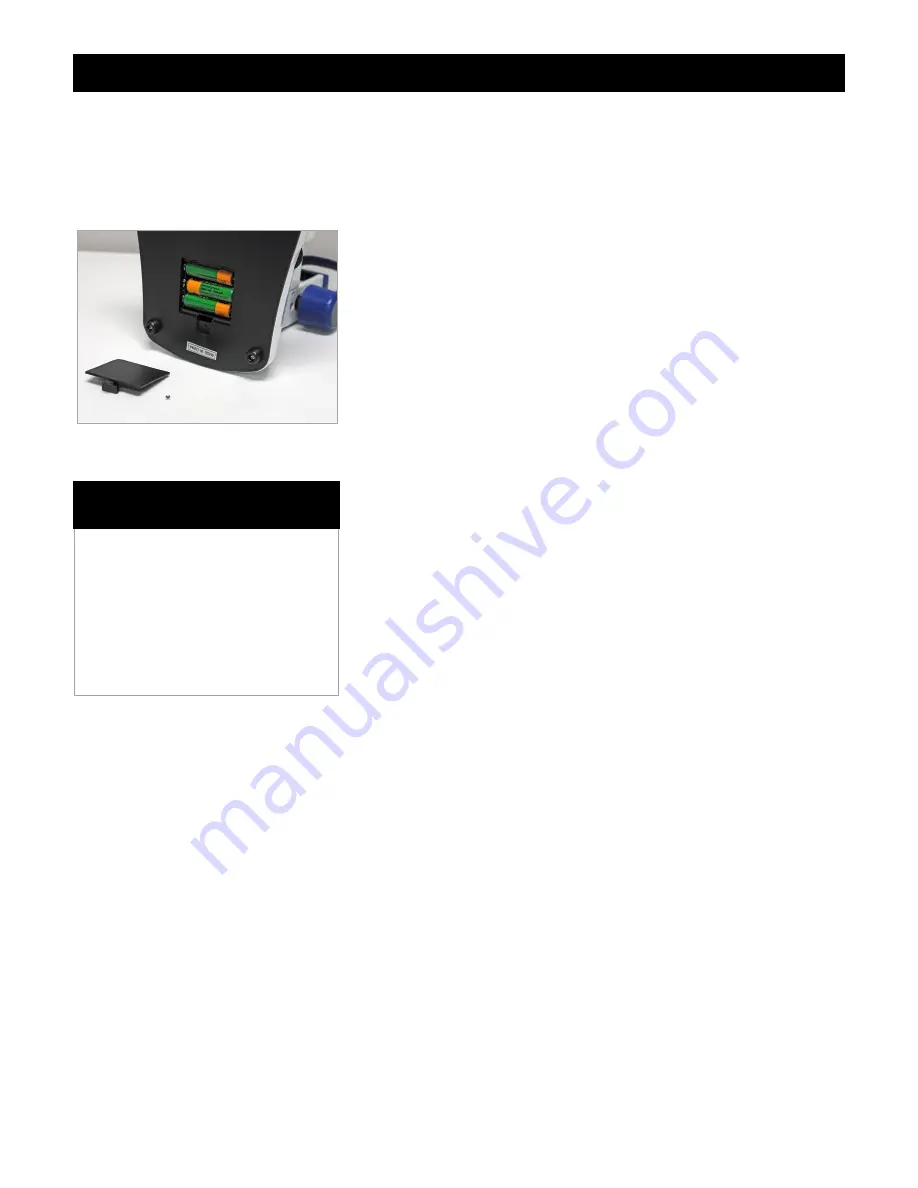
Replacing the Rechargeable Batteries 

(Fig. 9)


1. Unplug the microscope from the electrical outlet (if plugged in)

and unplug charger from rear of microscope (if plugged in).

2. Carefully place the microscope on the back of its arm so the

bottom of the microscope base is facing towards you.

3. Open the trap door on the bottom using a small Philips head

(+) screw driver.

4. Replace the three NiMH AA 1300mAh rechargeable batteries.

5. Close the trap door, and place the microscope in an upright

position.

6. Plug the charger to the power receptacle on the back of the

microscope and plug into an electrical receptacle for continued
use while charging.

Allow the LED microscope to charge for 8 hours before using as 
cordless.  

Replacing the LED Bulbs

The reflected (top) and transmitted (bottom) lights can be used 
simultaneously.  The lux rating for the reflected illuminator is 
7000lux, and the transmitted 18,000 lux by a distance of 70mm.  
The life expectancy of the LED bulbs is 20,000 hours.   The LED 
bulbs are covered by a 1 

year manufacturer’s warranty.   

Should your LED bulbs need replacing, please contact an 
authorized ACCU-SCOPE service center or call ACCU-SCOPE 
Inc.’s technical service department at 631-864-1000 for an 
authorized service center near you. 

Fig. 9 

Summary of Contents for EXS-210-24

Page 1: ...MANUAL EXS 210 STEREO MICROSCOPE SERIES 100 Lauman Lane Suite A Hicksville NY 11801 Tel 877 877 7274 Fax 516 801 2046 Email Info nyscopes com www microscopeinternational com LVWULEXWHG E...

Page 2: ...NT AND OPERATION CONNECTING THE POWER CORD 5 ADJUSTING INTERPUPILLARY DISTANCE 5 ADJUSTING THE DIOPTER 6 ADJUSTING THE FOCUSING TENSION 6 CHANGING THE MAGNIFICATION 7 ADJUSTING ILLUMINATION 7 OBSERVIN...

Page 3: ...semble any component including eyepieces objective housing or the focusing assembly 2 Keep the instrument clean remove dirt and debris regularly Accumulated dirt on metal surfaces should be cleaned wi...

Page 4: ...shipment UNPACKING AND COMPONENTS Your microscope arrived packed in a molded shipping carton Do not discard the carton the shipping carton should be retained for reshipment of your microscope if need...

Page 5: ...210 STEREO MICROSCOPE ACCU SCOPE 4 COMPONENTS DIAGRAM continued Indicent Top Illuminator Transmitted Bottom Illuminator Incident Top Illuminator Variable Intensity Adjustment Dial Power Cord Receptac...

Page 6: ...he way toward the front of the microscope or away from you for the Top illuminator the dial on the right side of the microscope should be turned all the way toward the back of the microscope or toward...

Page 7: ...e diopter ring on left eyepiece to focus the specimen NOTE The working distance of the microscope is 57mm the distance between the microscope objective to the top of the specimen Adjusting the Focusin...

Page 8: ...cation of eyepiece i e 3x X 10 30x Adjusting Illumination Fig 6 The EXS 210 is equipped with a rechargeable variable built in 3 way illumination system LEDs for incident top and transmitted bottom Bri...

Page 9: ...ion A slight turn of the focusing knobs may be needed to sharpen focus Recharging the Microscope Fig 8 The LED cordless rechargeable microscope is completely portable and be used indoors or outdoors i...

Page 10: ...able batteries 5 Close the trap door and place the microscope in an upright position 6 Plug the charger to the power receptacle on the back of the microscope and plug into an electrical receptacle for...

Page 11: ...Illumination system Adjustable illumination for both LEDs top and bottom OPTICAL DATA EYEPIECE OBJECTIVE 1X 2X 3X 4X 5X 22MM Total Magnification 5X 10X 15X 20X FOV mm 22 12 8 6 10X 20mm Total Magnifi...

Page 12: ...iopter adjustment is incomplete Complete diopter adjustment 2 Dirt is visible in field of view Dirt on specimen Clean specimen Dirt on eyepiece Clean eyepiece 3 The visibility of the image is poor Dus...

Page 13: ...m the date of invoice to the original end user purchaser The LED lamp is warranted for a period of two years from the date of invoice to the original end user purchaser This warranty does not cover da...

Reviews: