8
Reversing the Door Swing
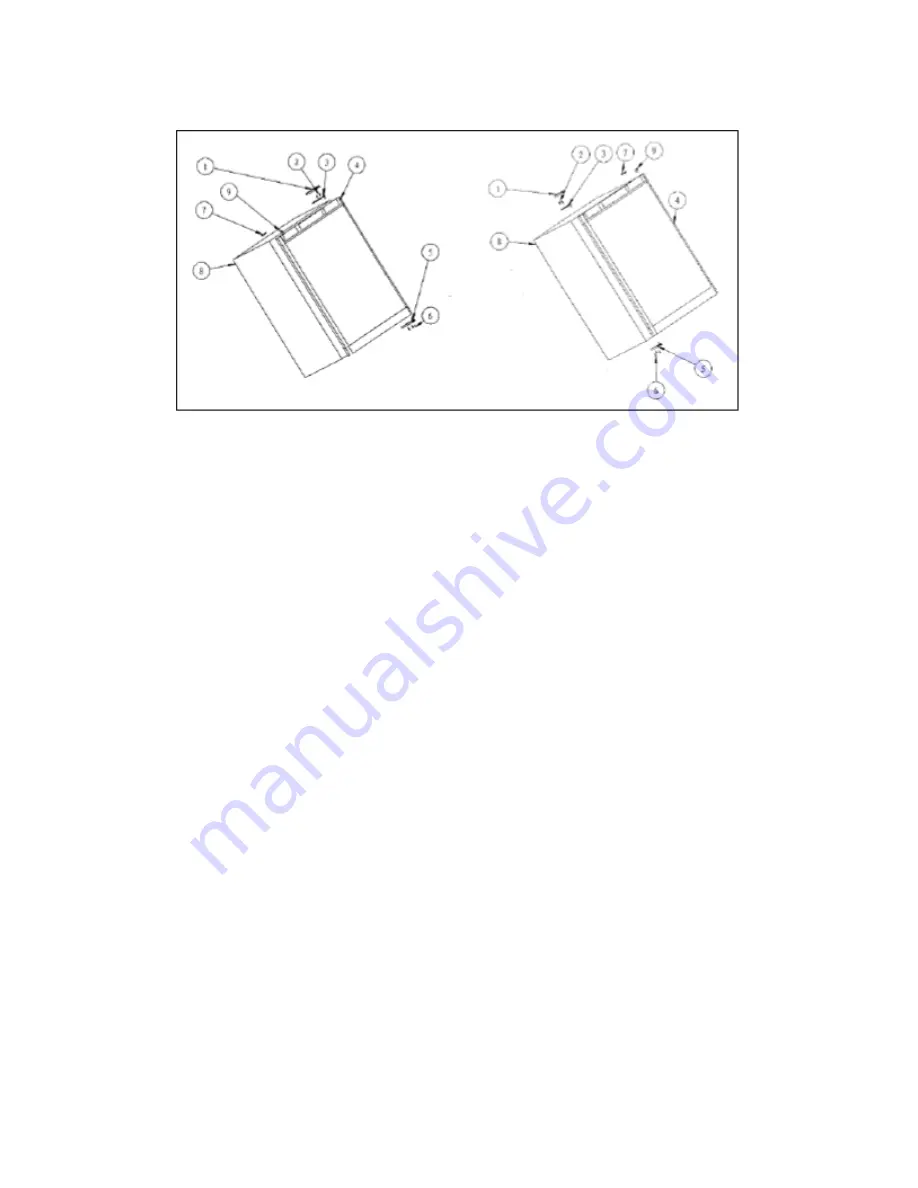
Figure 1 (Default position)
Figure 2 (After door reversal)
1. Upper hinge cover
6. Screws
2. Screws
7. Hole cover
3. Upper hinge
8. Cabinet
4. Door
9. Pin cap
5. Lower door hinge
This freezer can be opened from either the right side or the left. By default, the door hinge is on the
right side. If you prefer it on the left, please follow these instructions:
NOTE:
All of the parts that are removed must be kept for the reinstallation of the door.
1.
Remove the three screws (6) holding lower door hinge (5). Keep hinge for later use.
2.
Remove the door from the upper hinge (3), and keep the padded surface upward to prevent
scratching.
3.
Remove the upper hinge cover (1), remove the two screws (2), remove the upper hinge (3) and
keep it for later use.
4.
Remove the hole cover (7) and transfer it to the same location on the opposite side.
5.
Insert the lower door hinge (5) into the left side, fixing the hinge into place by tightening all the
screws (6).
6.
Remove the pin cap (9) from the left side of the upper door frame and then transfer it to the same
location on the opposite side.
7.
Set the door on the lower door hinge (5), keep the door level, then fix the upper hinge (3) to the
body (8) by the screws (2).
8.
Put on the upper hinge cover (1).
NOTE
:
Some door styles may not be reversible. Consult our website for details
Door Handle Installation
The door has two screw holes on each side, allowing you to install a handle (included). To do so,
align the handle with the screw holes on the side you prefer. Fix the handle in place with the
included screws, then cover the screw heads with the handle seal (included).


