background image


OPERATION


Compressor


The compressor in your unit is designed to function silently. DO NOT plug in the unit immediately 
after moving it or changing its position. Allow a minimum of 2 hours for the pressures inside the 
refrigeration system to equalize and the oils in the compressor to settle. After plugging the unit in, let 
it run for one more hour without load or product. The refrigerator may then be loaded.  
  

NOTE: 

Do not touch the compressor top cover while the unit is running. It is designed for high 

operational temperatures, and its surface can become very hot, which may cause burns. 
(The compressor is located at the bottom of the refrigerator, behind the front louvers.)  


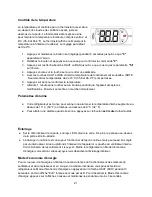
Temperature Control


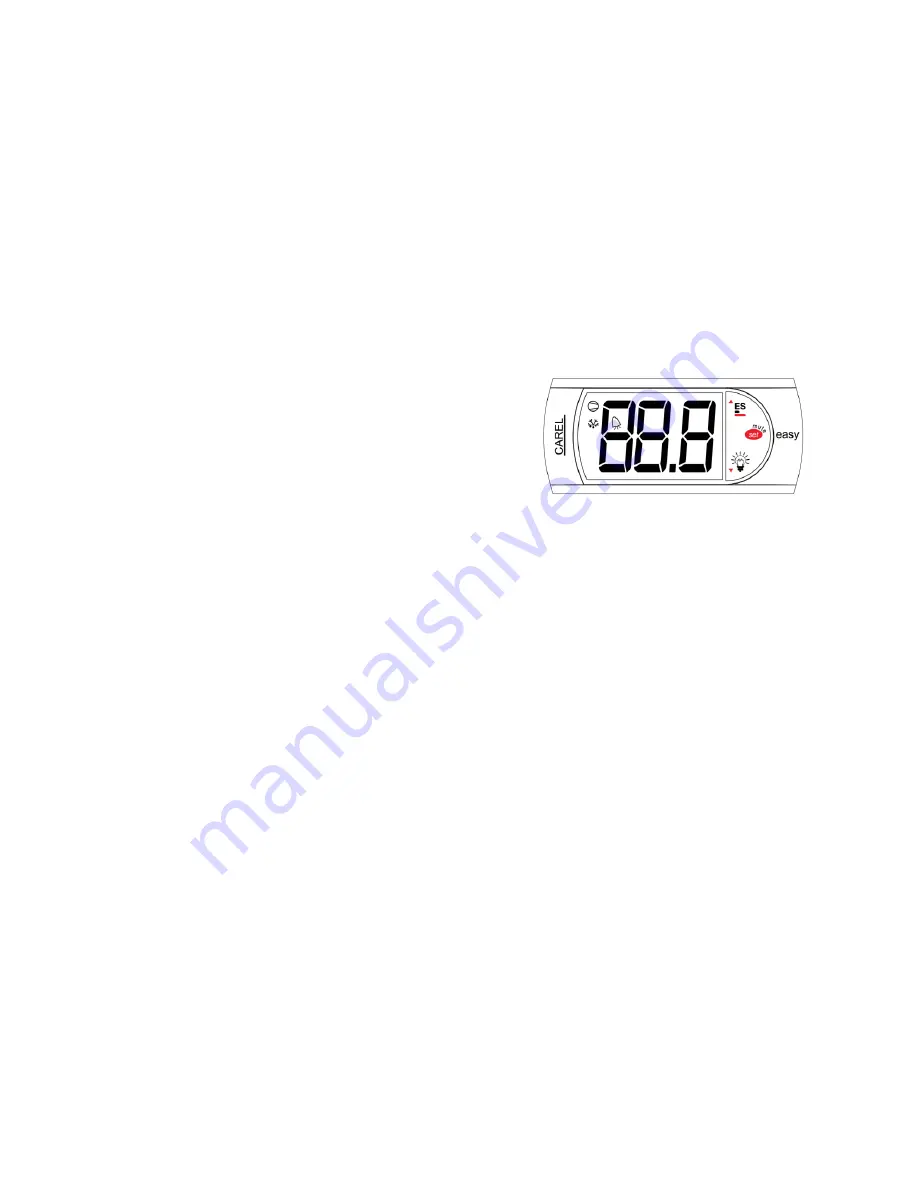
The temperature is controlled by a thermostat which is 
located above the front ventilation louvers, just below the 
door. The thermostat is factory-set to maintain the internal 
temperature between 2 and 8°C (35.6 and 46.4°F). The 
thermostat normally displays the temperature inside the 
cabinet. The default setting is 2°C.  
 
To change the set temperature,   

1. 

Press and hold the 

set 

button for 5 seconds until “

0

” appears on the screen.  


2. 

Release the button and press it again to confirm the “

0

” command. 


3. 

Press the 

UP

 or 

DOWN


buttons until you see the parameter “

St

” on the screen.  


4. 

Press the 

set

 button again to enter that parameter. 


5. 

With the 

UP

 and 

DOWN

 buttons choose the desired operating temperature. (NOTE: Only 

temperatures from 2°C (35.6° F) to 8

°

C (46.4° F) are permitted. 


6. 

Press 

set

 again to confirm the temperature. 


7. 

Wait 1 minute without touching any button while the unit accepts the changes. It will then start 
running normally. 


Alarm Settings


Your refrigerator is designed to sound an alarm if the internal temperature rises above15°C   
(59° F) or falls below 0°C (32° F).  


To stop an alarm when it is sounding, press the 

SET/MUTE

 button on the thermostat. 


Lighting


  LED lighting surrounds the glass on the interior side of the door. Additionally, the header panel 

above the door is backlit. 


  Cabinet lighting is designed to function continuously or may be controlled with a switch, located 

inside the unit to the left of the internal fan in the ceiling. See Wiring Diagram, page 9. Putting 
the refrigerator into Energy-Saving mode (see section above) will also turn off the interior 
lighting. 


Energy-Saving Mode


To save energy by limiting the length of operation time of the fan motors and compressor and by 
turning off the interior light, you can put the refrigerator into 

Energy-Saving mode

 by pressing the 

UP arrow (ECO)


for 3 seconds. The display will show “ 

EnS

“ when this mode is active. To 

deactivate the 

Energy-Saving mode

, press the 

UP arrow

 again and hold it for at least 3 seconds.  


Summary of Contents for Summit ACR1106 Series

Page 1: ...d les ACR1106 ACR1107 SCR1104 SCR1105 series Instruction Manual Mode d emploi BEFORE USE PLEASE READ AND FOLLOW ALL SAFETY RULES AND OPERATING INSTRUCTIONS AVANT UTILISATION VEUILLEZ S IL VOUS PLA T L...

Page 2: ...an adapter and do not use an extension cord Replace all panels before operating It is recommended that a separate circuit serving only your appliance be provided Use receptacles that cannot be turned...

Page 3: ...pliance must be installed with all electrical water and drain connections in accordance with state and local codes A standard electrical supply 120 V AC only 60 Hz properly grounded in accordance with...

Page 4: ...KEEP HANDS AWAY from door pivot when door is open Before loading refrigerator CHECK that shelves are fixed and have the number of supports indicated for your model in the Instruction Manual CHECK tha...

Page 5: ...5 HANDLING AND TRANSPORT DO NOT MOVE UNIT WITH PRODUCT INSIDE as loose product can break spill damage the appliance etc LOCATION OF PARTS...

Page 6: ...standing and not built into an enclosure Do not place the unit near heat sources such as stoves grills radiators etc and do not place in areas where direct sunlight may reach the unit CAUTION This app...

Page 7: ...he tab pointing up as shown Once all clips are in place install the shelves by placing them on the clips with the outside bar of the shelf on the inside of the clip tabs Keep all stored items inside t...

Page 8: ...e the parameter St on the screen 4 Press the set button again to enter that parameter 5 With the UP and DOWN buttons choose the desired operating temperature NOTE Only temperatures from 2 C 35 6 F to...

Page 9: ...ring cleaning could result in electrical shock or other personal injury Cleaning the Cabinet Turn off the power unplug the appliance and remove all items including shelves and shelf clips When cleanin...

Page 10: ...ce 2 Remove the two screws as shown above 3 Life the front louver panel then pull it toward you being careful not to disconnect any attached wiring 4 Clean the area with a damp cloth then dry it 5 Rep...

Page 11: ...ice call Try the suggestions below to see if you can solve the problem before calling the servicer PROBLEM POSSIBLE CAUSE The unit does not operate Not plugged in Voltage is outside specifications Tri...

Page 12: ...appliance is not level The door will not close properly The appliance is not level The gasket is dirty The shelves are out of position Excessive condensation in interior and on door High relative hum...

Page 13: ...nty coverage 3 Damage resulting from accident alteration misuse abuse fire flood acts of God improper installation installation not in accordance with electrical or plumbing codes or use of products n...

Page 14: ...l appareil Il est recommand d utiliser un circuit distinct afin d alimenter votre appareil uniquement Utilisez des r cipients qui ne peuvent pas tre d sactiv s par un interrupteur ou une cha ne de tr...

Page 15: ...60 F 16 C et au dessous de 80 6 F 27 C Cet appareil doit tre install dans une zone prot g e contre les l ments comme le vent la pluie les claboussures et les gouttes d eau L appareil ne doit pas tre...

Page 16: ...situ l avant pour l entretien et le nettoyage d branchez l alimentation lectrique de l appareil pour viter les accidents qui peuvent tre provoqu s par l oscillation de la lame du moteur du ventilateur...

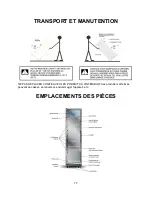
Page 17: ...17 TRANSPORT ET MANUTENTION NE PAS D PLACER L UNIT AVEC LES PRODUITS L INT RIEUR des produits mal ferm s peuvent se casser se renverser endommager l appareil etc EMPLACEMENTS DES PI CES...

Page 18: ...ionnement maximale de 27 C 80 6 F et un degr humidit de 55 Il est destin tre autonome et non int gr dans un bo tier Ne placez pas l appareil pr s de sources de chaleur telles que po les grilles chauff...

Page 19: ...INSTALL ESDANS L APPAREIL L AIDE DES PINCES Votre r frig rateur comprend 6 tag res en metalic et 24 pinces Pour installer les tag res placez d abord les pinces d tag re dans les fentes des pilastres...

Page 20: ...areil DOIT tre branch sur une prise de terre FONCTIONNEMENT Compresseur Le compresseur de votre unit est con u pour fonctionner silencieusement NE branchez PAS l appareil imm diatement apr s l avoir d...

Page 21: ...se mettra en marche normalement Param tres d alarme Votre r frig rateur est con u pour sonner une alarme si la temp rature interne augmente au dessus de 15 C 59 F ou tombes en dessous de 0 C 32 F Pour...

Page 22: ...ner un choc lectrique ou d autres blessures Nettoyage de l armoire Coupez l alimentation d branchez l appareil et retirer tous les l ments y compris les tag res et les clips Lors du nettoyage int rieu...

Page 23: ...indiqu ci dessus 3 Soulevez le panneau du volet avant puis tirez le vers vous en prenant garde de ne pas toucher au c blage 4 Nettoyez la zone avec un chiffon humide puis s chez 5 Replacez le panneau...

Page 24: ...nt risquez vous de contaminer les produits m dicaux mais le syst me d air forc absorbera l humidit de la nourriture D PANNAGE Vous pouvez r soudre de nombreux probl mes courants facilement vous pargna...

Page 25: ...ment de fluide frigorig ne ce qui est normal Comme chaque cycle se termine vous pouvez entendre gloussements caus s par le d bit de r frig rant dan l unit Contraction et la dilatation des parois inter...

Page 26: ...es filtres sont exclus de la couverture de la garantie 3 Les dommages r sultant d un accident modification usage impropre ou abusif incendie inondation actes de Dieu mauvaise installation une installa...

Reviews: