background image


77 


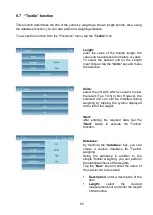
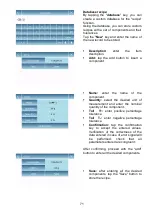
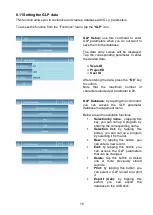
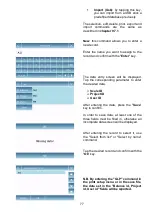
Import  (Usb): 

by  tapping  this  key, 

you can import from a USB stick a 
predefined database previously


The selection, edit, delete, print, export and 
import  commands  are  the  same  as 
described in 

chapter 9.7.1


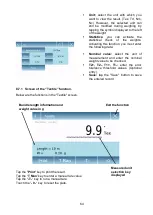
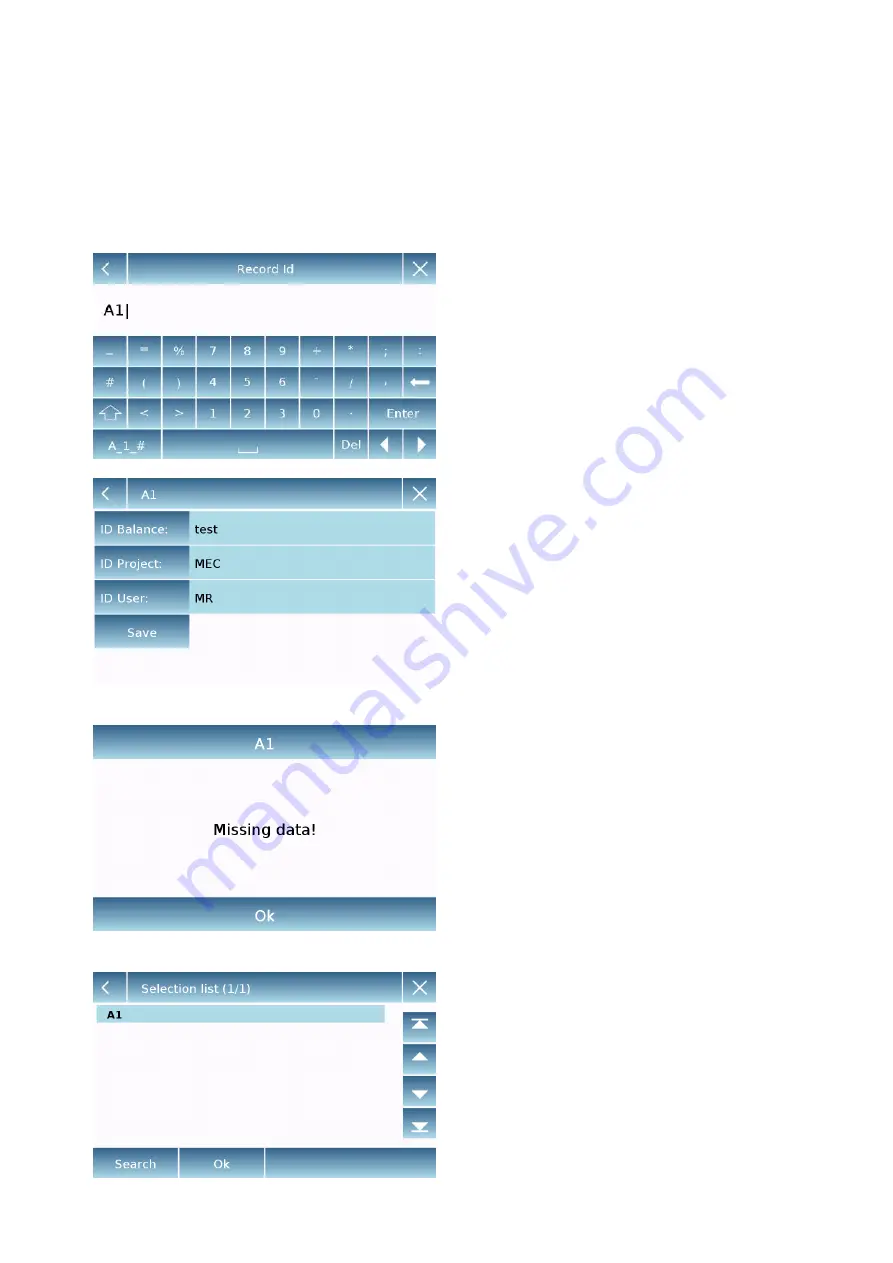
New

:  this  command  allows  you  to  enter  a 

new record. 
 
Enter  the  name  you  want  to  assign  to  the 
record and confirm with the "

Enter

" key. 


The  data  entry  screen  will  be  displayed. 
Tap  the  corresponding  parameter  to  enter 
the desired data. 


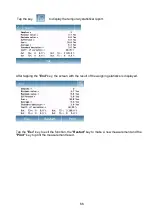
Scale ID


Project ID


User ID


After  entering  the  data,  press  the  "

Save

key to confirm. 
 
In  order  to  save  data,  at  least  one  of  the 
three  fields  must  be  filled  in,  otherwise  an 
incomplete data screen will be displayed. 
 
 
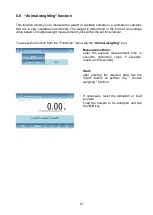
After  entering  the  record  to  select  it,  use 
the  "Select  from  list"  or  "Select  by  name" 
command. 
 
 
Tap the desired record and confirm with the 
"

Ok

" key. 


N.B. By entering the "GLP" command in 
the print setup menu or in the save file, 
the  data  set  in  the  "Balance  id,  Project 
id, User id" fields will be reported. 

Summary of Contents for Tx Series

Page 1: ...Operation Manual Analytical Balance Series Tx ES59135 Models W3002A 120 W3102A 220 Touch Screen Revision 1 18...

Page 2: ...ING THE WEIGHING PARAMETERS 29 7 6 SELECTING THE UNIT OF MEASUREMENT 30 7 7 SELECTING THE CUSTOM MEASUREMENT UNITS 31 7 8 CALIBRATING AND SETTING THE CALIBRATION MODE 32 7 9 SETTING THE PERIPHERALS 35...

Page 3: ...4 8 7 2 Screen of the database textile function with statistics enabled 65 8 8 ANIMAL WEIGHTING FUNCTION 67 8 8 1 Screen of the Animal weighting function 68 8 9 MAXIMUM LOAD FUNCTION 69 8 10 RECIPE FU...

Page 4: ...rly used the warranty can be void Do not use the device in areas at risk of explosion Before starting the device for the first time check if the power supply unit or the power cord is damaged and conf...

Page 5: ...ng Power supply unit Power supply box Remove the accessory box and then carefully lift the balance with the protective foam parts in place IMPORTANT Keep the original balance packaging in case the ins...

Page 6: ...ized Service Center to prevent damage Below are the procedures Before packing packing remove the weight pan pan support draft ring and any other loose parts and place them in the accessory box Followi...

Page 7: ...6...

Page 8: ...7 3 2 Overview and accessories installation 1 Pan Support 2 Weigh Pan 3 Power supply unit 2 1 3...

Page 9: ...ging check for visible damage to the device Do not install the balance in any room or location where there are any air currents strong heat shifts or vibrations Do not use the balance in explosive atm...

Page 10: ...s allow the balance to equilibrate for 12 hours For calibration procedures please refer to the Device calibration chapter Perform the device calibration whenever it is moved to another place Never dro...

Page 11: ...ations When switching off wait for the green LED to turn off before removing the power supply socket if necessary 4 Serial interface connections The device is equipped with an RS 232C interface for co...

Page 12: ...atures of the device 1 Weighing value display g Measuring unit indication by tapping the symbol you can access the measurement unit menu and select the desired unit Stability indicator T Man Indicatio...

Page 13: ...on or off menu for the device standby mode Tap this area to access the user menu 3 Function key menu bar Touching the keys displayed in this area you will run the corresponding function Below are all...

Page 14: ...evice Mod 1 Mode 2 Mod 3 Alphanumeric keypad Selection key for entering uppercase or lower case letters Delete key of the last entered character Delete key for all entered characters Back and forward...

Page 15: ...Numeric keypad Delete key of the last entered character Key to confirm and store the entry Delete key for all entered characters Input operation cancellation key Key for selecting the unit of measurem...

Page 16: ...the display will be off and it will remain ON only the lower right command to turn on the system again Touch the symbol to return to the basic weighing screen Logout Select the logout mode to enable t...

Page 17: ...n At first power on the device starts by activating the default user with the factory settings In the weighing screen the area displaying the weight shows the value of the weight on the weighting plat...

Page 18: ...lity symbol to light up before detecting the value Press Lrd and Net to display the gross and net weights and vice versa To reset the balance remove all items from the plate and press the 0 key If you...

Page 19: ...Calibration menu Setup Users setup Preferences Info Service To access the settings menu tap the button in the top bar of the display The following screens will be displayed with all the functions of t...

Page 20: ...nction Tap Language in the menu list You can select the device s use language Then select the desired language Automatically all screens will be translated into the selected language N B The selected...

Page 21: ...t will be changed for all users Tap Date and time in the menu list Tap Date in the menu list to change the date Tap Time in the menu list to change the time Tap 24h 12h in the menu list to set the tim...

Page 22: ...ator Standard Creating an administrator user allows the user to access all the device setting features and changing or deleting other users Creating a standard user allows the user to access only some...

Page 23: ...ers allowed is 30 The insertion method distinguishes between uppercase and lowercase letters so a user entered as TEST will be different from a user entered as a test After searching for a new user go...

Page 24: ...ct Administrator to set the user with administrator rights Settings Selecting this function will prompt you to enter a user s password with administrator rights Then select the Enable function to temp...

Page 25: ...te a new user with the same configuration as an existing user Any databases will not be copied and no password protection will be enabled To copy the databases of another user you need to export and i...

Page 26: ...d You will then be asked to re enter the password for confirmation Enter it and tap the OK key From this moment on every time you want to access the user you will be required to enter your password N...

Page 27: ...After selecting User Password you will be asked to enter the Old Password Enter an administrator password Then enter the New password to assign to the user Confirm the password you have just entered...

Page 28: ...ameters that can be set in the Preferences menu are as follows Language see chapter 7 1 Appearance Brightness Beeper Functions Appearance You can choose between 6 different color combinations and sele...

Page 29: ...the sequence assigned to function keys F1 to F10 To assign a function press the key you want to assign and select one from the list of available functions To remove a function press the key correspon...

Page 30: ...low down the balance response according to weighing requirements and environmental conditions By selecting Level1 the response will be immediate but the balance will remain more sensitive to environme...

Page 31: ...ent Below is shown how to select the desired weighing unit In the settings menu select the Setup function and then the Units selection function On the Units Selection screen all available weighing uni...

Page 32: ...up screen you can select one of the three units K1 K2 K3 available to personalize it After the selection enter the following data Name enter the unit identifier max 15 characters Symbol enter the symb...

Page 33: ...function in the settings menu In the calibration menu you can calibrate display and print the data for the last calibration and set the calibration mode Before performing the calibration procedure che...

Page 34: ...Calibration mode the balance can be set to calibrate with two different modes External default By selecting the default calibration mode when the calibration command is given the required weight will...

Page 35: ...libration mode the balance automatically calibrates when the ambient conditions change or within a set time of 60 to 999 minutes Also with this mode you can calibrate each time you want by tapping the...

Page 36: ...ox on the right of the parameter Tapping the parameter key to be set will activate its screen with the list of the various selectable options Printer this function allows you to select the device conn...

Page 37: ...y enabled mode before executing the print command verify that the save USB stick is inserted in the USB port on the left side of the device While saving the file on the screen you can scroll through t...

Page 38: ...r at the beginning of the receipt The function can be On Bill heading enabled Off Bill heading disabled Print heading Setup Activation of the screen for inserting the desired text for the receipt head...

Page 39: ...g after user have entered it On g l p data print enabled Off g l p data print disabled For information entry and G l p database management see chapter 9 9 Time and date this function enables you to en...

Page 40: ...and Backups of the device data In the settings menu select the Setup function then the Service one The functions available in the Service menu are as follows System data backup and restore Factory re...

Page 41: ...port that the export operation was successful A backup folder with the assigned name was then created in the USD stick Opening the folder you will find a set of files and subfolders that contain all t...

Page 42: ...e backup you want to restore A screen with the message Completed will report that the system recovery operation was successful 7 11 2 Factory reset You can perform a total reset of the device to bring...

Page 43: ...upgrade program supplied by the manufacturer and confirm with the Ok key If the selected file is correct the upgrade operation will be enabled and a displayed counter will indicate the progress status...

Page 44: ...and sequenced according to its usage needs See section on preferences in the functions section So each time you change the user its function settings will vary Tap the button to access the functions...

Page 45: ...ng this key you can call up a program by entering the corresponding name Selection list by tapping this button you can call up a program by selecting it from a list New insert new record refer to the...

Page 46: ...mber of pieces Enter the number of samples you want to use for the count by tapping the Number of samples key Unit mean weight Count by entering the weight value of the single piece to be counted Ente...

Page 47: ...a description of the item Mode select the count mode Samples number Unit mean weight enter the number of samples or the average unit weight of the pieces Options you can select the statistical control...

Page 48: ...number of pieces is within the set range Save tap the Save button to store the recorded record 8 2 1 Pieces count screen with Statistics function The following describes the pieces counting functions...

Page 49: ...ng the i key you can see the parameters used for counting the pieces The pieces number control bar is yellow when the number of pieces loaded is lower than the minimum threshold It is green when the p...

Page 50: ...measurement to be used for testing by tapping the Unit key To deactivate the limit enter the value 0 or tap the C key and then tap the OK key Beeper enable or disable the beeper In case of enabling wh...

Page 51: ...i key you can see the parameters used for counting the pieces The Check weight bar is yellow when the loaded weight is lower than the minimum threshold and green when the weight is within the set rang...

Page 52: ...eference weight value 100 Then tap the Reference Weight key and enter the weight value in the input screen and select the desired unit of measurement Start after selecting the desired mode and enterin...

Page 53: ...e Enter the nominal weight value to be checked T2 T2 T1 T1 enter the error tolerance threshold values Optional entry Save tap the Save button to store the recorded record Check weight To enable this f...

Page 54: ...unctions of the weighing with statistical calculation Tap the Ok key to capture a new weight and tap the END key to end the capture and perform the final statistical calculation Parameters used for th...

Page 55: ...eck By tapping the i key you can see the parameters used for weight check The weight check bar is yellow when the loaded weight is lower than the minimum threshold green when the weight is within the...

Page 56: ...electing this type of measure you will be required to enter the solid density value g cm3 If using distilled water or ethanol select the relevant item below and enter only the liquid temperature value...

Page 57: ...density index Database By tapping the database key you can create a custom database to determine the different density types Tap the New key and enter the name of the new record to be stored Descripti...

Page 58: ...Screen with the Density of a liquid calculation function Below are the functions for calculating the density of a liquid Tap the Esc key to exit the function the Restart key to make a new measurement...

Page 59: ...ctions for calculating the density index Tap the Esc key to exit the function the Restart key to make a new measurement and the Print key to print the measurement result Detected values for density de...

Page 60: ...hing Database statistics by selecting the statistical mode from the database you can store and then recall a custom statistics method By tapping the database key you can create a custom database to de...

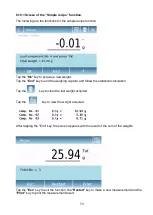
Page 61: ...an key to enter a manual tare value Tap the T key to run a manual tare Touch the 0 key to reset the plate Tap the End key to end the weighing acquisition and follow the statistical calculation Tap the...

Page 62: ...the T Man key to enter a manual tare value Tap the T key to run a manual tare Touch the 0 key to reset the plate Tap the End key to end the weighing acquisition and follow the statistical calculation...

Page 63: ...statistical report After tapping the End key the screen with the result of the weighing statistics is displayed Tap the Esc key to exit the function the Restart key to make a new measurement and the P...

Page 64: ...th which you want to view the result Tex Td Nm Nc However the selected unit can still be modified during weighing by tapping the symbol displayed to the left of the weight Start after entering the req...

Page 65: ...ct the unit of measurement and enter the nominal weight value to be checked T2 T2 T1 T1 enter the error tolerance threshold values Optional entry Save tap the Save button to save the entered record 8...

Page 66: ...a new weight Tap the T Man key to enter a manual tare value Tap the T key to run a manual tare Touch the 0 key to reset the plate Tap the End key to end the weighing acquisition and follow the statis...

Page 67: ...statistical report After tapping the End key the screen with the result of the weighing statistics is displayed Tap the Esc key to exit the function the Restart key to make a new measurement and the P...

Page 68: ...weight measurement cycles within the set time interval To access the function from the Functions menu tap the Animal weighing icon Measurement time enter the express measurement time in seconds Minimu...

Page 69: ...the countdown and display the result Tap the Esc key to exit the function the Restart key to make a new measurement and the Print key to print the measurement result Information during weight capture...

Page 70: ...y displays the measurement screen Prepare the sample to be tested on the weighing plate Perform tare or zero reset if necessary Tap the Ok key to start the test Once the tested sample breakage load is...

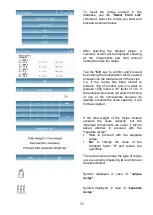
Page 71: ...to carry out a series of consecutive weights and finally get the total weight of the dosed components and the relative list with the value of the individual weights Tapping the Simple recipe button i...

Page 72: ...he component Quantity select the desired unit of measurement and enter the nominal quantity of the component Toll T enter positive percentage tolerance Toll T enter negative percentage tolerance Confi...

Page 73: ...you want to produce 100g insert a K factor of 10 If the entered value does not allow the dosing of one of the components because its quantity exceeds the scale capacity it will not be accepted If the...

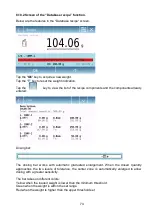
Page 74: ...end the weighing capture and follow the statistical calculation Tap the key to clear the last weight acquired Tap the key to view the weight acquired After tapping the End key the screen appears with...

Page 75: ...components already entered Dosing bar The dosing bar works with automatic graduated enlargement When the dosed quantity approaches the two levels of tolerance the center zone is automatically enlarged...

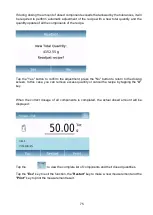
Page 76: ...onfirm the adjustment press the No button to return to the dosing screen In this case you can remove excess quantity or cancel the recipe by tapping the X key When the correct dosage of all components...

Page 77: ...ed per parameter is 20 GLP Database by tapping this command you can access the GLP parameter database management menu Below are all the available functions Selection by name y tapping this key you can...

Page 78: ...layed Tap the corresponding parameter to enter the desired data Scale ID Project ID User ID After entering the data press the Save key to confirm In order to save data at least one of the three fields...

Page 79: ...titude 4000m Degree of Pollution 2 Overvoltage category II Power supply unit supplied INPUT Switching 100 240Vac 50 60Hz OUTPUT 24V DC 550mA Potenza Max absorbed power 13 2VA Adaptation to environment...

Page 80: ...hocks fall of the balance or fall of objects on the weighing plate The transport to and from the Service Center is the responsibility of the customer 11 Disposal If the packaging is no longer used it...

Reviews: