7
5 Operating the PLAYER II
5. 1 PLAYER II as a CD player
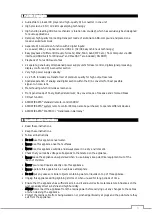
The PLAYER II is an audiophile 24 bit / 192 kHz upsampling CD player with a very precise CD drive designed
purely for audio playback. The device is compatible to CD, CD-R and CD-RW discs.
In order to use the PLAYER II as a CD player, it is only necessary to connect the AUDIO OUTPUT analog
outputs to the corresponding analog inputs on your integrated amplifier (e.g. ACCUSTIC ARTS
®
POWER I)
or preamplifier. We recommend use of high quality audio cables.
Further information on CD player operation is available in Chapter
6
.
5. 2 PLAYER II as D/A converter
Four high quality digital inputs (coaxial and USB 32/384) additionally allow the PLAYER II to be a pure D/A
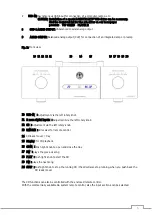
converter which can convert external digital signals into analog music signals. These inputs USB , IN-1 ,
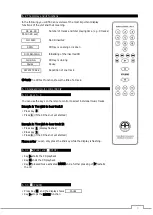
IN-2 and IN-3 are selected by left rotary knob the on the front panel or with the AA system remote
control. When the device is used as a D/A converter, the CD section switches off and the selected input is
shown on the display.
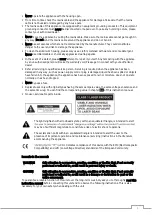
In order to use the PLAYER II as a D/A converter, it is firstly necessary to connect both the AUDIO OUTPUT
analog outputs to the corresponding analog inputs on your integrated amplifier (e.g. ACCUSTIC ARTS
®
POWER I) or preamplifier. Then you can connect the selected digital input to the appropriate digital output
of the respective source device. We recommend use of high quality audio cables.
Further information on D/A converter operation is available in Chapter
7
.
6 PLAYER I operation as a CD player
6. 1 Start-up and CD insertion
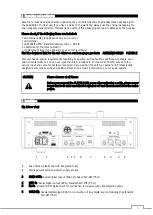
Switch on the device by pressing mains switch
2
. The device switches automatically to CD mode. The laser
unit initialises itself for approximately 5 seconds and determines if a CD has been inserted or not. If no CD
has been inserted, the display changes to
NO DISC
.
.
If there is a CD in the device, after the initialisation of the laser the number of music tracks and total
playing time of the CD are displayed. The display then shows, for example, the following:
09 65 : 20
.
This display indicates the inserted CD has 9 music tracks with a total playing time of 65 minutes and 20
seconds.
If you wish to load a CD or exchange a CD which is already loaded, then first of all slowly push the cover
16
to the back and the display shows
0PEN
.
. Now remove the CD clamper
by lifting it upwards.
Please note that the clamper has an integrated magnet and therefore sits rather firmly on the CD. After
removing the clamper you may now remove a CD. When removing the CD take care not to touch the laser
unit. Finger prints and dirt on the laser unit can disturb the scanning process.
Insert the desired CD and now place the CD clamper
in the middle of the CD. Make sure that the clamper
locks correctly into position, otherwise playback is not possible. Close the cover
16
completely again. After
the closing process the laser initialises again, i.e. it scans the inserted CD and determines the number of
music tracks as well as the total time. If no CD is loaded or the CD clamper
is not correctly fixed on to the
CD, the display shows
NO DISC
.
.
After the CD has been properly inserted the device is ready for operation and you can select the PLAY
FUNCTION with the right knob to play the CD.
Select the STOP to stop the CD.
The functions STOP and PLAY can also be operated from the remote control.


