2. Preparation
User Guide
Page 2-2
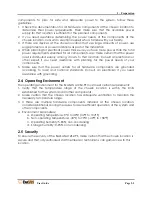
components. To plan for safe and adequate power to the system, follow these
guidelines:
1.
Check the documentation for all hardware components at the chosen location to
determine their power requirements. Then make sure that the available power
supply for that location is sufficient for the planned components.
2.
If you need assistance determining the power needs of the components at the
chosen location, consult an electrical expert who is familiar with your facility.
3.
If there are devices at the chosen location that use large amounts of power, use
surge protectors or power conditions as part of the installation.
4.
When planning for electrical power, make sure you have more power than the total
power requirements specified for all components. Also make certain that the power
load is distributed evenly among circuits to that location. Consult an electrician or
other expert if you need assistance with planning for the power needs of your
components.
5.
Make sure that the power outlets for all hardware components are grounded
according to local and national standards. Consult an electrician if you need
assistance with grounding.
2.4
Operating Environment
The operating environment for the ExaSAN A12S2-PS must meet certain requirements:
1.
Verify that the temperature range of the chosen location is within the limits
established for the system and all other components.
2.
Make certain that the chosen location has adequate ventilation to maintain the
necessary temperature range.
3.
If there are multiple hardware components installed at the chosen location,
consider additional cooling measures to assure efficient operation of the system and
other components.
4.
Environment parameters:
a.
Operating temperature: 0°C to 40°C (32°F to 104°F)
b.
Non-operating temperature: -40°C to 70°C (-40°F to 158°F)
c.
Operating humidity: 5-85%, non-condensing
d.
Storage humidity: 0-95%, non-condensing
2.5
Security
To ensure the security of the ExaSAN A12S2-PS, make certain that the chosen location is
secure and that only authorized staff members or technicians can gain access to this
location.
Summary of Contents for ExaSAN A12S2-PS
Page 8: ...1 Introduction User Guide 1 Introducing ExaSAN PCIe 2 0 Storage System...
Page 28: ...2 Preparation User Guide 2 Preparing to Install ExaSAN A12S2 PS...
Page 31: ...3 Installation User Guide 3 Installing the ExaSAN A12S2 PS...
Page 47: ...4 How to Use User Guide 4 Using RAIDGuard X...
Page 77: ...4 How to Use User Guide Page 4 30 2 Check the Confirm box and click Unlock Drive...
Page 79: ...5 RAID User Guide 5 RAID Overview...

