background image

1

English

1


English

 -10


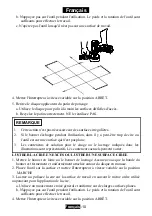
4. Release the switch to the OFF position. 
5. Remove the wax applicator pad from the sanding pad. 

a. Use the pad to hand polish hard to reach surfaces. 
b. Dispose of the pad properly. DO NOT reuse it. 


1.


This action is not necessary on irregularly shaped surfaces. 

2.


If the bonnet comes off during use, you may be using too much wax or running 
the tool when it is not on a work surface. 

3.


The wax and polishing solution containers shown in the illustrations is 
representative. Actual containers may vary. 

BUFFING EXCESS WAX FROM SURFACE OR POLISHING A WAXED 
SURFACE 

1. Put the wool bonnet or the polishing bonnet. Make sure the bonnet band securely and 

evenly around the foam pad. 

2. Place the tool on the surface and press the switch to the start position. 
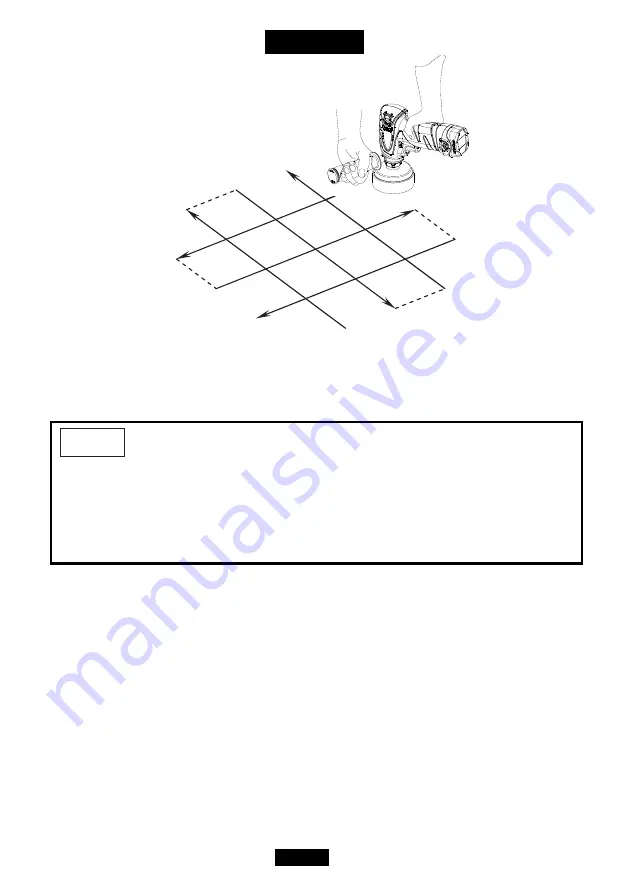
3. Buff or polish the wax on the work surface in the same order it was applied. 

a. Use across-the-board strokes in a crisscross pattern on flat surfaces. 
b. Do not press down on the polisher while using. The weight and rotation of the tool 

make the work go well. 

4. Release the switch to the OFF position. 
5. Remove the wool bonnet or the polishing bonnet from the sanding pad. 


NOTE


Summary of Contents for ARS1212

Page 1: ...IN ACCIDENTS INVOLVING FIRE ELECTRIC SHOCK OR SERIOUS PERSONAL INJURY SAVE THIS OWNER S MANUAL FOR FUTURE REFERENCE AND REVIEW IT FREQUENTLY FOR SAFE OPERATION NE PAS TENTER D OPERER L OUTIL TANT QUE VOUS N AVEZ PAS LU ET COMPRIS TOUTES LES INSTRUCTIONS ET REGLES DE SECURITE CONTENUES DANS CE MANUEL SINON VOUS RISQUEZ DES ACCIDENTS TELS QU UN INCENDIE UNE ELECTROCUTION OU DES BLESSURES CORPORELLES...

Page 2: ... LABELS The safety instructions provided in this manual are not intended to cover all possible conditions and practices that may occur when operating maintaining and cleaning power tools Always use common sense and pay particular attention to all the DANGER WARNING CAUTION and NOTE statements of this manual This is the safety alert symbol It is used to alert you to potential personal injury hazard...

Page 3: ...tains chemicals known to cause cancer birth defects or other reproductive harm Some examples of these chemicals are Lead from lead based paints Crystalline silica from bricks and cement and other masonry products and arsenic and chromium from chemically treated lumber Your risk from these exposures varies depending on how often you do this type of work To reduce your exposure to these chemicals wo...

Page 4: ...s may result in serious personal injury Dress properly Do not wear loose clothing or jewellery Keep your hair clothing and gloves away from moving parts Loose clothes jewellery or long hair can be caught in moving parts Avoid accidental starting Be sure switch is in the locked or off position before inserting battery pack Carrying tools with your finger on the switch or inserting the battery pack ...

Page 5: ...ools out of reach of children and other untrained persons Tools are dangerous in the hands of untrained users When battery pack is not in use keep it away from other metal objects like paper clips coins keys nails screws or other small metal objects that can make a connection from one terminal to another Shorting the battery terminals together may cause sparks burns or a fire Maintain tools with c...

Page 6: ...terminal to another Shorting the battery terminals together may cause burns or a fire Under abusive conditions liquid may be ejected from the battery avoid contact If contact accidentally occurs flush with water If liquid contacts eyes additionally seek medical help Liquid ejected from the battery may cause irritation or burns SERVICE Have your power tool serviced by a qualified repair person usin...

Page 7: ...on use face shield safety goggles or safety glasses As appropriate wear dust mask hearing protectors gloves and shop apron capable of stopping small abrasive or workpiece fragments The eye protection must be capable of stopping flying debris generated by various operations The dust mask or respirator must be capable of filtrating particles generated by your operation Prolonged exposure to high int...

Page 8: ... Speed No load Rotational Speed kg Kilograms Weight Direct Current Type of Current min Revolutions per Minute Revolutions Surface Speed Strokes etc per Minute FUNCTIONAL DESCRIPTION CONTROLS AND COMPONENTS 1 3 Sanding pad 2 Battery indicator 3 Side Handle 4 Forward Reverse Control Button 5 Variable Speed Switch 6 Anti slip Soft Grip 7 Battery Pack Release Button 8 Battery Pack 4 5 6 1 7 8 3 2 ...

Page 9: ... pull the battery pack 8 out of tool TO INSTALL BATTERY PACK Push the battery pack 8 onto tool until it locks in place INSTALLING THE SANDING PAD INSTALLING ACCESSORIES WITH VELCRO DESIGN The polisher is designed to use 3 size Velcro sanding pad Put the accessory on the sanding pad The Velcro design is using hook side engages the loops for a secure grip INSTALLING SIDE HANDLE The auxiliary side ha...

Page 10: ...ding b Paste wax Use a putty knife or flat object to spread about a heaping teaspoonful of wax evenly over the surface of the wax applicator pad Due to its heavier consistency using paste wax requires the 12V battery pack to work harder when applying and removing the wax This will shorten the run time of the battery For optimal battery performance liquid wax is preferable 3 Place the tool on the w...

Page 11: ...s is representative Actual containers may vary BUFFING EXCESS WAX FROM SURFACE OR POLISHING A WAXED SURFACE 1 Put the wool bonnet or the polishing bonnet Make sure the bonnet band securely and evenly around the foam pad 2 Place the tool on the surface and press the switch to the start position 3 Buff or polish the wax on the work surface in the same order it was applied a Use across the board stro...

Page 12: ... a work surface in direct sunlight 8 Do not leave wax on a work surface for an extended time period 9 When wax is difficult to remove do not force down on the tool Remove the wax buildup by hand 10 Follow up the advice provided with the wax to avoid wax removal problems or paint damage TIPS FOR CAR CARE 1 Applying buff and polish the car three to four times per year to ensure paint protection 2 Wa...

Page 13: ...iable Speed Switch 6 to display the lights 1 One light ON 30 remaining capacity 2 Two lights ON 60 remaining capacity 3 All lights ON 100 remaining capacity Always set switch to off position when operate these operations CLEANING With the motor running blow dirt and dust out of all air vents with dry air at least once a week Wear safety glasses when performing this Exterior plastic parts may be cl...

Page 14: ... RELIABILITY repairs maintenance and adjustments should be performed by certified service centers or other qualified service organizations always using identical replacement parts PROTECTING THE ENVIRONMENT Before disposing of damaged check with your state Environmental Protection Agency to find out about special restrictions on the disposal of tool or return them to a certified service center for...

Page 15: ...STRUCTIONS EN CAS DE BESOIN FUTUR SACHEZ RECONNAITRE LES SYMBOLES LES MOTS ET LES AVIS DE SECURITE Le but des instructions de sécurité fournies dans ce manuel n est pas de couvrir tous les cas possibles pouvant se présenter pendant le fonctionnement la maintenance et le nettoyage des outils Faites toujours preuve de bon sens et faites particulièrement attention aux instructions marquées DANGER AVE...

Page 16: ...ussière nocives et de les respirer AVERTISSEMENT La poussière générée par le ponçage le sciage le broyage le forage et d autres activités de construction contient des composants chimiques connus pour causer le cancer des anomalies congénitales ou d autres problèmes de reproduction Voici quelques uns de ces composants chimiques Le plomb provenant des peintures à base de plomb La silice cristallisée...

Page 17: ...Toute pénétration d eau à l intérieur de l outil augmentera les risques d électrocution SÉCURITÉ PERSONNELLE Restez attentif faites attention à ce que vous faites et utilisez votre bon sens lorsque vous manipulez l outil électrique N utilisez pas un outil électrique quand vous êtes fatigué ou sous l influences de drogue d alcool ou de médicaments Un moment d inattention pendant le fonctionnement d...

Page 18: ...variable ne fonctionne pas correctement Un outil dont l Interrupteur à vitesse variable ne fonctionne pas est dangereux et doit être réparé Déconnectez la batterie de l outil ou commutez l interrupteur en position de verrouillage ou d arrêt avant d effectuer un réglage un changement d accessoires ou de le stocker De telles mesures préventives réduisent les risques de démarrage accidentel de l outi...

Page 19: ...e connecter deux bornes entre elles Le court circuit des bornes de la batterie peut causer des étincelles des brûlures ou un incendie Dans des conditions abusives du liquide risque d être éjecté de la batterie Évitez tout contact En cas de contact accidentel rincez abondamment à l eau Si du liquide entre en contact avec vos yeux consultez votre médecin Le liquide éjecté de la batterie cause des ir...

Page 20: ... protection facial et des lunettes de sécurité Quand c est approprié portez un masque anti poussière des protecteurs auditifs des gants et un tablier capable de stopper les petits éléments abrasifs ou des fragments des pièces de fabrication La protection oculaire doit pouvoir stopper les débris volants générés par différentes opérations Le masque anti poussière ou le respirateur doit pouvoir filtr...

Page 21: ...ion à vide kg Kilogrammes Poids Courant direct Type de courant min Tours par minute Tours vitesse de surface courses etc par minute DESCRIPTION FONCTIONNELLE COMMANDES ET COMPOSANTS 1 Patin de ponçage 3 2 Indicateur de batterie 3 Poignée latérale 4 Bouton de commande marche avant arrière 5 Interrupteur à vitesse variable 6 Poignée anti dérapante 7 Bouton de libération de la batterie 8 Batterie 4 5...

Page 22: ... INSTALLER LA BATTERIE Poussez la batterie 8 dans l outil jusqu à ce qu elle s enclenche correctement INSTALLER LE PATIN DE PONÇAGE INSTALLER LES ACCESSOIRES AVEC UNE SOLUTION VELCRO La polisseuse est conçue pour utiliser un patin de ponçage Velcro 3 Mettez l accessoire sur le patin de ponçage La solution Velcro utilise un côté avec crochet qui s engage dans les boucles pour fournir une accroche s...

Page 23: ...cirage de la surface de travail Le disque n absorbera pas autant de cire lors de la recharge b Cire en pâte utilisez un couteau à mastiquer ou un objet plat pour étaler une cuillerée à café de cire sur la surface du disque applicateur En raison de sa consistence plus épaisse la cire en pâte entraîne une plus grande consommation de la batterie 12V pour l application et l extraction de la cire Ceci ...

Page 24: ... Les conteneurs de solution pour le cirage ou le lustrage indiqués dans les illustrations sont représentatifs Les conteneurs actuels peuvent varier LUSTRER LA CIRE EN EXCES OU LUSTRER UNE SURFACE CIREE 1 Mettez le bonnet en laine ou le bonnet de lustrage Assurez vous que la bande du bonnet est fermement et uniformément attachée autour du disque en mousse 2 Placez l outil sur la surface et mettez l...

Page 25: ...a cire sur une surface de travail pendant une période prolongée 9 Si la cire est difficile à retirer ne forcez pas sur l outil Retirez la cire accumulée à la main 10 Suivez les conseils d utilisation fournis avec la cire pour éviter les problèmes d extraction de la cire ou de dommage de la peinture CONSEILS POUR L ENTRETIEN DES VOITURES 1 Appliquez lustrez et polissez votre voiture trois à quatre ...

Page 26: ... capacité restante 2 Deux voyants allumés 60 de capacité restante 3 Tous les voyants allumés 100 de capacité restante Toujours mettre l interrupteur hors tension pendant ces manipulations NETTOYAGE Avec le moteur allumé soufflez pour extraire la saleté et la poussière des orifices d aération avec de l air sec au moins une fois par semaine Portez des lunettes de sécurité quand vous faites ce nettoy...

Page 27: ...nance et les réglages doivent être effectués par des centres de services certifiés ou d autres organisations de services qualifiées en utilisant toujours des pièces de rechange identiques PROTECTION DE L ENVIRONNEMENT Avant de jeter les composants usagés vérifiez auprès de votre agence de protection de l environnement pour connaître les restrictions spécifiques concernant le recyclage des outils o...

Page 28: ... FUTURO RECONOCER LOS SÍMBOLOS PALABRAS Y ETIQUETAS DE SEGURIDAD Las instrucciones de seguridad ofrecidas en este manual no pretenden cubrir todas las condiciones y prácticas posibles que puedan ocurrir al utilizar mantener y limpiar las herramientas de corriente Utilice siempre el sentido común y preste especial atención a todos los avisos de PELIGRO ADVERTENCIA PRECAUCIÓN y NOTA en este manual É...

Page 29: ...spirar y exponerse al polvo o partículas dañinas ADVERTENCIA El polvo creado por el lijado serrado pulido taladrado y otras actividades de la construcción contiene químicos que provocan según el Estado de California cáncer defectos de nacimiento u otros daños reproductivos Algunos ejemplos de estos químicos son Plomo de pinturas basadas en plomo Sílice cristalino de ladrillos y cemento y otros pro...

Page 30: ... potencia aumentará el riesgo de descarga SEGURIDAD PERSONAL Manténgase atento mire lo que está haciendo y utilice el sentido común cuando trabaje con una herramienta de potencia No utilice una herramienta de potencia si está cansado o bajo la influencia de drogas alcohol o medicación Un momento de distracción durante la utilización de herramientas de potencia puede resultar en graves lesiones per...

Page 31: ...que no puede controlarse con el interruptor es peligrosa y debe repararse Desconecte la batería de la herramienta o coloque el interruptor en la posición de bloqueo o apagado antes de realizar cualquier ajuste cambio de accesorios o cuando guarde la herramienta Estas medidas de seguridad preventivas reducen el riesgo de que la herramienta se active accidentalmente Guarde las herramientas fuera del...

Page 32: ...puedan conectar un terminal con otro Si los terminales de la batería se unen podría provocar quemaduras o un fuego En condiciones de uso abusivo podría salir líquido de la batería evite el contacto directo Si entra en contacto accidental lávese bien con agua Si el líquido entra en contacto con los ojos además de lavarse busque ayuda médica El líquido expulsado de una batería puede causar irritació...

Page 33: ...ctoras o gafas de seguridad Donde corresponda lleve máscara antipolvo protectores auditivos guantes y un delantal capaz de detener pequeños fragmentos abrasivos o cortantes La protección de los ojos debe ser capaz de detener restos aéreos generados por varias operaciones La máscara antipolvo o respirador deben ser capaces de filtrar las partículas generadas por su operación La exposición prolongad...

Page 34: ...arga kg Kilogramos Peso Corriente Directa DC Tipo de corriente min Revoluciones por Minuto Revoluciones velocidad de superficie impactos etc por minuto DESCRIPCIÓN DE LAS FUNCIONES CONTROLES Y COMPONENTES 1 Almohadilla lijadora de 3 2 Escobilla de carbón intercambiable externa 3 Mando lateral 4 Botón de control Adelante Atrás 5 Interruptor de velocidad variable 6 Agarre suave antideslizante 7 Botó...

Page 35: ...ra sacarla PARA INSTALAR LA BATERÍA Presione la batería 8 contra la herramienta hasta que quede ajustada en su lugar INSTALAR LA ALMOHADILLA LIJADORA INSTALAR LOS ACCESORIOS CON VELCRO La pulidora ha sido diseñada para utilizar almohadillas pulidoras con Velcro de 3 de tamaño Coloque el accesorio sobre la almohadilla pulidora Su diseño con Velcro utiliza un sistema de retención con ganchos para un...

Page 36: ...lique más cera a la almohadilla conforme lo vaya necesitando para finalizar el encerado de la superficie de trabajo La almohadilla no absorberá tanta cera conforme se vaya rellenando b Cera en pasta Utilice un aplicador de masilla u objeto plano para una cucharadita de cera por igual sobre la superficie de la almohadilla aplicadora de cera Debido a su consistencia más pesada el uso de la cera de p...

Page 37: ...onas de difícil acceso b Deseche la almohadilla de forma apropiada NO la reutilice 1 Esto no es necesario en superficies de formas irregulares 2 Si la almohadilla se desprende durante el uso puede que esté utilizando demasiada cera o que esté utilizando la herramienta sin estar sobre la superficie de trabajo 3 Los contenedores de solución de pulimento y cera mostrados en las ilustraciones sirven s...

Page 38: ...ferente dando como resultado un acabado desigual También acortará la duración de la batería No deje la herramienta sobre una misma zona en la superficie de trabajo 4 Levante la herramienta de la superficie de trabajo antes de apagarla No apague la herramienta mientras descansa sobre la superficie de trabajo 5 No utilice la herramienta sin una almohadilla la almohadilla de esponja o la superficie d...

Page 39: ... saldrá de la herramienta MANTENIMIENTO Quite la batería de la herramienta antes de usar disoluciones de limpieza Esta herramienta ha sido lubricada antes de salir de fábrica El lubricante debería durar hasta el final de la vida útil de la herramienta No necesita más lubricación INDICADOR DE CARGA DE LA BATERÍA Utilice el indicar de carga de la batería para ver la capacidad restante de la batería ...

Page 40: ...otra herramienta Los accesorios recomendados para usarlos con la herramienta están disponibles para su compra en su centro local de servicios IMPORTANTE Para una mayor SEGURIDAD y FIABILIDAD del producto las reparaciones mantenimiento y ajustes deberán realizarse en centros de servicio oficiales u otros servicios técnicos cualificados utilizando siempre componentes idénticos PROTECCIÓN DEL MEDIOAM...

Reviews: