10
2.5 Hardware installation
This section describes how to connect and configure the ADSL2+ Router.
Step 1. Connect the ADSL Line
Connect the router directly to the wall jack using the included ADSL cable.
Step 2. Connect a Workstation to the Router's LAN port
There are two methods to connect the router and workstation. The one use the crossover Ethernet cable to
connect directly between them. The other use straight Ethernet cable to connect router with hub (or switch), and
then go to the workstation.
Step 3. Connect the Power Adapter to the Router
Connect the power adapter to the port labeled POWER on the rear panel of router.
Step 4. Connect All Cables to the Network
The procedure for connecting cables differs depending on whether or not your telephone equipment is connected
to a POTS splitter.
POTS Splitter Configuration
(ADSL over POTS)
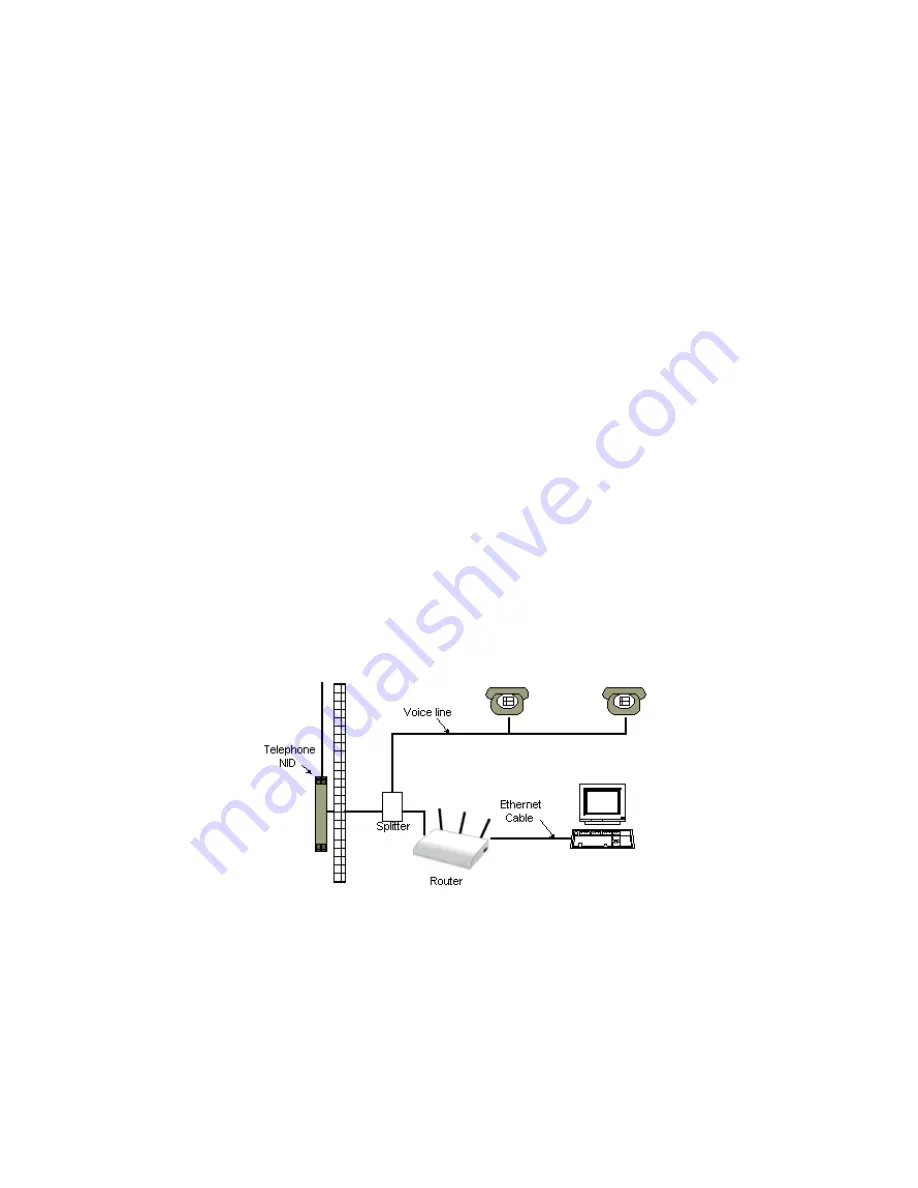
A POTS splitter separates data signals from voice signals on your telephone line. The POTS splitter works by
running a separate data line from the voice line, so that the ADSL router has a dedicated cable for data
transmission. Figure 2-5.1 and 2-5.2 shows how to connect all cables to the Router.
Figure 2-5.1 Router Connected through a POTS Splitter
Note:
The POTS splitter may also be installed on the outside of the house adjacent to the telephone network
interface device (NID).
Summary of Contents for ADSL2+ 11n Wireless Router
Page 1: ...User s Manual ADSL2 Wireless 11n Router...
Page 14: ...13 At the Password prompt type admin You can change these later if you wish Click LOGIN...
Page 20: ...19 3 3 5 System Log Click Download to save or open system log file...
Page 25: ...24 3 5 1 WAN Configuration...
Page 37: ...36 3 8 3 Packet Filtering To add packet filtering rule to block certain packet...


