background image

9. ECO

When the unit is in ECO mode, the light will turn on. In ECO mode, the unit will turn off 

once the room is cooled to the user set temperature. The unit will turn back on when the 

room temperature rises above the user set temperature. Before the compressor starts, 

the fan motor will run for a while, then it will stop for a while, and will repeat to provide 

a much more comfortable feeling and save energy.

10. Fan Only

Press the Fan Only button to FAN ONLY mode.

The air filter should be checked at least once every month to see if it needs cleaing. 

Trapped particles and dust can build up in the filter and may decrease airflow as well as 

cause the cooling coils to accumulate frost.

To clean the air filter:

Battery Size: 

AAA-NOTE:

 Do not mix old and new batteries or different types of AAA batteries.

Care and Cleaning

Air Filter Cleaning

Remove the filter by sliding it out from the front right side of the air conditioner. (See 

Fig.15)

Wash the filter using liquid dish soap and warm water. Rinse the filter thoroughly. 

Gently shake the filter to remove excess water.

Let the filter dry completely before placing it into the air conditioner.

If you do not wish to wash the filter, you may vacuum the filter to remove the dust and


other particles.

Fig.15

Your home in sync

18

Summary of Contents for CW1

Page 1: ...you for purchasing Acekool Window Air Conditioner Before operating this unit please read these instructions completely and keep the manual ready for further reference Window Air Conditioner CW1 USER M...

Page 2: ...05 06 14 18 19 CONTENTS Important Safety Instructions Electrical Requirements Packing List Installation Assembly Instructions Using Your Air Conditioner Care and Cleaning Troubleshooting Your home in...

Page 3: ...es alert you of potential hazards how to reduce the chance of injury and what can happen if instructions are not followed correctly The refrigerants used for air conditioners are environmentally frien...

Page 4: ...rictly comply with the Operation Manual provided by the corresponding manufacturer and any non professional is prohibited to maintain the air conditioner The handling installation storage servicing an...

Page 5: ...on the front left side of the unit when facing the front Speci c electrical requirements are listed in the chart below Follow the requirements below for the type of plug on the power supply cord For...

Page 6: ...ually reset This is intended to reduce the risk of a re in the power cord or combustible materials nearby The cord shields are not grounded and they must be considered a shock hazards if exposed The c...

Page 7: ...4 Remote Control Battery 2 1 2 Screws 3 Window Sash Seal Sponge 1 Foam Top Window Gasket 1 Insulation strip Sponge 2 Lock Frame 2 Filler Panels 2 With Left Right remark on the front face Thin sponge f...

Page 8: ...the lower part of the window that moves up and down must allow for 14 5 of vertical dearance when open See Fig 1 All supporting parts must be secured to rm wood masonry or metal The electrical outlet...

Page 9: ...edges and aluminum ns on the front and rear coils 3 8 Screws 4 NOTE For safety reasons all 4 screws must be used to attach the top rail Remove the air conditioner from the box and place on a hard and...

Page 10: ...ion panels in the box Gently pull the free end of the accordion panel See Fig 2 Do this for both panels Slide the free end of the accordion panel into the side panel of the air conditioner See Fig 3 D...

Page 11: ...Board or wood piece must be approximately 1 2 higher than the storm window frame for proper drainage Storm window frame OUTSIDE 1 1 2 min 38 mm INSIDE SASH Fig 5 Fig 7 Fig 6 Place the air conditioner...

Page 12: ...Sash Lock and Foam Seal Installation Mounting Hardware Place the frame lock between the extended accordionpanels and the window sill as show in Fig 9 Screw a 3 4 19mm locking screw through the frame l...

Page 13: ...oner to the lower sash See Fig 11 Fig 12 To secure the lower sash into place use the sash lock and a 3 4 screw as shown below See Fig 13 For added insulation cut the supplied insulation foam to the wi...

Page 14: ...nd notes When lling the combustible refrigerant any of your rude operations may cause serious injury or injuries to human body or bodies and object or objects Requirements for the total weight of lled...

Page 15: ...ir inlets and outlets of the indoor and outdoor units should be not surrounded by obstacles or close to any heat source or combustible and or explosive environment If the indoor unit su ers refrigeran...

Page 16: ...ion allows the air conditioner to cool the room and at the same time reduces humidity Press the MODE button to activate the cooling function To optimize this function adjust the temperature by pressin...

Page 17: ...7 Filter Button When the Filter Check light is o it is not necessary to press the Filter Check button When the Filter Check light is on you can turn o the light by pressing the Filter Check button Aft...

Page 18: ...O In FAN MODE you can choose from HIGH MED LOW 10 Directional Louvers Use the horizontal wheels to control horizontal air ow and the air de ectors to control vertical air ow Air De ector Air De ector...

Page 19: ...is o press TIMER button at the rst time set the temperature with pressing the button or Press TIMER button at the second time set the rest time with pressing the button or Press TIMER button at the th...

Page 20: ...ee if it needs cleaing Trapped particles and dust can build up in the lter and may decrease air ow as well as cause the cooling coils to accumulate frost To clean the air lter Battery Size AAA NOTE Do...

Page 21: ...r polish on the cabinet front Be sure to wring excess water from the cloth before wiping around the controls Excess water in or around the controls may cause damage to the air conditioner Troubleshoot...

Page 22: ...The batteries may be dead Make sure there are no curtains blinds or furniture blocking the front of the air conditioner Lower the set thermostat temperature Clean the lter See the Cleaning and Care S...

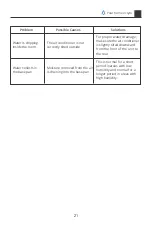
Page 23: ...drainage make sure the air conditioner is slightly tilted downward from the front of the unit to the rear Water collects in the base pan Moisture removed from the air is draining into the base pan Thi...

Page 24: ...Model TWC 06CRD1 L1U ES Email support acekool vip Website https www acekool vip Made in China ENERGY STAR...

Reviews: