background image


IMPORTANT SAFETY INSTRUCTIONS


1.  Please read these instructions carefully before using the product and keep the user’s manual for later 

reference. 

2.  This product should be operated from the type of power indicated on the marking label. If you are not 

sure of the type of power available, consult your dealer or local power company. 

3.  Unplug this product from the wall outlet before cleaning. Clean the product with a damp soft cloth. Do 

not use liquid or aerosol cleaners as it may cause permanent damage to the screen. 

4.  Slots and openings in the cabinet and the back or bottom are provided for ventilation; to ensure reliable 

operation of the product and to protect it from overheating, these openings must not be blocked or 

covered. The openings should never be placed near or over a radiator or heat register, or in a built-in 

installation unless proper ventilation is provided. 

5.  Do not place this product on an unstable cart, stand, or table. The product may fall and cause serious 

damage to the product. 

6.  Do not use this product near water. 

7.  Do not allow anything to rest on the power cord. Do not locate this product where persons will walk 

on the cord. 

8.  Never push objects of any kind into this product through cabinet slots as they may touch dangerous 

voltage points or short out parts that could result in a risk of fire or electric shock. Never spill liquid of 

any kind on the product. 

9.  Do not attempt to service this product yourself, as opening or removing covers may expose you to 

dangerous  voltage  points  or  other  risks  and  will  void  the  warranty.  Refer  all  servicing  to  qualified 

service personnel. 

10.  Unplug this product from the wall outlet and refer servicing to qualified service personnel under the 

following conditions: 

a.  When the power cord or plug is damaged or frayed. 

b.  If liquid has been spilled into the product. 

c.  If the product has been exposed to rain or water. 

d.  If the product does not operate normally when the operating instructions are followed. Adjust only 

those controls that are covered by the operating instructions since improper adjustment of other 

controls may result in damage and will often require extensive work by a qualified technician to 

restore the product to normal operation. 

e.  If the product has been dropped or the cabinet has been damaged. 

f. 

If the product exhibits a distinct change in performance, indicating a need for service.

Summary of Contents for AP2151

Page 1: ...Interactive Pen Display AP2151 MANUAL Windows 2000 XP Vista 7 8 10 Mac OS X 10 68 or above WWW ACE PEN COM...

Page 2: ...d Do not locate this product where persons will walk on the cord 8 Never push objects of any kind into this product through cabinet slots as they may touch dangerous voltage points or short out parts...

Page 3: ...Catalog 1 Introduction 1 2 Installation 2 3 Component Description 7 4 Display Control 9 5 Specifications 21 5 10 6 Trouble shooting 12...

Page 4: ......

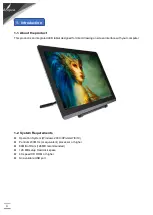
Page 5: ...on screen interface with your computer 1 2 System Requirements l Operation System Windows 2000 XP vista 7 8 10 l Pentium 233MHz or equivalent processor or higher l 64MB of Ram 128MB recommended l 128...

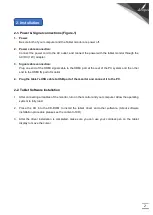
Page 6: ...the other end to the HDMI IN port of monitor 4 Plug the tablet s USB cable to USB port of the monitor and connect it to the PC 2 2 Tablet Software Installation 1 After connecting all cables of the mon...

Page 7: ...3 2 3 Using the Tablet driving software Click on the tablet icon at the bottom right of the tool bar to enter the tablet screen The tablet icon appears when the cable is plugged in 1 Info...

Page 8: ...4 2 Button...

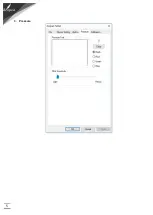
Page 9: ...5 3 Pressure...

Page 10: ...6 4 Calibration...

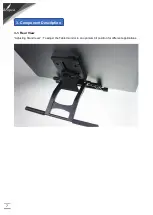
Page 11: ...7 3 1 Rear View Adjusting Stand lever To adjust the Tablet monitor in an optimum tilt position for different applications 3 Component Description...

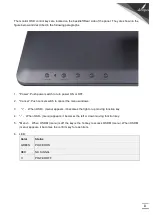
Page 12: ...or OFF 2 Cancel Push cancel switch to cancel the menu windows 3 When OSD menu appears it becomes the right or up moving function key 4 When OSD menu appears it becomes the left or down moving function...

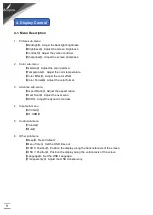
Page 13: ...olor Format Adjust the color format 3 Advance sub menu Aspect Ratio Adjust the aspect ration Over Scan Adjust the over scan DCR Adjust the dynamic contrast 4 Input sub menu A0 VGA D1 HDMI 5 Audio sub...

Page 14: ...80 RH non condensing Storage temperature 15 60 C 10 90 RH Operating System Support Windows 2000 XP Vista 7 8 10 Mac OS Handwriting Software Support Windows Tablet PC Components group MSN Outlook Expr...

Page 15: ...m deviation 3mm Reading Height Not less than 5mm Above the surface the glass Power line 1 5m AC power line Power adapter External power adapter input 100 240VAC 50 60Hz output 12VDC5A Data Interface U...

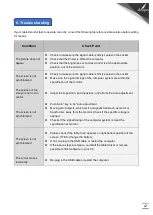
Page 16: ...e screen is not in the center l Adjust the H position and V position or Perform the Auto adjustment The screen is not synchronized l Push Auto key to do Auto adjustment l Moving all of objects which e...

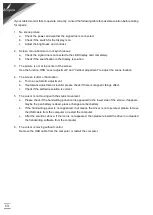
Page 17: ...screen is jitter or fluctuation a To do an automatic adjustment b If automatic adjustment is invalid please check if there is magnetic things effect c Check if the settled resolution is correct 5 The...

Page 18: ...14 Thank you for purchasing Acepen pen display if you want to know more Acepen products please check our website www ace pen com...

Reviews: