

English
3
First things first
We would like to thank you for making this Acer LCD TV your choice. With proper care, your new Acer LCD TV will provide you
with years of entertainment and satisfaction.
This User's Guide introduces you to the various features your LCD TV can offer, and provides clear and concise information about
the product, so please read it thoroughly and retain it for future reference.
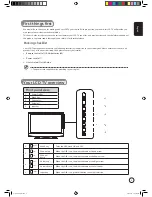
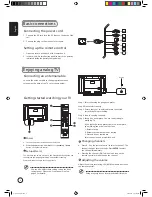
Packing checklist
Your LCD TV package should contain the following accessories, in addition to the accessory box. Please ensure that they are all
present. If any of the items is missing, then please contact your retailer.
•
Remote control (x1) / AAA batteries (x2)
•
Power cord (x1)*
•
User's Guide / Quick Guide
* The power cord supplied varies according to your region.
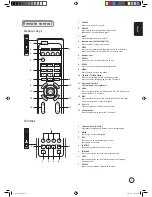
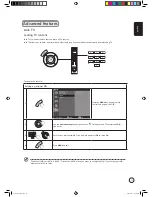
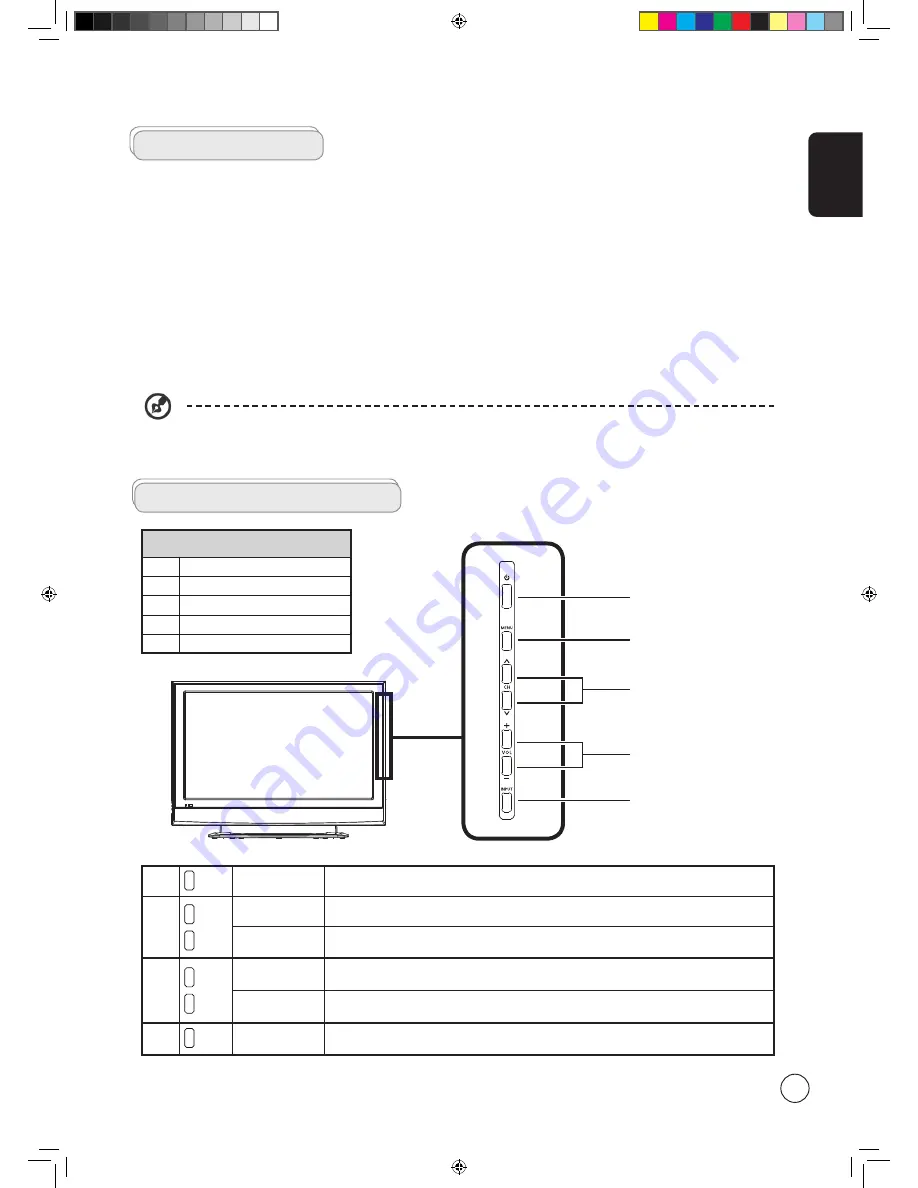
Front panel view
1
Power On/Off
2
Menu key
3
C/-
4
/-
5
Input key
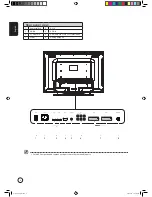
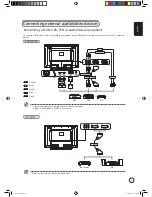
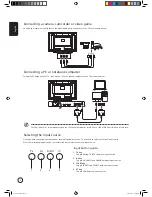
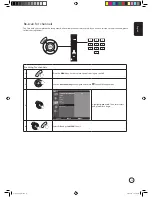
Your LCD TV overview
2
MENU
Menu key
Turns the OSD menu ON and OFF
3
CH+
CH-
Channel up
When the OSD is on, functions the same as the Up arrow
Channel
down
When the OSD is on, functions the same as the Down arrow
4
-
VOL+
VOL
Volume up
When the OSD is on, functions the same as the Right arrow
Volume down
When the OSD is on, functions the same as the Left arrow
5
INPUT
Input key
When the OSD is on, press this button to confirm selection
1
2
3
4
5
Acer.TV.EU.UK.indb 3
6/23/2006 9:37:02 AM


