1-
30
Service Guide
1.5
Software Configuration and Specification
1.5.1
BIOS
The BIOS is compliant to PCI v2.1, APM v1.2, E-IDE and PnP specification. It also defines the hotkey
functions and controls the system power-saving flow.
1.5.1.1
Keyboard Hotkey Definition
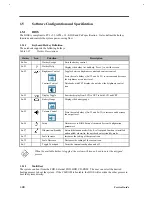
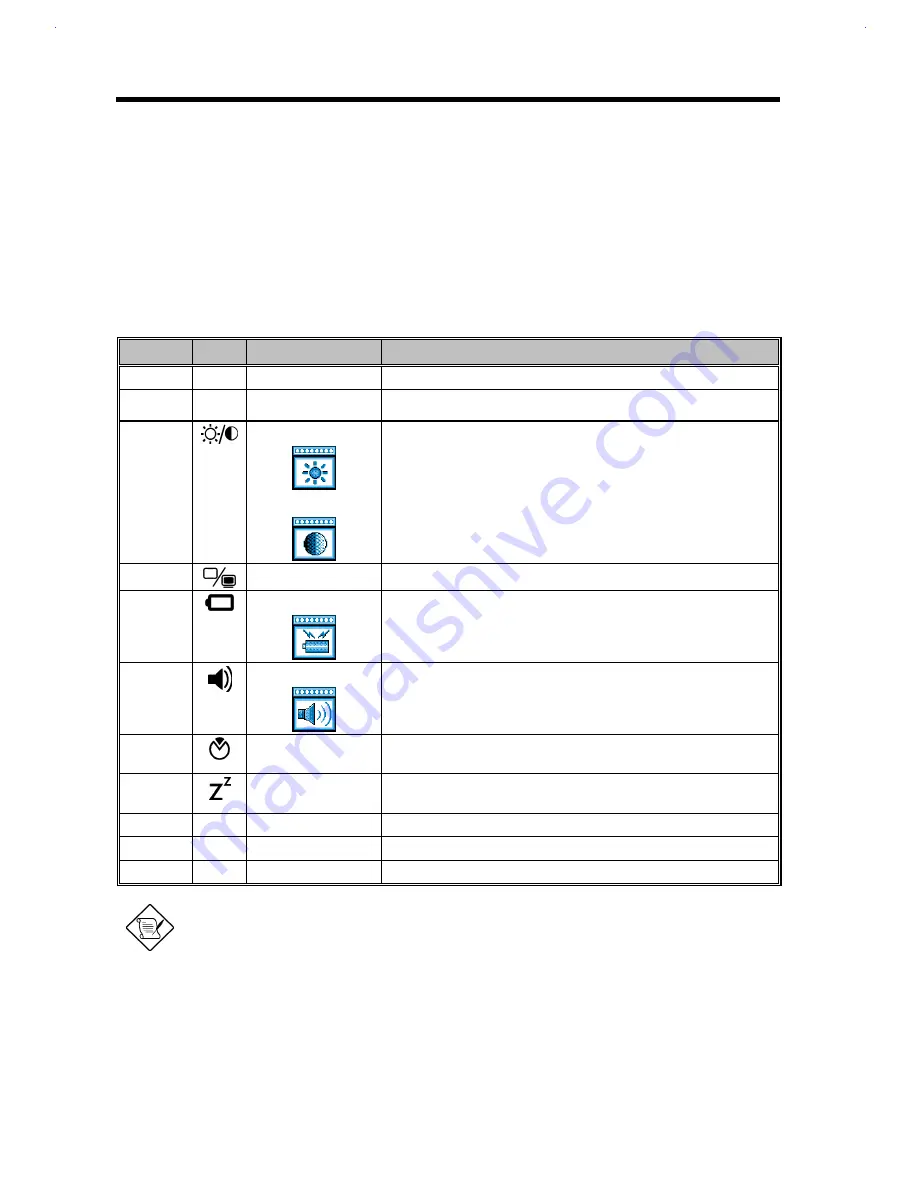
The notebook supports the following hotkeys.
Table 1-35
Hotkey Descriptions
Hotkey
Icon
Function
Description
Fn-Esc
Hotkey Escape
Exits the hotkey control.
Fn-F1
?
Hotkey Help
Displays the hotkey list and help. Press
|
to exit the screen.
Fn-F2
Brightness Control
Contrast Control
Toggles between brightness control and contrast control.
Press the scale hotkeys (Fn-
→
and Fn -
←
) to increase and decrease
the brightness or contrast level.
Notebooks with TFT displays do not show the brightness control
icon.
Fn-F3
Display Toggle
Switches display from LCD to CRT to both LCD and CRT.
Fn-F4
Battery Gauge
Displays the battery gauge.
Fn-F5
Volume Control
Press the scale hotkeys (Fn-
→
and Fn-
←
) to increase and decrease
the output level.
Fn-F6
Setup
Gains access to BIOS Setup’s Advanced System Configuration
parameters.
Fn-F7
Hibernation/Standby
Enters hibernation mode if the 0-volt suspend function is installed
and enabled; otherwise, the notebook enters standby mode.
Fn-
→
Scale Increase
Increases the setting of the current icon.
Fn-
←
Scale Decrease
Decreases the setting of the current icon.
Fn-T
Toggle Touchpad
Turns the internal touchpad on and off.
When the available hotkey is toggled, the system will issue a beep to enter the assigned
process.
1.5.1.2
MultiBoot
The system can boot from the FDD, External FDD, HDD, CD-ROM. The user can select the desired
booting process to boot the system. If the CD-ROM is bootable, the BIOS will override the other process to
boot the system directly.
Summary of Contents for AcerNote Light 370P
Page 6: ...vi ...
Page 26: ...1 8 Service Guide Figure 1 5 Main Board Layout Bottom Side ...
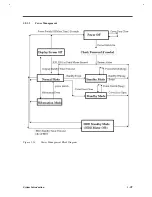
Page 49: ...System Introduction 1 31 1 5 1 3 Power Management Figure 1 14 Power Management Block Diagram ...
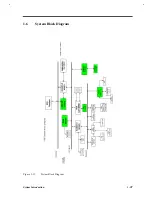
Page 55: ...System Introduction 1 37 1 6 System Block Diagram Figure 1 15 System Block Diagram ...
Page 64: ...Major Chips Description 2 7 2 2 5 Pin Diagram Figure 2 4 M1521 Pin Diagram ...
Page 99: ...2 42 Service Guide 2 5 3 Pin Diagram Figure 2 10 C T 65550 Pin Diagram ...
Page 117: ...2 60 Service Guide Figure 2 12 Functional block diagram CardBus Card Interface ...
Page 119: ...2 62 Service Guide Figure 2 14 PCI to CardBus terminal assignments ...
Page 135: ...2 78 Service Guide 2 7 3 Pin Diagram Figure 2 16 NS87336VJG Pin Diagram ...
Page 145: ...2 88 Service Guide 2 8 2 Pin Diagram Figure 2 17 YMF715 Block Diagram ...
Page 185: ...Disassembly and Unit Replacement 4 5 Figure 4 3 Disassembly Sequence Flowchart ...
Page 209: ...B 2 Service Guide ...
Page 210: ...Exploded View Diagram B 3 ...

