background image


iii

IMPORTANT SAFETY INSTRUCTIONS

1.

Read these instructions carefully.  Save these instructions for future
reference.

2.

Follow all warnings and instructions marked on the product.

3.

Unplug this product from the wall outlet before cleaning.  Do not use
liquid cleaners or aerosol cleaners.  Use a damp cloth for cleaning.

4.

Do not use this product near water.

5.

Do not place this product on an unstable cart, stand, or table.  The
product may fall, causing serious damage to the product.

6.

Slots and openings in the cabinet and the back or bottom are provided
for ventilation; to ensure reliable operation of the product and to protect
it from overheating, these openings must not be blocked or covered.
The openings should never be blocked by placing the product on a bed,
sofa, rug, or other similar surface.  This product should never be placed
near or over a radiator or heat register, or in a built-in installation unless
proper ventilation is provided.

7.

This product should be operated from the type of power indicated on the
marking label.  If you are not sure of the type of power available, consult
your dealer or local power company.

8.

Do not allow anything to rest on the power cord.  Do not locate this
product where persons will walk on the cord.

9.

If an extension cord is used with this product, make sure that the total
ampere rating of the equipment plugged into the extension cord does
not exceed the extension cord ampere rating.  Also, make sure that the
total rating of all products plugged into the wall outlet does not exceed
the fuse rating.

10. Never push objects of any kind into this product through cabinet slots as

they may touch dangerous voltage points or short out parts that could
result in a fire or electric shock.  Never spill liquid of any kind on the
product.

Summary of Contents for AcerNote Nuovo 970

Page 1: ...AcerNote Nuovo User s Manual ...

Page 2: ...ensed as is Should the programs prove defective following their purchase the buyer and not Acer Incorporated its distributor or its dealer assumes the entire cost of all necessary servicing repair and any incidental or consequential damages resulting from any defect in the software Further Acer Incorporated reserves the right to revise this publication and to make changes from time to time in the ...

Page 3: ...ar surface This product should never be placed near or over a radiator or heat register or in a built in installation unless proper ventilation is provided 7 This product should be operated from the type of power indicated on the marking label If you are not sure of the type of power available consult your dealer or local power company 8 Do not allow anything to rest on the power cord Do not locat...

Page 4: ... in damage and will often require extensive work by a qualified technician to restore the product to normal condition e If the product has been dropped or the cabinet has been damaged f If the product exhibits a distinct change in performance indicating a need for service 13 Replace battery with the same type as the product s battery we recommend Use of another battery may present a risk of fire o...

Page 5: ...en Kassera anvãnt batteri enligt fabrikantens instruktion VAROITUS Päristo voi räjähtää jos se on virheellisesti asennettu Vaihda paristo ainoastaan laitevalmistajan suosittelemaan tyyppiin Hävitä käytetty paristo valmistajan ohjeiden mukaisesti Canadian Department of Communications Regulatory Statement This digital apparatus does not exceed Class B limits for radio noise emissions from digital ap...

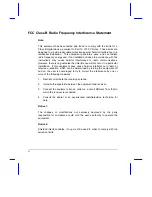
Page 6: ... If this equipment does cause harmful interference to radio or television reception which can be determined by turning the equipment off and on the user is encouraged to try to correct the interference by one or more of the following measures 1 Reorient or relocate the receiving antenna 2 Increase the separation between the equipment and receiver 3 Connect the equipment into an outlet on a circuit...

Page 7: ...udes information on the unique power management system Chapter 4 Options tells how to connect and install hardware options Chapter 5 Software describes how to configure certain utilities and applications Chapter 6 Setup explains how to configure the system with the BIOS Setup utility Chapter 7 Traveling with the Notebook includes informative and useful tips on travel Chapter 8 Troubleshooting list...

Page 8: ...s that you have to press on the keyboard NOTE Gives bits and pieces of additional information related to the current topic WARNING Alerts you if damage may result from doing or not doing specific actions CAUTION Gives precautionary measures to avoid possible hardware or software problems IMPORTANT Reminds you to take action relevant to the accomplishment of the procedure at hand TIP Tells how to c...

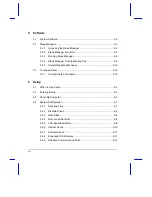
Page 9: ... 3 Battery Pack 1 6 1 2 4 Cleaning and Servicing 1 7 1 2 5 Diskettes 1 7 1 3 Connecting the Notebook 1 9 1 4 Getting Help Online 1 10 2 System Tour 2 1 Features 2 2 2 2 Display 2 4 2 3 Indicator Lights 2 7 2 4 Keyboard 2 8 2 4 1 Keyboard Layout 2 8 2 4 2 Special Keys 2 9 2 4 3 Automatic Tilt Feature 2 16 2 4 4 Palm Rest 2 17 2 5 Touchpad 2 18 ...

Page 10: ...9 2 9 Communications 2 30 2 9 1 Serial Infrared 2 30 2 9 2 Fax Data Modem 2 31 2 10 Securing your Notebook 2 32 2 10 1 Security Notch 2 32 2 10 2 System Resource Lock 2 32 3 Power 3 1 Battery Power 3 2 3 1 1 Battery Pack Characteristics 3 2 3 1 2 Removing and Installing the Battery Pack 3 3 3 1 3 Charging the Battery 3 4 3 1 4 Checking the Battery Level 3 5 3 1 5 Optimizing Battery Life 3 7 3 1 6 ...

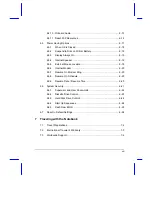
Page 11: ...1 External Monitor 4 2 4 2 External Keyboard 4 3 4 3 External Keypad 4 4 4 4 External Pointing Device 4 5 4 5 Printer 4 7 4 6 Audio Devices 4 8 4 7 Mini Dock 4 9 4 8 PC Cards 4 9 4 9 Miscellaneous Options 4 10 4 9 1 Additional Power Packs 4 10 4 9 2 Cables 4 12 4 10 Key Component Upgrades 4 14 4 10 1 Additional Memory 4 14 4 10 2 Hard Disk 4 16 ...

Page 12: ...anager 5 10 5 3 Touchpad Driver 5 12 5 3 1 Configuring the Touchpad 5 12 6 Setup 6 1 When to Use Setup 6 2 6 2 Entering Setup 6 3 6 3 About My Computer 6 4 6 4 System Configuration 6 7 6 4 1 Date and Time 6 7 6 4 2 Diskette Drives 6 8 6 4 3 Hard Disks 6 8 6 4 4 Num Lock After Boot 6 8 6 4 5 LCD Expansion Mode 6 8 6 4 6 Internal Cache 6 10 6 4 7 External Cache 6 11 6 4 8 Enhanced IDE Features 6 11 ...

Page 13: ... Internal Modem 6 20 6 5 7 Resume On Modem Ring 6 20 6 5 8 Resume On Schedule 6 20 6 5 9 Resume Date Resume Time 6 20 6 6 System Security 6 21 6 6 1 Supervisor and User Passwords 6 22 6 6 2 Diskette Drive Control 6 23 6 6 3 Hard Disk Drive Control 6 24 6 6 4 Start Up Sequences 6 24 6 6 5 Flash New BIOS 6 25 6 7 Reset to Default Settings 6 26 7 Traveling with the Notebook 7 1 Travel Preparations 7 ...

Page 14: ...v 8 Troubleshooting 8 1 Q A 8 2 8 2 POST Error Messages 8 7 A Specifications B Address and Interrupt Tables B 1 System Memory Map B 1 B 2 I O Address Map B 2 B 3 Interrupt Levels B 3 B 4 DMA Channels B 3 ...

Page 15: ... 2 7 Left Panel Ports 2 23 2 8 Rear Panel Ports 2 26 2 9 Built in Speakers and Microphone 2 28 4 1 Connecting an External Monitor 4 2 4 2 Connecting an External Keyboard 4 3 4 3 Connecting an External Keypad 4 4 4 4 Connecting an External Pointing Device 4 5 4 5 Connecting a Parallel Printer 4 7 4 6 Connecting Audio Devices 4 8 4 7 Mini Dock 4 9 4 8 Using the File Transfer Cable 4 13 ...

Page 16: ...2 9 Rear Panel Port Descriptions 2 27 2 10 Audio Control Hot Keys 2 29 3 1 Battery level Chart 3 6 3 2 Course of Action for Battery low Condition 3 9 4 1 Memory Configurations 4 14 4 2 Hard Disk List 4 16 5 1 Sleep Manager Window Items 5 4 5 2 Sleep Manager Error Messages and Solutions 5 9 6 1 About My Computer Item Descriptions 6 5 6 2 Diskette Drive Control Settings 6 23 6 3 Hard Disk Drive Cont...

Page 17: ...xvii ...

Reviews: