3 Upgrading the system
44
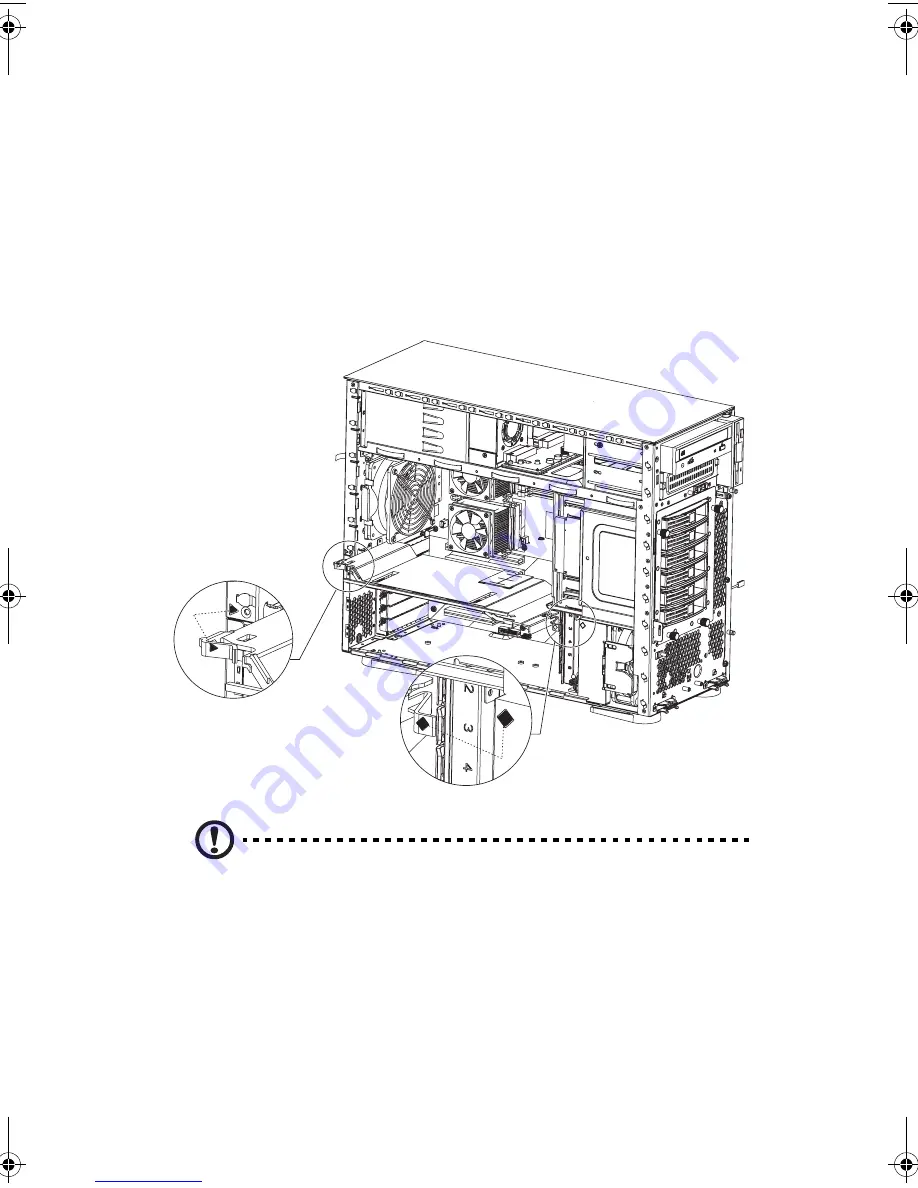
To remove the air baffle
Remove the air baffle to allow easy access to the motherboard and
system components.
Follow the steps below to remove the air baffle:
1
Press the release latches on both ends of the air baffle.
2
Pull out the air baffle to remove it from the chassis.
Caution!
After completing the component upgrade/replacement
procedures, do not forget to reinstall the air baffle before
replacing the chassis panels. Failure to do so will reduce the
system’s cooling efficiency which can adversely affect performance
or cause damage due to overheating.
BB!H621!.!FO/cppl!!Qbhf!55!!Uivstebz-!Kvof!23-!3114!!2;34!QN
Summary of Contents for Altos G510 series
Page 1: ...Acer Altos G510 series User s guide ...
Page 8: ...viii ...
Page 12: ......
Page 13: ...1 System tour ...
Page 18: ...1 System tour 6 Front panel Altos G510 Basic model Altos G510 model ...
Page 21: ...9 Rear panel Altos G510 Basic model Altos G510 model ...
Page 24: ...1 System tour 12 Internal components Altos G510 Basic model Altos G510 model ...
Page 31: ...2 System setup ...
Page 45: ...3 Upgrading the system ...
Page 91: ...4 BIOS setup ...
Page 128: ...4 BIOS setup 116 ...
Page 129: ...Appendix A ASM Quick Installation Guide ...
Page 130: ...This appendix shows you how to install the ASM software package ...
Page 133: ...Appendix B Altos G510 Rack Installation Guide ...
Page 134: ...This appendix shows you how to install the optional rack mount kit for Acer Altos G510 ...
Page 143: ...127 ...
Page 148: ...Appendix B Altos G510 Rack Installation Guide 132 ...
Page 149: ...Appendix C Onboard SCSI Integrated Mirroring ...


