71
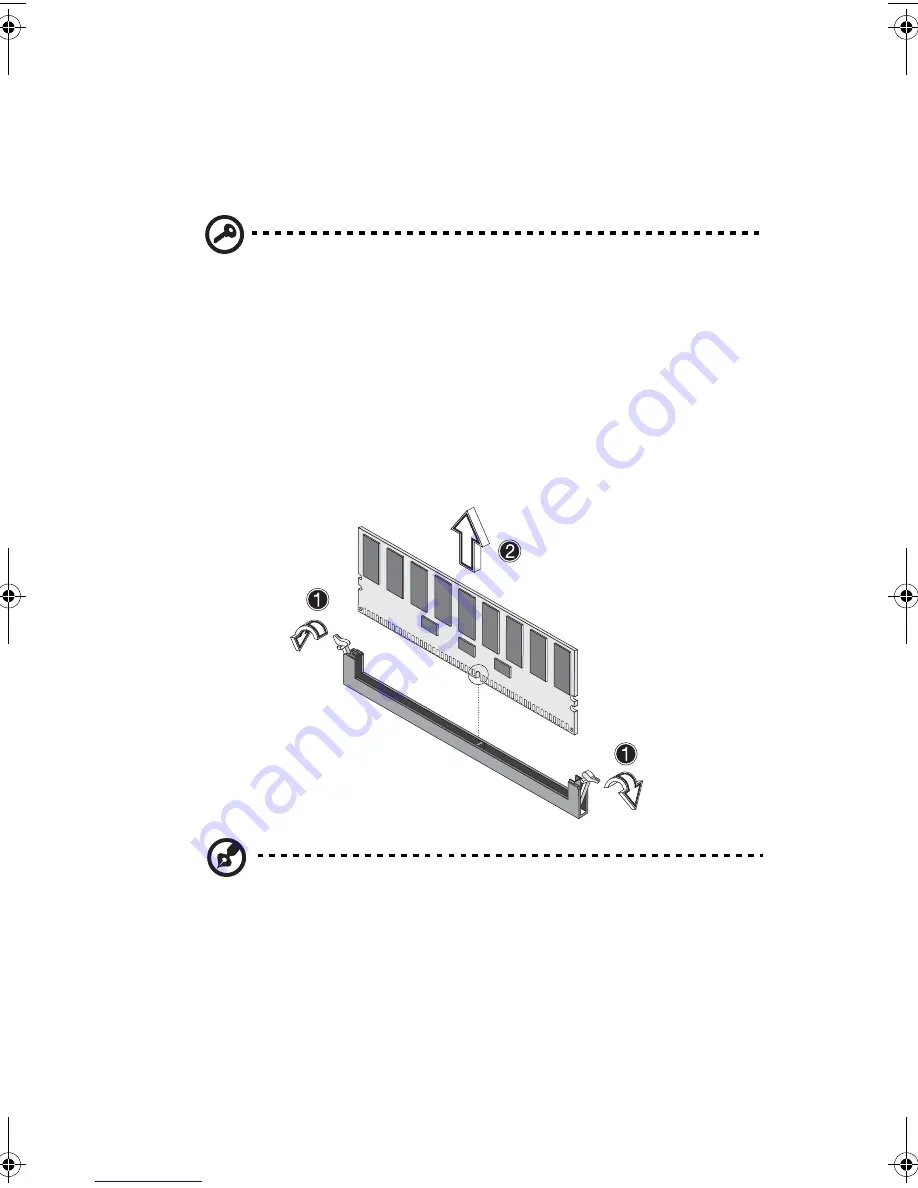
To remove a DIMM
Before installing a new DIMM in a socket, remove first any previously
installed DIMM from that socket.
Important:
Before removing any DIMM from the mainboard,
make sure to create a backup file of all important data.
1
Observe the ESD precautions and pre-installation procedures
described on page 36.
2
Locate the DIMM socket on the mainboard.
3
Press the holding clips on both sides of the socket outward to
release the DIMM
(1)
.
4
Gently pull the DIMM upward to remove it from the socket
(2)
.
Note:
Place your forefingers on the top of the DIMM before
pressing the holding clips to gently disengage the DIMM from the
socket.
BB!H621!.!FO/cppl!!Qbhf!82!!Uivstebz-!Kvof!23-!3114!!2;34!QN
Summary of Contents for Altos G510 series
Page 1: ...Acer Altos G510 series User s guide ...
Page 8: ...viii ...
Page 12: ......
Page 13: ...1 System tour ...
Page 18: ...1 System tour 6 Front panel Altos G510 Basic model Altos G510 model ...
Page 21: ...9 Rear panel Altos G510 Basic model Altos G510 model ...
Page 24: ...1 System tour 12 Internal components Altos G510 Basic model Altos G510 model ...
Page 31: ...2 System setup ...
Page 45: ...3 Upgrading the system ...
Page 91: ...4 BIOS setup ...
Page 128: ...4 BIOS setup 116 ...
Page 129: ...Appendix A ASM Quick Installation Guide ...
Page 130: ...This appendix shows you how to install the ASM software package ...
Page 133: ...Appendix B Altos G510 Rack Installation Guide ...
Page 134: ...This appendix shows you how to install the optional rack mount kit for Acer Altos G510 ...
Page 143: ...127 ...
Page 148: ...Appendix B Altos G510 Rack Installation Guide 132 ...
Page 149: ...Appendix C Onboard SCSI Integrated Mirroring ...


