


145
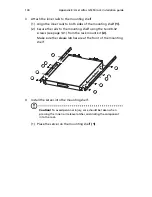
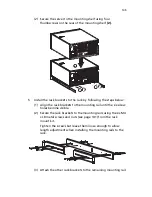
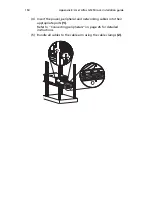
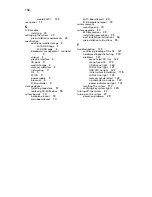
(2) Secure the server to the mounting shelf using four
thumbscrews on the rear of the mounting shelf
(2)
.
5
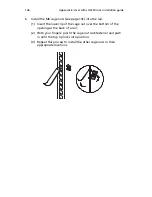
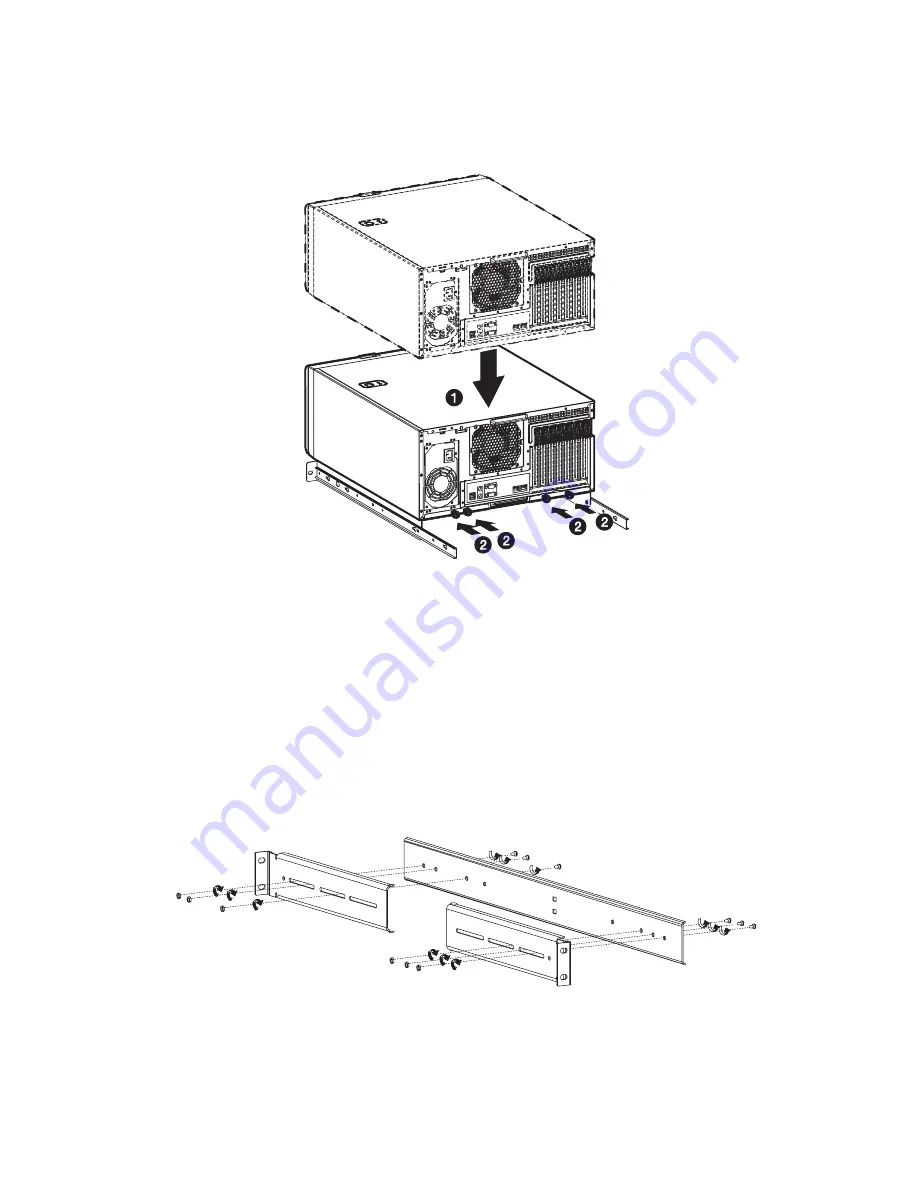
Install the rack brackets to the rack by following the steps below:
(1) Align the rack brackets to the mounting rail until the six screw
holes become visible.
(2) Secure the rack brackets to the mounting rails using the six M4
x L8 metal screws and nuts (see page 141) from the rack
mount kit.
Tighten the screws but leave them loose enough to allow
length adjustment when installing the mounting rails to the
rack.
(3) Attach the other rack brackets to the remaining mounting rail.
Summary of Contents for Altos G5350
Page 1: ...Acer Altos G5350 Series User s Guide ...
Page 10: ...x ...
Page 11: ...1 System tour ...
Page 31: ...21 5 4 pin power cable connector 6 I2 C bus interface connector No Code Description ...
Page 32: ...1 System tour 22 ...
Page 33: ...2 System setup ...
Page 43: ...3 System upgrade ...
Page 88: ...3 System upgrade 78 ...
Page 89: ...4 BIOS setup ...
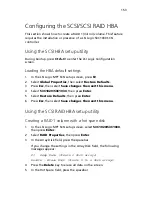
Page 123: ...113 Save Changes Saves changes made in the BIOS setup Parameter Description ...
Page 124: ...4 BIOS setup 114 ...
Page 125: ...5 Troubleshooting ...
Page 136: ...5 Troubleshooting 126 ...
Page 137: ...Appendix A System management utility ...
Page 144: ...Appendix A System management utility 134 ...
Page 145: ...Appendix B Acer Altos G5350 rack installation guide ...
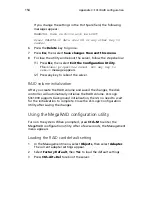
Page 146: ...This appendix shows you how to set up the Altos G5350 server in a rack mount configuration ...
Page 161: ...Appendix C SCSI RAID configuration ...
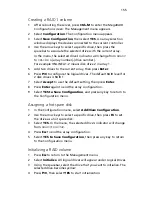
Page 162: ...This appendix shows you how to create a RAID volume in your SCSI drives ...


