


43
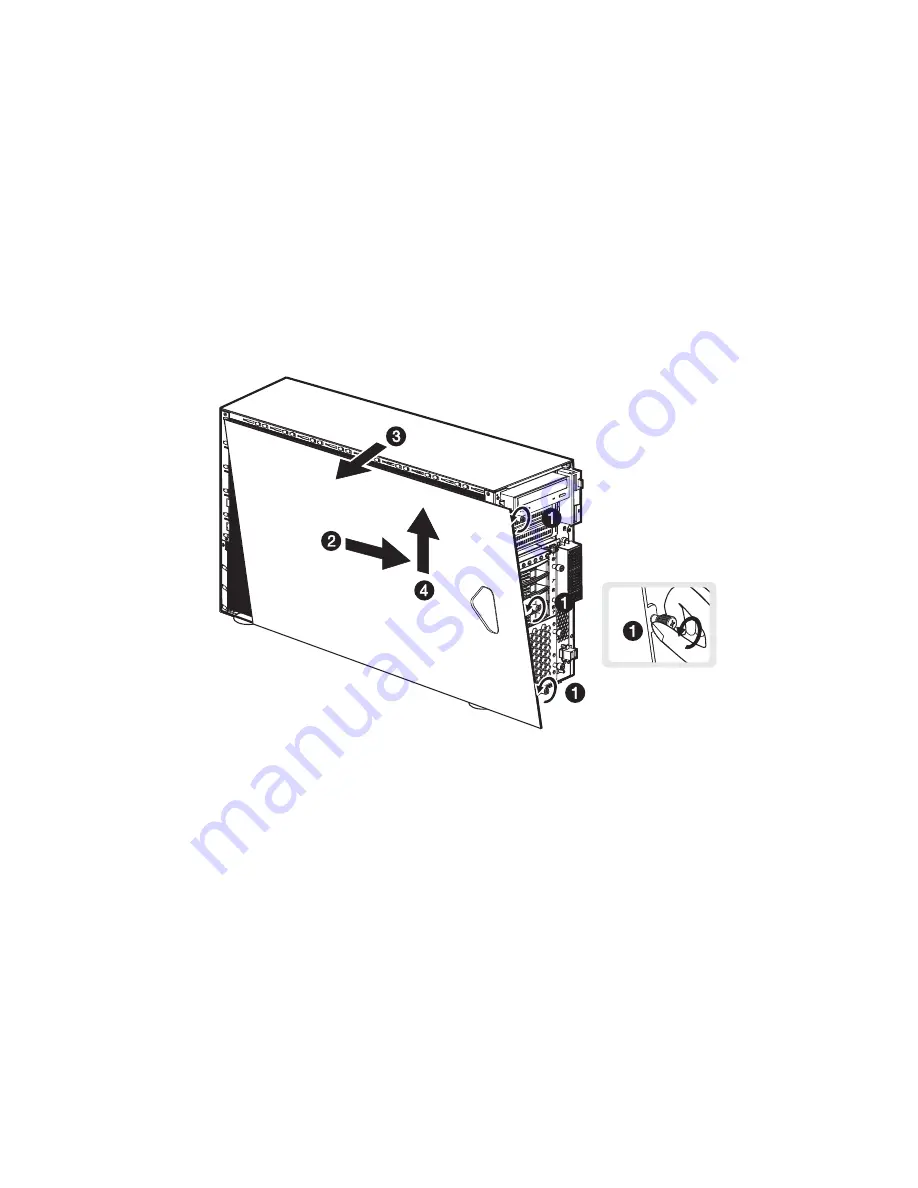
Removing the left-side panel
1
Observe the ESD precautions and pre-installation procedures
described on page 39.
2
Remove the bezel door and the bezel.
Refer to the preceding sections for detailed instructions.
3
Loosen the three thumbscrews located at the end of the side panel
closest to the front panel
(1)
.
4
Slide the side panel slightly forward
(2)
, then tilt it outward
(3)
and upward
(4)
before detaching it from the chassis.
Removing the air baffle
Once you remove the left-side panel, most of the system’s internal
components are still hidden from view by the air baffle. Remove the
air baffle to allow easy access to the system components.
Follow the steps below to remove the air baffle:
1
Press the release latch on the right
(1)
and left
(2)
side of the air
baffle.
Summary of Contents for Altos G710
Page 1: ...Acer Altos G710 User s Guide ...
Page 10: ...x Setting 183 Index 187 ...
Page 11: ...1 System tour ...
Page 35: ...2 System setup ...
Page 46: ...2 System setup 36 ...
Page 47: ...3 System upgrade ...
Page 69: ...59 2 Pull out the CPU from the socket 2 ...
Page 89: ...4 BIOS setup ...
Page 130: ...4 BIOS setup 120 ...
Page 131: ...5 Troubleshooting ...
Page 142: ...5 Troubleshooting 132 ...
Page 143: ...Appendix A System management ...
Page 151: ...Appendix B Acer Altos G710 rack installation guide ...
Page 152: ...This appendix shows you how to set up the Altos G710 server in a rack mount configuration ...
Page 167: ...Appendix C SCSI RAID configuration ...
Page 168: ...This appendix shows you how to create a RAID volume in your SCSI drives ...
Page 173: ...Appendix D ePanel ...
Page 196: ...Appendix D ePanel 186 ...


