


3 System upgrade
66
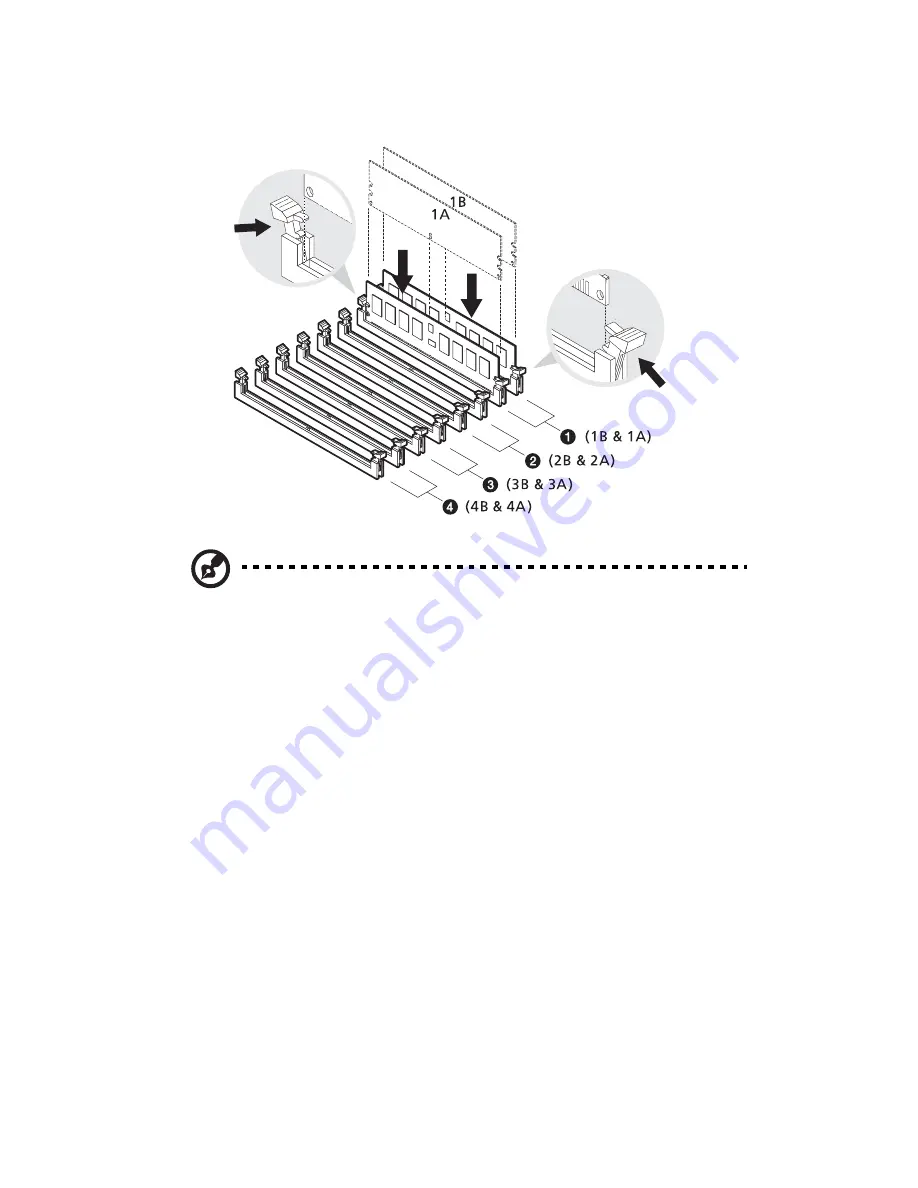
Note:
The DIMM slot is slotted to ensure proper installation.
If you insert a DIMM but it does not fit easily into the socket, you
may have inserted it incorrectly. Reverse the orientation of the
DIMM and insert it again.
6
Observe the post-installation instructions described on page 40.
Reconfiguring the system memory
The system automatically detects the amount of memory installed.
Run the BIOS setup to view the new value for total system memory and
make a note of it.
Summary of Contents for Altos G710
Page 1: ...Acer Altos G710 User s Guide ...
Page 10: ...x Setting 183 Index 187 ...
Page 11: ...1 System tour ...
Page 35: ...2 System setup ...
Page 46: ...2 System setup 36 ...
Page 47: ...3 System upgrade ...
Page 69: ...59 2 Pull out the CPU from the socket 2 ...
Page 89: ...4 BIOS setup ...
Page 130: ...4 BIOS setup 120 ...
Page 131: ...5 Troubleshooting ...
Page 142: ...5 Troubleshooting 132 ...
Page 143: ...Appendix A System management ...
Page 151: ...Appendix B Acer Altos G710 rack installation guide ...
Page 152: ...This appendix shows you how to set up the Altos G710 server in a rack mount configuration ...
Page 167: ...Appendix C SCSI RAID configuration ...
Page 168: ...This appendix shows you how to create a RAID volume in your SCSI drives ...
Page 173: ...Appendix D ePanel ...
Page 196: ...Appendix D ePanel 186 ...


