3 Hardware configuration
46
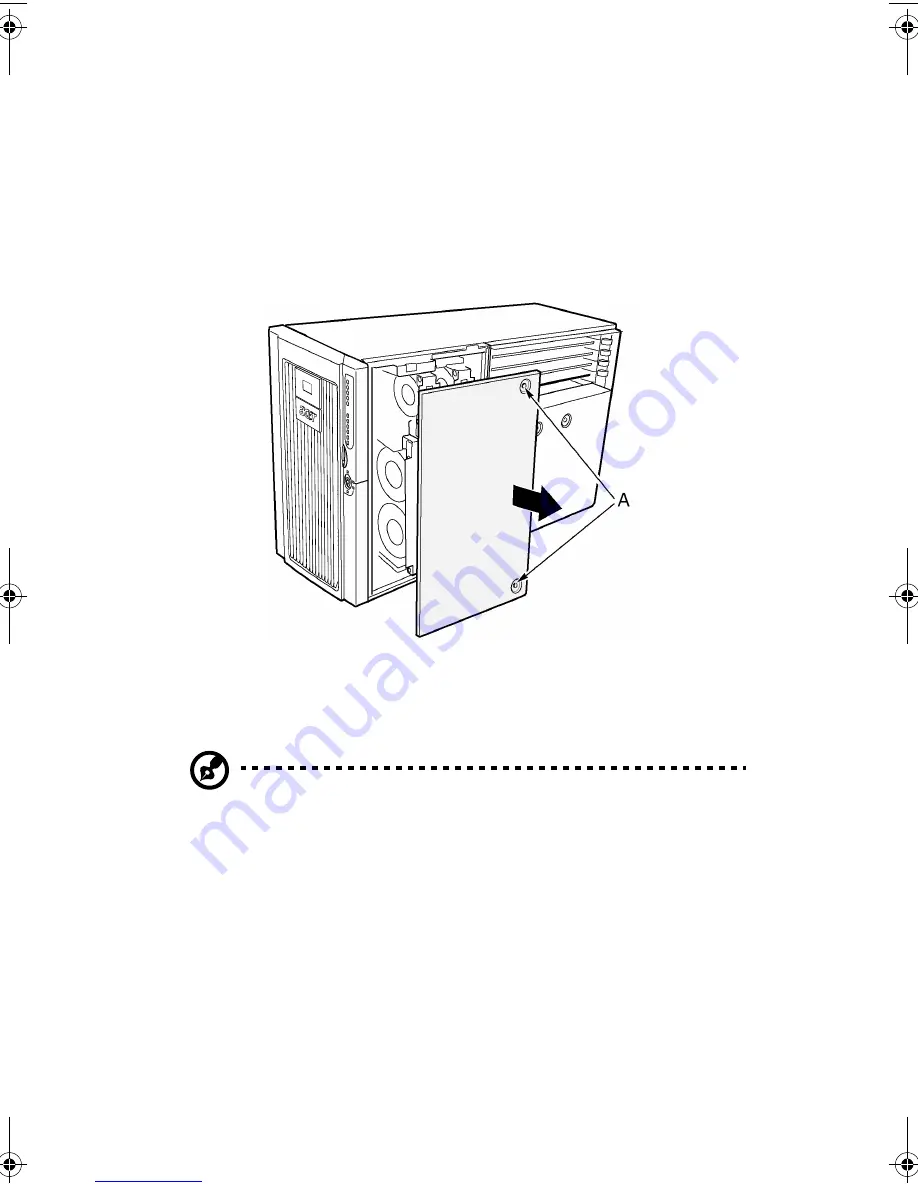
To remove the front access panel
1
Remove the rear access panel (refer to page 44).
2
Release the two captive panel screws (Figure 13, A).
3
Lift the rear edge of the panel slightly and slide it toward the rear
of the chassis.
4
Lift the panel up and off of the chassis.
To install the front access panel
Note:
Before installing the front access panel, check that you
have not left tools or loose parts inside the system.
1
Position the panel on the chassis so that the panel tabs align with
the chassis slots.
2
While lightly pressing the panel against the chassis, slide it toward
the front of the chassis until the panel tabs fully engage the chassis
slots.
3
Attach the panel to the chassis with the captive screws.
4
Reinstall the rear access panel (refer to page 45).
Figure 13 - Removing the front access panel
AA G900 ug - EN.book Page 46 Wednesday, September 25, 2002 5:23 PM
Summary of Contents for Altos G900
Page 1: ...Acer Altos G900 User s guide ...
Page 10: ...x ...
Page 16: ...xvi ...
Page 17: ...1 System tour ...
Page 43: ...2 System setup ...
Page 44: ...This chapter describes the system setup procedures both for hardware and software aspects ...
Page 55: ...3 Hardware configuration ...
Page 56: ...This chapter describes detailed procedures for system hardware setup ...
Page 127: ...4 BIOS setup ...
Page 160: ...4 BIOS setup 144 ...
Page 161: ...Appendix A System rack installation ...
Page 162: ...This appendix describes the procedures for configuring the system in a rack mount fashion ...
Page 175: ...159 5 Slide the server into the rack Figure 70 Mounting the server to the rack ...
Page 176: ...Appendix A System rack installation 160 ...
Page 177: ...Appendix B System management ...
Page 210: ...Appendix B System management 194 ...
Page 211: ...Appendix C Equipment log and configuration worksheets ...
Page 217: ...201 ...
Page 218: ...Appendix C Equipment log and configuration worksheets 202 ...
Page 219: ...Appendix D Troubleshooting ...


