3 Hardware configuration
50
Closing the front subchassis and rear
electronics bay
Caution!
Before you close the front subchassis or electronics bay,
make sure no cables are pinched or otherwise obstructing the
front subchassis and rear electronics bay. Excessive cable stress or
chafing can cause cables to disconnect and connector pins to bend
or break the cable insulation.
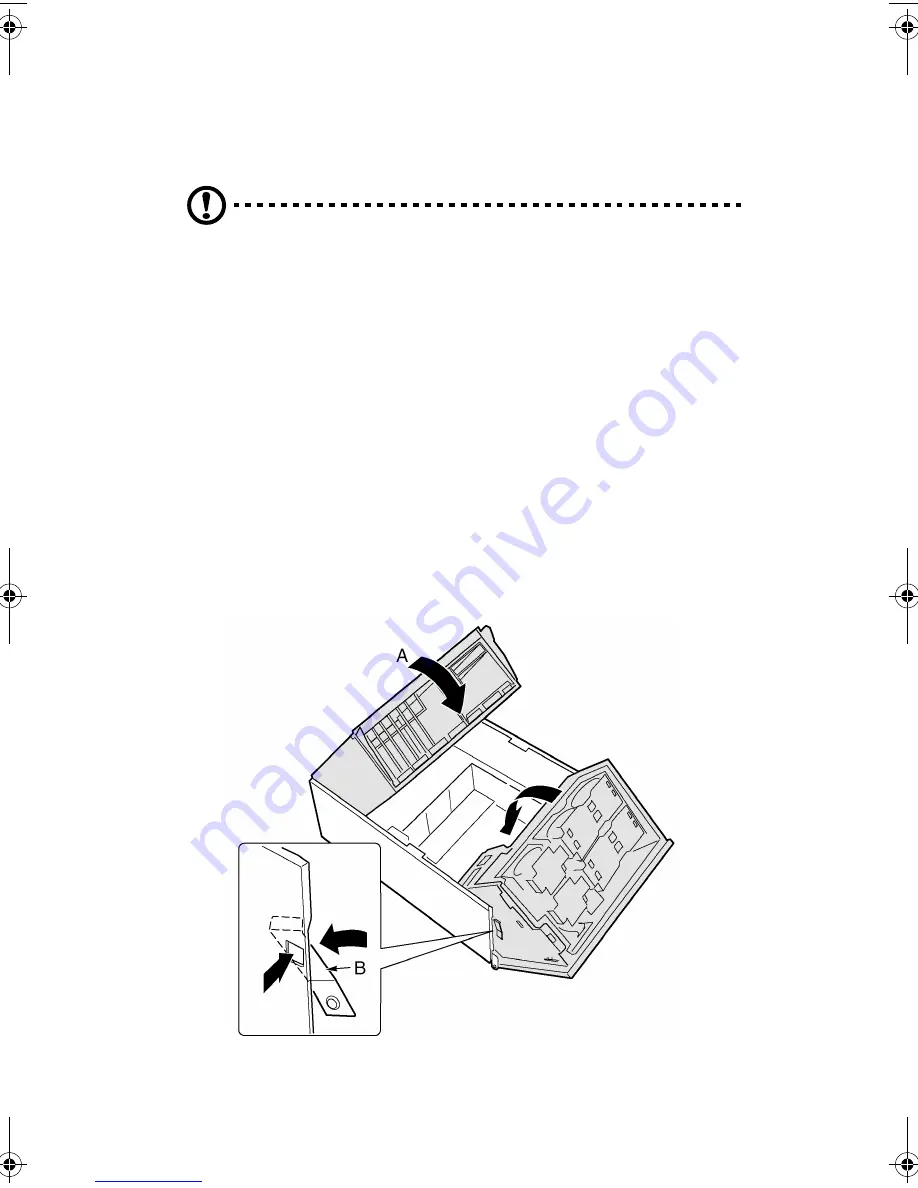
To close the front subchassis and rear electronics bay
1
To close the rear electronics bay:
a
Grasp the inside edge of the electronics bay and swing the
electronics bay into the main chassis.
b
Connect all cables to the mainboard.
2
To close the front subchassis:
a
Grasp the edge of the front subchassis.
b
Depress and hold the spring clip (Figure 16, B) and swing the
front subchassis all the way into the main chassis.
Figure 16 - Closing the front subchassis and rear electronics bay
AA G900 ug - EN.book Page 50 Wednesday, September 25, 2002 5:23 PM
Summary of Contents for Altos G900
Page 1: ...Acer Altos G900 User s guide ...
Page 10: ...x ...
Page 16: ...xvi ...
Page 17: ...1 System tour ...
Page 43: ...2 System setup ...
Page 44: ...This chapter describes the system setup procedures both for hardware and software aspects ...
Page 55: ...3 Hardware configuration ...
Page 56: ...This chapter describes detailed procedures for system hardware setup ...
Page 127: ...4 BIOS setup ...
Page 160: ...4 BIOS setup 144 ...
Page 161: ...Appendix A System rack installation ...
Page 162: ...This appendix describes the procedures for configuring the system in a rack mount fashion ...
Page 175: ...159 5 Slide the server into the rack Figure 70 Mounting the server to the rack ...
Page 176: ...Appendix A System rack installation 160 ...
Page 177: ...Appendix B System management ...
Page 210: ...Appendix B System management 194 ...
Page 211: ...Appendix C Equipment log and configuration worksheets ...
Page 217: ...201 ...
Page 218: ...Appendix C Equipment log and configuration worksheets 202 ...
Page 219: ...Appendix D Troubleshooting ...


