3 Hardware configuration
78
The table below lists the LED states and the drive status indicated by
each state.
Installing and removing a hot-swap drive
in a carrier
To install a hot-swap drive in a carrier
Before you can install a drive in the hot-swap drive bay, you must
install the drive into a drive carrier. To install a hot-swap drive in a
carrier:
1
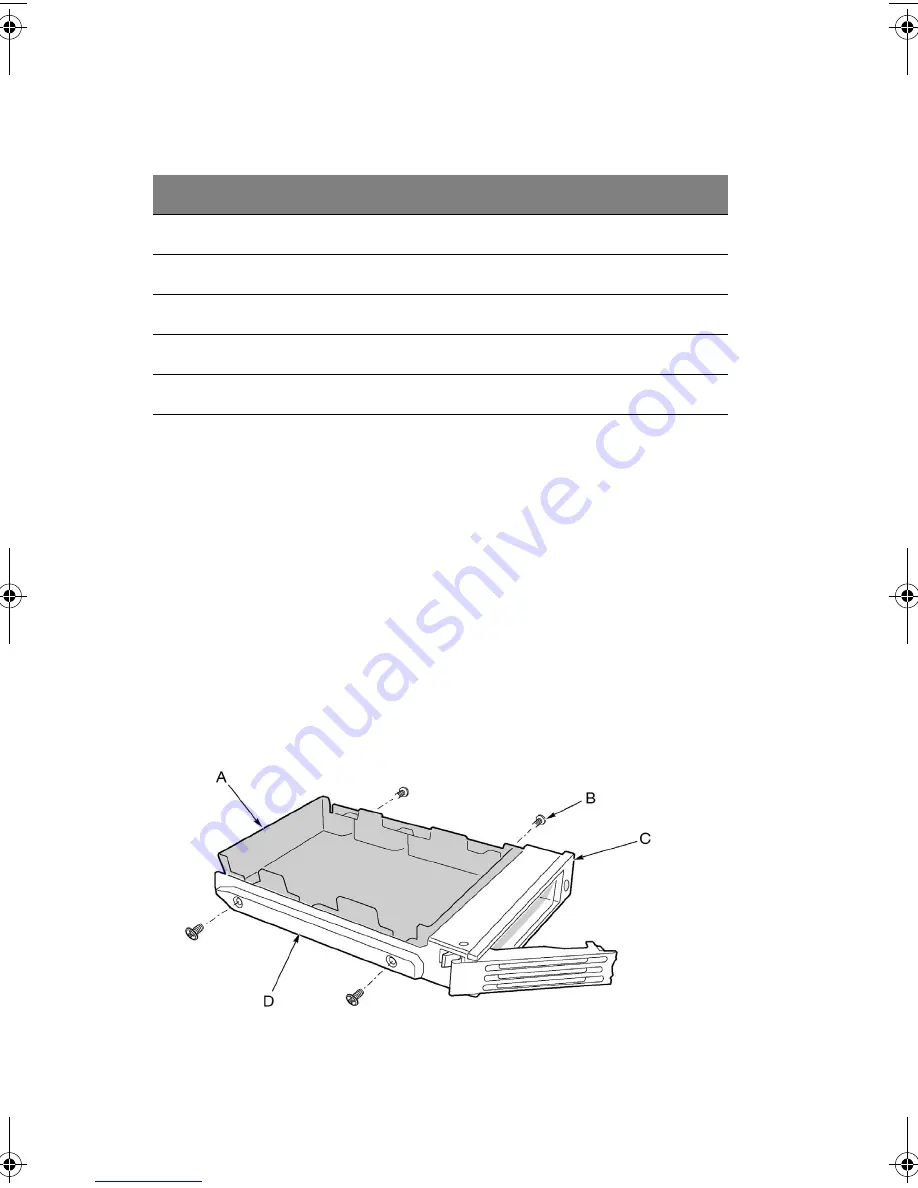
If the plastic air baffle is installed in the carrier, remove the four
screws that attach the air baffle to the carrier.
Save the air baffle in case you later remove a drive.
LED state
Status
Solid green
The hard drive is present and powered on.
Flashing green
The hard drive is active.
Solid yellow
There is an asserted fault status on the hard drive.
Flashing yellow
A rebuild of the hard drive is in progress.
Off
The hard drive is not powered on.
Figure 40 - Removing a plastic air baffle from a carrier
AA G900 ug - EN.book Page 78 Wednesday, September 25, 2002 5:23 PM
Summary of Contents for Altos G900
Page 1: ...Acer Altos G900 User s guide ...
Page 10: ...x ...
Page 16: ...xvi ...
Page 17: ...1 System tour ...
Page 43: ...2 System setup ...
Page 44: ...This chapter describes the system setup procedures both for hardware and software aspects ...
Page 55: ...3 Hardware configuration ...
Page 56: ...This chapter describes detailed procedures for system hardware setup ...
Page 127: ...4 BIOS setup ...
Page 160: ...4 BIOS setup 144 ...
Page 161: ...Appendix A System rack installation ...
Page 162: ...This appendix describes the procedures for configuring the system in a rack mount fashion ...
Page 175: ...159 5 Slide the server into the rack Figure 70 Mounting the server to the rack ...
Page 176: ...Appendix A System rack installation 160 ...
Page 177: ...Appendix B System management ...
Page 210: ...Appendix B System management 194 ...
Page 211: ...Appendix C Equipment log and configuration worksheets ...
Page 217: ...201 ...
Page 218: ...Appendix C Equipment log and configuration worksheets 202 ...
Page 219: ...Appendix D Troubleshooting ...


