


141
1
Power down the system and disconnect the AC power.
2
Open the server.
3
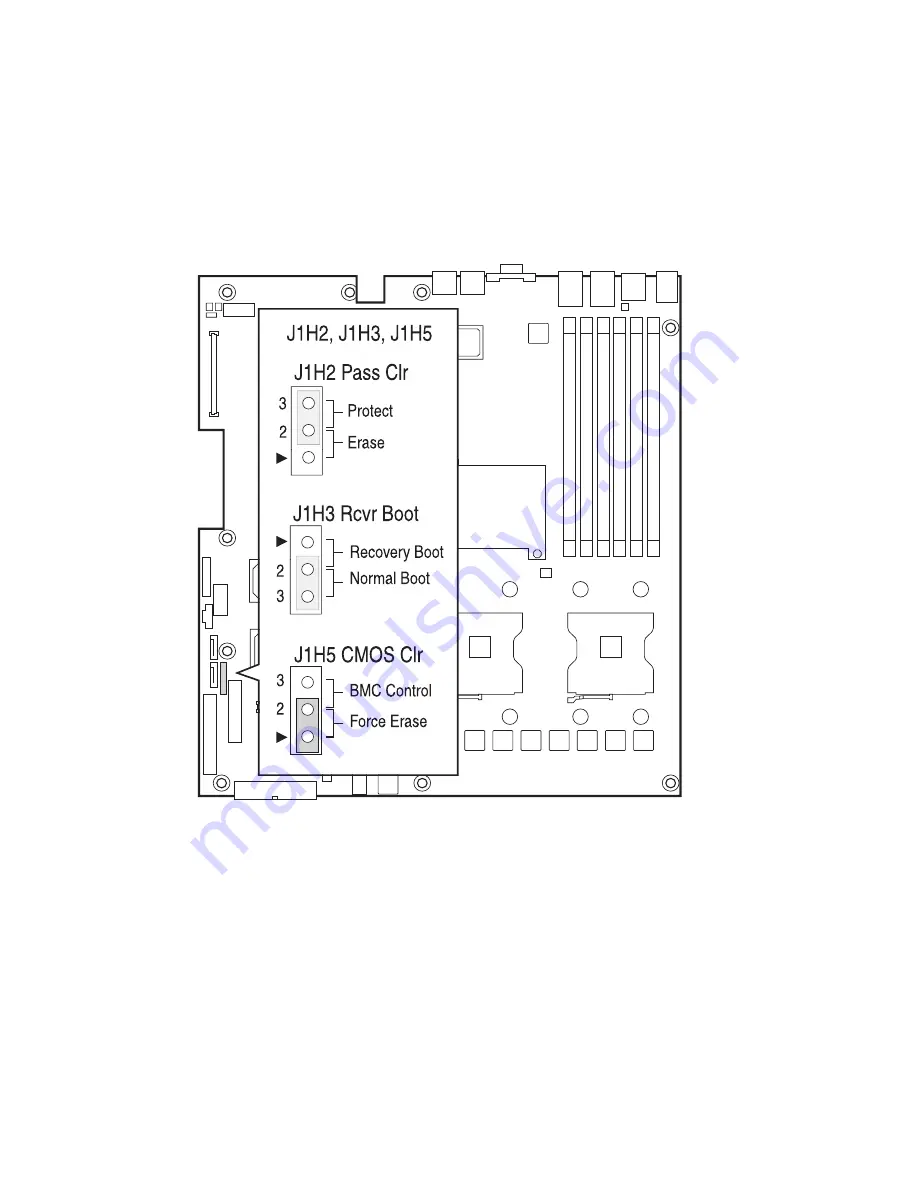
Move the jumper from the normal operation position, CMOS Clear
by BMC, at pins 2 and 3 to the CMOS Clear Force Erase position,
covering pins 1 and 2 as indicated in the following diagram.
4
Reconnect the AC power, power up the system.
5
When the system begins beeping, power it down and disconnect
the AC power.
6
Return the CMOS Clear jumper to the CMOS Clear by BMC
location, covering pins 2 and 3.
7
Close the server chassis.
8
Reconnect the AC power and power up the system.
Summary of Contents for Altos R510
Page 1: ...Acer Altos R510 User s Guide ...
Page 12: ......
Page 13: ...1 System information ...
Page 19: ...2 System tour ...
Page 35: ...3 Getting Started ...
Page 36: ...This chapter gives information on setting up and starting to use your system ...
Page 40: ...3 Getting Started 28 ...
Page 41: ...4 Configuring the system ...
Page 104: ...4 Configuring the system 92 ...
Page 105: ...5 BIOS setup ...
Page 154: ...5 BIOS setup 142 ...
Page 155: ...6 Troubleshooting ...
Page 168: ...6 Troubleshooting 156 ...
Page 169: ...Appendix A Management software installation ...
Page 170: ...This appendix shows you how to install the ASM software packages ...
Page 174: ...Appendix A Management software installation 162 ...
Page 175: ...Appendix B Tool less rail kit installation ...
Page 187: ...Appendix C Sensor Table ...
Page 188: ...This appendix shows you the Altos R510 sensor table details ...
Page 191: ...Appendix D SATA RAID Configuration ...
Page 192: ...This appendix shows you how to create SATA RAID ...
Page 196: ...Appendix D SATA RAID Configuration 184 ...
Page 198: ...186 ...