


61
Installing a Floppy Drive into the Converted Hard
Drive Bay (Backplane Installed)
The slimline floppy drive conversion kit can only be installed into a
system that is using either the SATA or the SCSI backplane. You will
know if you have one of these backplanes installed if you can install
either hot-swap SATA or hot-swap SCSI drives. The conversion kit must
be installed in the left hard drive bay.
1
Observe the safety and ESD precautions at the beginning of this
book. See
“Safety Information.”
2
Power down the server and unplug all peripheral devices and the
AC power cable.
3
Remove the chassis cover. For instructions, see
“Removing the
Chassis Cover.”
4
Remove the front bezel if it is installed. For instructions, see
“Removing and Installing the Front Bezel.”
5
Remove the left hot-swap hard drive carrier from the chassis.
6
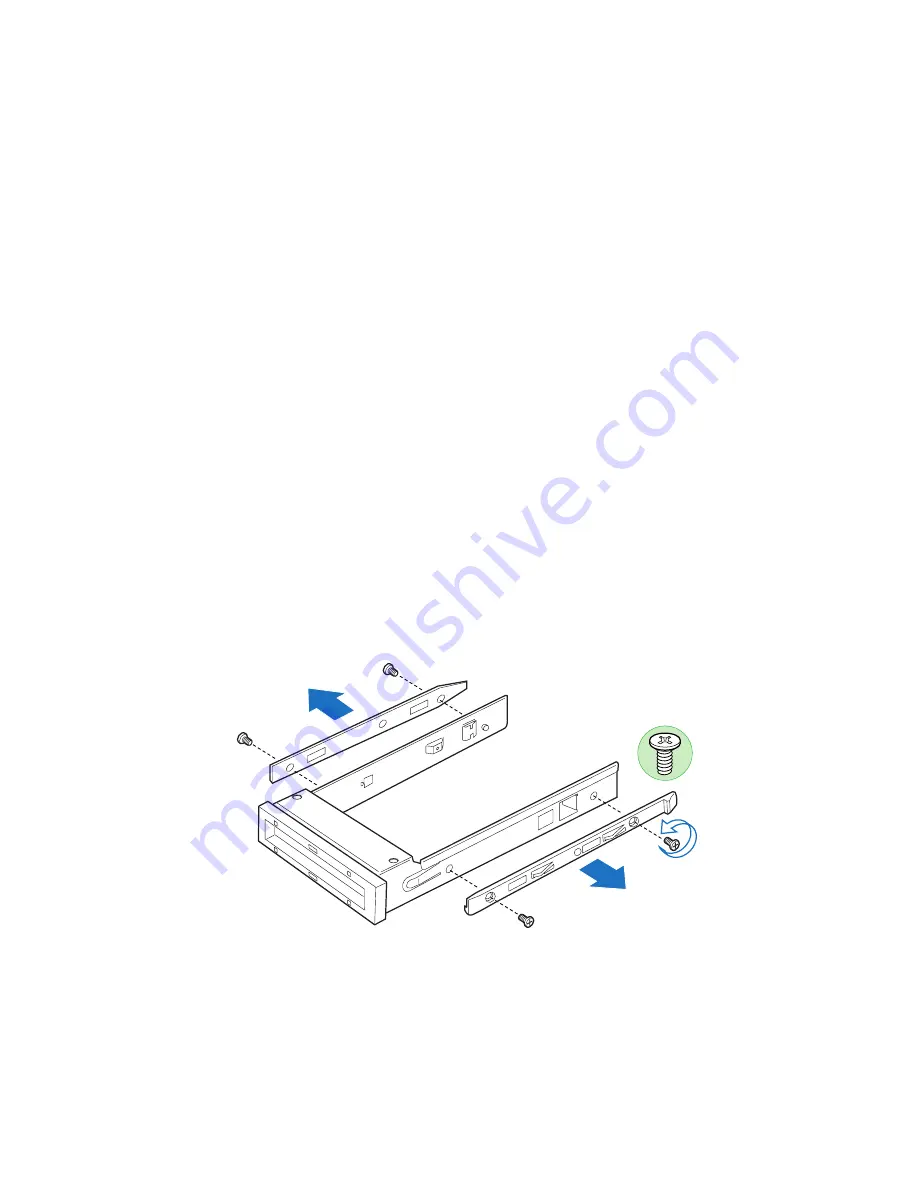
Remove the screws that attach the slide rails to the floppy drive
conversion kit carrier.
7
Slide the floppy drive into the drive carrier, rear of the drive first,
with the underside of the drive facing down.
8
Line up the holes in the side of the drive with the holes in the
carrier. See letter “A” in the figure below.
Summary of Contents for Altos R510
Page 1: ...Acer Altos R510 User s Guide ...
Page 12: ......
Page 13: ...1 System information ...
Page 19: ...2 System tour ...
Page 35: ...3 Getting Started ...
Page 36: ...This chapter gives information on setting up and starting to use your system ...
Page 40: ...3 Getting Started 28 ...
Page 41: ...4 Configuring the system ...
Page 104: ...4 Configuring the system 92 ...
Page 105: ...5 BIOS setup ...
Page 154: ...5 BIOS setup 142 ...
Page 155: ...6 Troubleshooting ...
Page 168: ...6 Troubleshooting 156 ...
Page 169: ...Appendix A Management software installation ...
Page 170: ...This appendix shows you how to install the ASM software packages ...
Page 174: ...Appendix A Management software installation 162 ...
Page 175: ...Appendix B Tool less rail kit installation ...
Page 187: ...Appendix C Sensor Table ...
Page 188: ...This appendix shows you the Altos R510 sensor table details ...
Page 191: ...Appendix D SATA RAID Configuration ...
Page 192: ...This appendix shows you how to create SATA RAID ...
Page 196: ...Appendix D SATA RAID Configuration 184 ...
Page 198: ...186 ...


